0:00 Mic check. One, two, three. A normal talk. One, two, three, four, five. Shall we put some cards on over here? Oh, no, you've got that on. Put your microphone on mute. Unmuting it. Hi.
9:00 Good evening, good evening. How are you all? It's raining. Ooh. It's raining, it's cold. Who's put the heating on?
9:30 Out come the knits. Out come the high necks. Is everyone okay? Welcome, everyone. I hope you're all well. Lovely to see you all. Now, looking at the comments, where is everyone? I feel like we've got a ton on from the States, and nobody's here from the UK. Whose idea was that? So, welcome everyone. My name is Toni, and this is the How to Craft Network Studios.
10:00 Now, some of you might be double-dippers, some of you might watch on Tuesdays, some of you might watch on Thursdays. Either or, come in, go home. Hello from Texas, says a viewer. Well, welcome, sweetheart. Lovely to have your company. So, if you are brand new here, and this is your first time ever visiting one of our shows, welcome. We do appreciate you being here. If you do, let us know if it is your first time. Let us know your name, where you're from. We like to know what food you like. We just love to hear from our newbies.
10:30 But if you're old, and you've been here for donkey's years, also give us a shout-out as well. Send some hearts, some thumbs up, and if you can share in any platforms where they allow you to share inspiration. A viewer says, "I am here." Well, that's all that matters then, if you're here, darling. A viewer says, "Vacation in Michigan." Whoop-whoop. Home soon, though, home soon. We've got a viewer on, we've got a viewer on, we've got Rosemond on, a viewer,
11:00 A viewer, Benagina. So, the purpose of these shows is basically to inspire you with either, old, question, question, whoops. I put my big foot in that one, didn't I? So, the purpose of my shows are to inspire you in one way or another. So, that might be with new product, sale product, older items, back in stock items, or just to have fun with what we've got on the website. So, I have a few bits and pieces that are back in stock, and I'm going
11:30 to show you those. I always do try and give everybody a shout-out. But if you do have a question, put "QQQ" in front of your question, and it'll just pop out a little bit clearer to me, and then I'll answer any questions. Okay? And that's the way we just get through, because everybody's commenting. And the reason why everybody comments lots and lots of times, and talks to their friends, which is wonderful, is because at the end of the show, I always do a lovely voucher for a winner at the end of the show, and I just flick through my
12:00 phone, and when my eyes stop on a name, that person has won a 50-pound voucher to spend on the website, just for being here live, which is awesome, right? Now, I have seen lots of you have been on the new updates on the website as well. Now. Now then. It's a good job it doesn't tell me who asked these questions, because the questions you've been asking me on our live chat, my goodness me, guys.
12:30 I'm just looking for my pa, pa, pa, pa, pa for our winner, because I didn't have it. Oh, I did. See, look. So, I've got this for the winner, which is cool. "I am young, free and single at 49 throughout a three-day week." Oh. "Bought so much SBM on HSN Craft Day. Can't wait to get them in and start playing." That's so
13:00 cool, Marliakins3759. Well, welcome, sweetheart. Hopefully, I will be touching on products that you have on HSN. Now, the items that are on HSN, that's a Tuesday show But we do bring a lot of products here to the UK as well, or vice versa, UK to HSN. So it is very prevalent to come and watch both shows because equally, if you don't have what I'm using, if you're a crafter, you're going to
13:30 have something in your stash that is going to enable you to probably create something similar or dig out your stash. Because it's not just about the sales here, it is a community as well, and we've got lots of friends here. Some of you have been here 15 year, some of you have been here today, which is awesome. So if you can share the shows, get share, share, share, that would be awesome. Now, a lot of the products that we have brought to you over the last few shows
14:00 are going to be on HSN as soon as they load them. But equally, they're on the website, so I'm not going to go over them in great detail. I am going to use some of the products today. And guess what? Guess what? Today, just for you. A lot of you, "Oh, a viewer's going to moan at me. A viewer's going to beat me up." She's like, "Albums." She always says to me, "I don't know who to give them to. Nobody appreciates them." Blah, blah, blah, blah, yada, yada, yada,
14:30 whatever it is. But she always does my classes. Bless her. And she always comes, and she always offers support. She's just so kind. But yeah, I'm sorry. Yada, yada, yada. We're doing a bit of an album today. So I have seen in some of our Thursday drop shows and some of our Tuesdays with Tony that some people are saying, "Please show albums." And I did a little mini one using envelopes, didn't I? If you missed that show, you might want to go back and watch it because the
15:00 envelope album that I showed you real, real quick, where you just stick a few envelopes together and make a really cool sort of mini album off the back of just a few envelopes that you will have in your stash because you don't have to buy, buy, buy, buy, buy. And I'll say it here because there are a lot of new crafters here as well, guys. I've always said this, you do not need to buy, buy, buy, buy, buy, because what will happen to you is you will be overwhelmed.
15:30 You will look at all of this craft stash and just not know what to do with it at all because there's just so much of it. You're all sat at home going, "I know this well." It ends up in a drawer. You never use it because it was a good idea at the time, and now you're just like, because of all of the stuff that you've got, you've become overwhelmed by it. You do not need to buy, buy, buy. Try and think about things that you've got in your stash as well. Of course, I am here to sell you things, but I'm here for the long haul.
16:00 So let's just take it easy. Let's take it easy. So if you like the things, of course you can buy them if you've got nothing similar, but always think about the things that you're buying. Don't get overwhelmed. Because honestly, when you start to get overwhelmed, you just push it away, and you walk away from it, and it can take weeks, days, months to get back into it. Excuse me. Let's have a look. "Chill in the air in Suffolk," says a viewer. I know. We've put our heating on. "I'm trying to watch you on TV and the comments on the mobile.
16:30 Not very easy," says a viewer. Stick with it, sweetheart. We're still working on it. "Hello, everyone from New York." A viewer, that's me. Yeah. We can all relate. We've all been there. It's not a bad thing, guys. It's just being smart, so that's all. A viewer says, "Hello. You're all talking to each other." That is awesome, too. "I have no idea what you're talking about," says a viewer. A viewer with the biggest craft room in the room. Okay. Let's move on pretty quick. So I'm going to do a little bit of a mini album.
17:00 Now, the mini album that I'm going to show you is so super-duper easy. You might have some of the bits and pieces to go with. You might not. You can get them if you want to, but have a look in your stash. And what I love about the album-making, guys, is they don't have to cost a lot of money to give the gift of a handmade project that looks a little bit more intentional than just a card. So we love to give cards and little gift wallets and things like that, but
17:30 this is sort of like the next stage. If you do love a particular person or you know a particular person that's going to absolutely enjoy something that's been handmade by you and they know it's taken a little bit of time to make, they're going to absolutely love it. It won't end up in the bin. It'll end up in a keepsake box, and they'll keep it forever. Now, the little albums that we do here, we keep them super simplified, so you can either put flavored teas in them, seed packets if you like to plant flowers.
18:00 You could put a dollar in each page or £5 in each page, gift cards, and things like that. So try and think outside the box. We've also done ones that hold chocolate bars, so it's just a little bit more than just a gift of giving as well. "You can't craft in your gloves." Look, see what I mean, guys? If you're new here, I take jip from my customers. They give me grief, let me tell you.
18:30 Last time it was, "What's in the box?" Let's not talk about it. But this is a top. It actually looks like I've sprayed my wrist. It's because it's cream. If it were black, you wouldn't be bothered, would you? But it's cream. Listen. Oh, you've made me all embarrassed now. I'm taking it off. Can't craft in gloves. There you go. My hands are cold now, though. Ooh. Come on, let's get cracked on. So let's just show you what's, very quickly in the show, the
19:00 three things that I'm going to... Four things maybe I might use. We'll see. And then all of the other items, I've added some fantastic back-in-stock items which have dropped on this morning, because I always do a rundown of the website to see what's been loaded new. And let me show you what is back in stock because these are really, really lovely, and they've been out of stock for a while. Four items, and they're all Tim Holtz. Now, if you are a Tim Holtz fan, you're going to love these. So let me quickly show you. So let's have a look at this our team
19:30 Holtz stamp with the leaves real quick And it's actually a great price as well. So you've got that lovely four-panel individual stamps. You've got the different leaves and that lovely sort of nut or oak or, I forgot what that's called now. Chestnut. Is it a chestnut with a little hat on? So just a lovely, lovely stamp set, and it's got all of those sketchy lines in it Tim Holtz Cling Stamps - Autumn Blueprint
20:00 and things like that. That's back in stock. We also have the amazing leaf stencil, which has not been in stock for a long time. It's already limited stock, this one. Some of you do click those notify me buttons and get advance notice. But you have the leaf stencil, which is a great one for backgrounds, isn't it? And then two more, very quick. Acorn. Thank you, darling. We like to get through product quick because we like to just chat and craft, right?
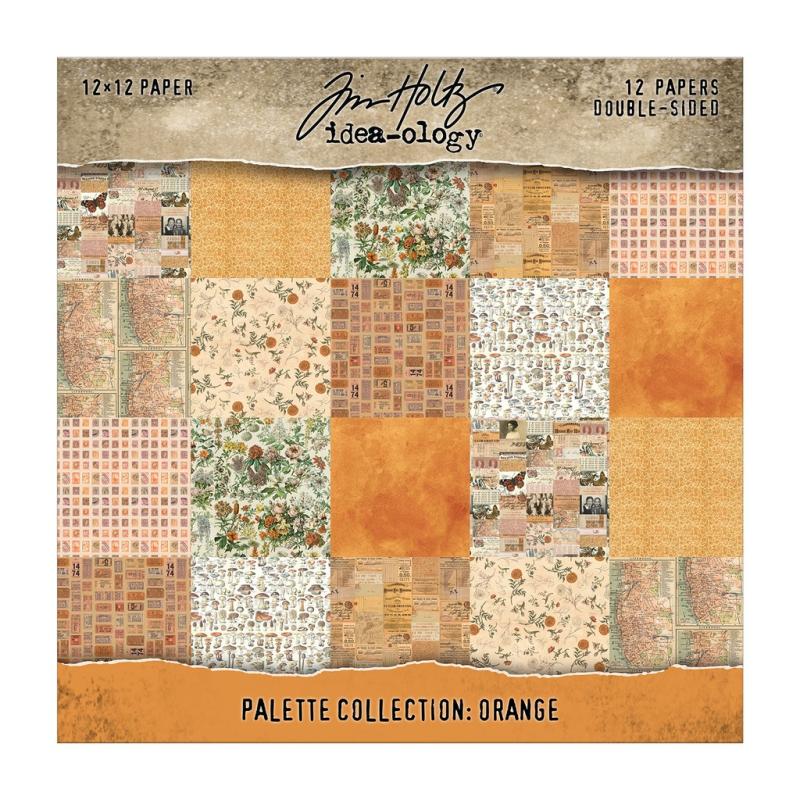
20:30 So the next one is this 12 by 12, and I thought, I put this on because it's orange, and we're coming into those months where everything turns from pinks and lemons and powder blues for the summer into those lovely tones of browns and orange. And this is 12 by 12, and look at the price. Absolutely awesome, that one. And then the last one is this plaid. Now, this one's sparkly plaid. Sparkly. So this one's back in stock as well. So this one is the Craft Stock Halloween Sparkle Plaid Tim Holtz Layering Stencil - Autumn Tim Holtz Idea-ology - Palette Collection: Orange (12"x12")
21:00 Tim Holtz Ideology. So those are your back-in-stock ones. There's lots of back-in-stock items, guys. I'd be here all day if I talked about them. But those are the four that I thought some of you might be interested in. Now let's get to what I want to talk about. There's some Halloween in the show as well, so have a look at that. I want to talk about the mount board, because this is where you can create your albums quite affordably as well. Okay, so I have loaded 10 sheets of A4 mount Kraft-stock Halloween Sparkle Plaid Tim Holtz Idealogy
21:30 board. That's this one. Comes in a pack of 10. It's white on the front, cream on the back. Really good quality, great for your album making. I'm going to use these, so I'll show you how to use it. 10 sheets, and we've also got an A5 one as well, okay? So the A4 you can cut into two if you want to make your album front and backs, or you've got some pre-cut ones as well. It's not hard to cut either. So if you know you're going to be making something bigger than A5, you might want STAMPS BY ME MOUNT BOARD - 10 SHEETS A4 - 081026B
22:00 to go for the A4. But if you want to get more, because obviously you can cut them in half, then you might want to get the A4. It's totally up to you. So those are the mount boards, and I'm going to be using the Heritage Textured paper, because I'm in love, which is the papers that have been used to do these ones, guys. So this one is the one that I'm using, which is this collection, the four paper pads. Okay. And they all match. Each pad has a different design, but
22:30 the color tones match, so you can do a lovely matchy project without having to go through a bit box to find the matching tones of paper. Absolutely gorgeous. So I'm going to be using the Heritage collection. That's the set of four. Here you've got your stripe, your lines, your deco, and then your solid, and then there is another one on there, and that one is called this one. HERITAGE TEXTURES PAPER COLLECTION - 240225D
23:00 And that one is the other tonal one. So this one that I've just put up here has got lots of shades of greens and stones and greens. The one that I'm working on has burnt reds, burnt oranges, because it's nice for this time of the month. So are we getting crafts on? Two, they'll be on their way. A viewer's not been in work for three days, unfortunately. She's not been very well. So she is still playing catch-up. So just bear with, if that's okay, guys. CLASSIC TEXTURES PAPER COLLECTION - 240225A
23:30 So let's get some crafting done. Don't forget to share the show. Look at you all. Now, pre-cut or bit this A4. If you're making a particular sized album that goes beyond, obviously, the little A5, you need the A4. So you can cut it and make it bespoke. But honestly, how big do you want your albums to go? Think about what size of your albums you want to go.
24:00 Now, I'm going to show you how to create the bones of a lovely album, and then what that's going to enable you to do then, guys, is either use your envelopes up, that you've got tons of, right? Because you make all these cards, and you never actually give them to anybody, do you? And then the envelopes stack up and stack up and stack up. So I'm going to show you how you can use envelopes. But if you bought the amazing black cardstock, the pack of 50, this is six by eight, this makes great pages, too. So if you've bought that,
24:30 let's get it used, okay? So I'm going to use a little mini one. But think about what the project is for. Cha, cha, cha, cha, cha, cha. Great for males. That's why I'm doing it, because I'm in love with this coordinated stack. I'm in love with it, and we never do enough for the guys, so I'm going with it. So you can see it's cream here. Cream and white. And I'm going to show you how to make the simplest of albums.
25:00 Now, I think I might make a little mini, mini. Mini, mini. So if I cut this in half, that'll be my front and my back. And then I need a little spine, so I'll cut a little spine off here, and then we're good to go, right? So I like to just use my cutter. But if you want to use a ruler or a blade, you can do that, too, okay? So. Hey, everyone. A viewer, you are late. Where have you been all my life?
25:30 She's like, "I was here. I was here, I promise." Now I have to tell you guys, this is marked as A5. The exact size, just so you know, five and a quarter and seven and a half. So you've got that little bit of extra there. Right. So let's cut this.
26:00 So has anybody got any funny stories? Just picking my guidelines, sorry guys.
26:30 Anybody got any funny stories? Lost track of time. That's okay. So I've got my two pieces here, and then I'm going to do a spine. Now, depending upon how thick... It helps if I give you it size, doesn't it, guys? Let me just show you on my cutter. Three and three-quarter. So straight down the middle.
27:00 If you've got that size, just cut it straight down the middle. And then I think we'll go for, shall we just go for a one-inch spine? No, let's do a one and a half, and then I can show you properly what we're going to do. Lots of you might know how to do this already. Do you all make these already? "Look at that Toni measuring," says a viewer. What? A viewer. A viewer. Alyssa, did you say I had to think about it? So now I've got my spine.
27:30 Super easy, right? See what I mean? Honestly, they really do love me. If you're new here, they do love me, I promise. Right. So, white side cream. Oh, boy. So you can see, look at the state of my mat. It's got all tape and all sorts of stuff on it.
28:00 Front, middle, back. Now pick a piece of paper. Which do we want to cover it in? I like that pinstripe but it's a bit deadly to do it in pinstripe, isn't it, because if you don't get it straight, it's going to mess with your mind. Ooh. I'm going to go with this one. Love him.
28:30 Oh, you can tell I like that one. I've used that a few times already. Let's do this one then. Thank God I've only got one sheet of that left. Does somebody want to borrow me one? Indian giver, I'm asking for it back. "You missed an SBM on HSN yesterday." I wasn't there.
29:00 Don't panic. It's fine. I wasn't on, don't panic. Right. So let's show you how I like to make an album. Super easy. So when you do your album, guys... Let me just put on the paper that I'm using so you can see the paper. So when you do your album, guys, you need to leave an
29:30 overhang so we can wrap the gray board. This gray board is really, really thick. It's lovely. And if you like mixed media as well, it carries paint and water really well. So if you like your collage and all of that stuff, it likes that, too. So what I'm going to do is I'm going to glue, like so. I know there's another sheet going to go here. Calm down.
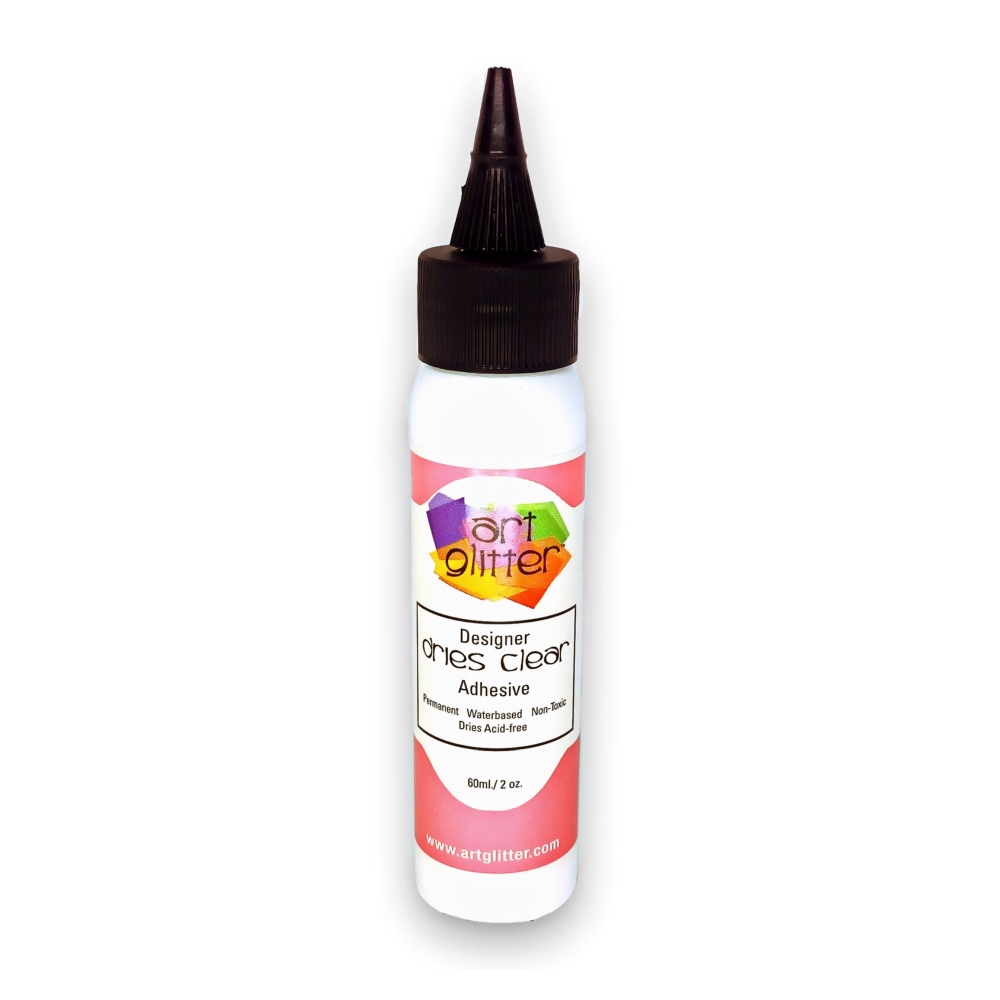
30:00 A viewer says, "I didn't watch, seeing as you weren't on." Oh, bless you. That's so kind. Well, it's not kind, but yeah. I've got a meeting with the buyers on Friday, so hopefully. Tomorrow night, isn't it? So let's get this stuck down. So I've just put some glue. This glue is brilliant. Fast Grab. In fact, I have attached it to the show. Fast Grab. Blooming brilliant. I can't recommend it enough. It's a little bit more pricier than
30:30 most, but it is so worth it, guys. I recommend this all the time. And you get your refills as well, so you can keep the grotty pot and have it disgusting like me, and then you can refill it. I can't recommend it enough, guys. So that's the glue back on the paper. If you've noticed as well, I'm trying to keep everything on screen that I'm working with because if you've noticed, the website has changed, and what's fallen out of that is lots of inspirational content, and it's Dry Clear Glue 2Oz.
31:00 really helpful when we put the inspirational content together for you if the correct item is on the screen. So if the wrong item is on the screen and I'm going off on a tangent, you need to say to me, "Toni," because I need it to be right, guys. So glued that one there, look, just on the side, so I've got that lovely overhang. And then I'm going to glue this one here. Now, the rule of thumb for your album-making, guys, is you leave a width between the same width as your gray board. Okay?
31:30 So it's about just over a mil. Probably do two just to be safe. Okay? So can you see that gap there? So you can either take the piece that you've cut, put it through like that, and then glue the next one but up to it And then when you take it away, you can see. Can you see the gap there? If you don't leave that gap when you come to close your book, it's just going to snap. The paper is not built to go around corners. It needs space to move. So
32:00 just bear that in mind. Okay, so let's get the next one on. So we'll put our spine on. "All new content is fab." Well, that's brilliant. Hopefully, you'll be able to take some little nuggets away from you from all of my shows and make your own. Or maybe I show you something where you think, "Oh, I never knew that is how that would be made like that." Make sure the gap is the same width as my gray board. Look.
32:30 You see? So far so good. Then that's what I'm here for. I'm here for you all for that. So then the next one, you can never put the edge of a piece of paper in one of the spines because it'll just crack open. So make sure it always comes past a spine, okay? I'm just going to put a bit of glue here. Does anybody make albums?
33:00 I've done hundreds of albums, so I don't really need to guess the width there, but use what I've just told you whilst you start going, okay? So you can see it looks something like this so far. So far so good. And then the same paper, this one, make sure the stripes are the right way. I'm just going to overlap just a little bit, like so, and then I'm just going to trim this piece, and then we'll glue that piece to that part.
33:30 Need to add soup. Just going to finger mark it there and just cut it there so I know. Don't forget to tell all your friends about my shows, Tuesdays and Thursdays. Tuesdays and Thursdays.
34:00 So what we will do now is we will stick this one in place, too. I'll just turn this over like so. And then we'll just give it a little bit of overhang onto there. Line it up. Doesn't look very straight, does it?
34:30 Then we'll stick that down. So now we've got the cover of our book. "All my thoughts are golden nuggets." I'm sure my other half would tell you differently. So give it a moment to stick properly. Okay, so we have the spine, the front, and the back. Super easy so far Right?
35:00 A viewer says she's made a few with me, but she hasn't passed them on because she's not sure they'd be appreciated. They have to go to the right people, right? They really do. So now it's stuck. Can you see now? Should I turn it over? Actually gone pretty seamless, that, to be fair. So then what we need to do, guys, is we need to manipulate this paper to wrap our book, okay? So then all you're going to do is you're just going to take the
35:30 paper. If you use really cheap paper, and honestly, that's okay, too, if you've bought paper thinking it were going to be good and it's absolutely pants, okay, when you come to do this, it might crack and feather. If that happens, don't worry about it, because there's ways to get around it. Get a blending brush, get some ink, and just sort of ink the edges like it was meant to be that way. So something that's obviously a negative in your craft, try and turn it into a
36:00 positive like it was meant to be. So ink the edges and make it look a little bit distressed, okay? So all I'm going to do is I'm going to manipulate the paper. So the paper and the fibers know I need it to come over here, because if you don't manipulate it and warm it up in those fingers, when you come to glue it, it'll just eventually just come back apart. I'm sort of educating the paper here as to, "This is where I want you to go. I need you to behave yourself." So really get in. If you've got a bone folder or a tool, you know those tools that really
36:30 help with manipulating cardstock. And honestly, the more time that you spend doing this, it will be better for your project, okay? So spend a bit of time educating the paper where it needs to go. So as your fingers are nice and warm, remember, so the paper fiber
37:00 will naturally just break down. And this is why you need to leave a nice little bit of a hangover, maybe an inch. You can get away with just under. So these books are like gifts, remember. They're not tat. They need to be nice. So make sure you put a bit of effort into it. Okay, so now hopefully my
37:30 paper knows that I want him to bend into those places. Okay, so then what I'm going to do is I'm just going to give it a little bit of a nick in there as well. Not too much, because it's not really that important at the moment, but I'm just going to say, "Hey, listen, this is where I need you to go. Be good." And then we're going to glue him down. Okay? Super easy. You're getting a free mini album class here, guys. Well, it's only a little mini album.
38:00 We're not doing all of the pockets and layers, but this is sort of like the bones of it, which means you can take it away and experiment and play with it. Okay, so now we're going to glue. So let's glue this one down first. So I'm just going to put some glue. Now, if you are using red liner tape, that will make it stay sturdier for longer, too. So what I'm going to do here is I'm just going to cut the corner in. So I'm going to cut there. So cut the corner away
38:30 on each one. I always say cut the square away, and then I always like to just chamfer the edge just on an angle a little bit so it sits neatly on the inside. Okay? So it's sort of protected. And let's do this side before I stick that down. So remove the square. You can see the square because we've manipulated it. There is a square there. Can you see? I'm just going to cut along those lines. You can't really make a mistake. Like so. And then this one I'm going to just chamfer off just a little bit, okay?
39:00 So before I stick this one down, I'm going to stick this in. Can you see? And when you push it in, if you've got a little bit of an overhang, just take a little bit off. It's going to be hidden. These are the albums that keep you up all night.
39:30 So let's stick this piece down first. Keep it neat. And this is why that glue really, really is cool, because it's fast grab. It dries clear, too, so I'm not overly concerned. It's fast grab, and it just sticks straight away. I just love it. Just love it. Right. Because I've stuck that down there, I'm going to stick this one down before it dries. And you get that lovely...
40:00 Can you see? A lovely corner here. Make sure you put enough glue on. Hi, Toni. Hi. Let's do this side, too.
40:30 Been a while since we've done anything like this in one of our shows, hasn't it? I think whilst we wait for all the new stock to come, it's really nice to have breathing space, guys. And be able to do some different things, too.
41:00 That's dried out. I need to add some more glue under there. But you can see how neat it looks, can't you, guys? How if you just chamfer those corners, like so. So let's move on to this one, this side here. So then I'm going to do the same here. We'll take the square out. And then we'll just chamfer that off a little bit so it looks neat when we fold it in. So take the square.
41:30 And then chamfer the corner. You've still got kits from last year. Come on. So let's push this one in. So I'll manipulate it a little bit, stick that in.
42:00 And around the side. And this is all going to be covered, so don't worry too much if you get a bit of glue all over. It's not the end of the world.
42:30 We are starting to have cool nights here in NC. Yeah, it's same here. Bit more glue under there. Yeah, our heating has gone on. Need some more glue under there.
43:00 I'm just going to get a piece of card now, because I'm getting glue everywhere. I'm just going to put this on then I can push. I'm going to go and dig out some mount board to make one of these tonight, after tonight finishes. Aw, Ruthy. Don't forget to post your make in our group.
43:30 So now you end up with something that looks like this, and it looks stiff as a board. So this is the point where you're like, "Am I going to crack a hinge? Is it going to crack when I do it?" Okay? If you've left enough space, it shouldn't. But I will sort of educate you on how to manipulate the paper, because it's really important. These things can't be rushed, okay? So make sure it's all glued. If you try and move it whilst it's still a little bit wet, everything's going to sort of like, "What are you doing? I'm wet, I'm greasy. Please don't push me around too much." So give it a little bit of time.
44:00 But what I like to do is I like to put my fingers in there, like so, and just slowly lift, lift, lift. Give it time. It knows where it's going. And then same at this side. Slowly, slowly.
44:30 And then eventually, it will stand tall. Stand upright. Look. You see there? How cool is that? And then when it's ready, you'll have a beautiful album. Now, if it's a bit bouncy like that, don't worry about it. It's absolutely fine. It will come good. The paper is still learning where you want it to put it. Okay? So I'm absolutely overwhelmed with that. So that's turned out really well.
45:00 So let me just get some more glue under there, and then let's show you how I like to line it. Okay? These are great little mini photo albums as well. If you've got loads of photos in a box, brilliant. So we need to hide the inner part of our book with that gray board. Now we need to totally hide it. So we need to get some paper.
45:30 Now, you can do same paper if you want. I think I might go solid, because this paper set is enabling me to coordinate. So I might do the solid in the same color, which is this one. Is it this one? No. Is it this one? Pick the coordinated color, and you are literally just good to go. Love red. Here we go.
46:00 You will do. Isn't it nice to be able to match? Love it. So what I'm going to do is, I'll just show you. So obviously I'm going to need two pieces. So what we'll do is we'll line the inside and then hide all of the ugly makings, and you'll have that lovely chamfered edge on there as well. So let me just get another sheet. Same color.
46:30 Paper pads are on the way. Whoop. We love that. So let's see how big we need to cut this. So let's just get our cutter. So basically, just lining the inner part now. So we get rid of all the nasties if you've used an ugly gray board or one that's not... Cream looks pretty, right? But we need to sort of sort that out. So the book is five and a half tall. So I think if I cut a piece at
47:00 five, that's going to be enough. So let's have a look. I'll cut it at five. Now that's beautifully aligned there. Yeah. So five is okay. So let's cut this one at five too. If I'm smart about this, I
47:30 could actually use this for my spine as well without having to cut. Let's be smart, guys. So five. Need a piece. A little piece.
48:00 You will figure it out as you go. That don't even look like five, does it? What a plonker. Five. Oh, that's the wrong way, Toni. There we go. It matches now. So what I'm trying to achieve, guys, is when you start lining the inside, if you do it all in one sheet and you haven't left enough gaps between the spine and
48:30 the front and the back, it causes problems. So what sometimes is easier to do, if you have done that, this is a little bit of a hack for you. Line the inner part first with a thicker piece. Like so. And then it's not dragging the rest of this paper down. Okay? So I might do that a little bit thinner. So like this. And then line the center, and then use two pieces to cover the inner and outer.
49:00 You are risking it, doing it all in one. I've got enough. I think I've got enough. But sometimes when you do cut, you don't have enough. So I'm going to show you how to do it this way, but you can do it the whole width and then push it down the gaps with your fingers and close it if you have enough space. Okay? So I'm just going to put it here. With my finger. Super easy.
49:30 "Time with Toni is better than HSN." Oh. It is nice to be able to talk to you all. I know that. So here we have more glue. So this is the spine part. And I'm just going to stick this in and then manipulate it down my gaps. Okay? Super easy. So I'll put this on. Can you see the gap at each side? So
50:00 And then you could do these part, oh, glue everywhere. Then you could do these parts in another color if you wanted to. Okay. And then probably what I'm going to do is I'm going to try, I'm going to cut that and then put one to each side so I haven't got any waste, because I'm tight. Moamui says, "Toni, you could have a stencil set for a bunch of books on a library
50:30 shelf and then stamp through." Oh, I might have a library book embossing folder. Library book embossing folder, too. Free shipping has not been done in the last three years, really. So what I'm going to do here now, guys, is I'm going to sort of manipulate it to go down the gap. So I'm just going to run my finger until I
51:00 find I can sort of like, can you see? So I can sort of educate the paper where it needs to go. And again, you need to take your time with this. Can you see how, because it's wet, can you see how it's creasing a little bit? You just need to let it dry, push it back out. You can use your bone folders, your tools as well, if you have one. Let me just see if I can find mine.
51:30 Can't see it. Push it down, down, down, down the gaps, and just sort of massage. If you get a little bit of a hump like that, it should come out if you massage it, but it's because I'm trying to do it whilst it's wet. I'm trying to get on with it.
52:00 So make sure you've given it half a chance, okay? Need some more glue under there, Toni. Like so, and then I'm not going to try and manipulate. It's still wet and I'm getting lumps and bumps, and it's frustrating me.
52:30 So just take your time, let it dry, and then manipulate it into place. I'm going to try and iron those little creases out now. But anyway, and then what we're going to do is we're going to take this bit. I'm going to cut this piece in half. And then we'll cover these pieces, too.
53:00 So that is how you would do it if you do not have the space in between your spine. Okay? You can, if you leave enough space, can do it in one sheet. Wait till it dries, manipulate it, but wait till it dries, and you'll get a perfect full run sheet. Honestly, if you do it either way, there are no right and wrong ways, because once you've added the pages and the hinges in here, you're not going to see it anyway. Whether you've done it in three pieces or one
53:30 piece, you're not going to see it. So please don't panic if you're thinking, "Oh, I didn't really want to do it in three pieces." It's not the end of the world. Half of it is hidden anyway. Okay? So, let's just get these two pieces glued into place, so. Get it all lined up.
54:00 And then this piece. And get it lined up best you can. But like I say, you're not going to see this, all this really. That is a little bit close to that spine there, Toni. Just make sure you're not cut too close to your spine.
54:30 Honestly, once you've done one, you'll do it, and then you'll be like, "Oh, I wouldn't have done that on my other one, on my next one." Let it dry. So you have your inner and your exterior coming together beautifully, right? So I'm going to set this aside because I'm rushing it and it's ruining it because I'm not letting it dry. So I'm going to leave it there.
55:00 What we need to do now is the hinges. Now, the hinges are super-duper easy. People will get a little bit scared of the hinges. Me personally, oh, sorry, I've just banged my mic. Me personally, I love a good hinge. That doesn't sound right, does it? So basically, you go down in one-inch increments and score. It's super easy. So let's just have a look at what size my spine is. So measure your spine. Let me just see how big my spine is. What did we do? An inch and a half.
55:30 We did an inch and a half. So I know that my spine is an inch and a half. Okay? So to hang the pages, I need an inch to hang cardstock onto. So I need an inch on the left, and I need an inch on the right. So whatever it is in the middle, my spine is an inch and a half. Obviously, I don't want my spine to sit on the creases of my spine, so it needs to come in. So I need an inch in the middle, an inch leg on the left, and an inch leg on the
56:00 right. One plus one plus one is three. 3 inch, okay? Am I explaining this very well? And the hinge needs to sit probably the same depth as your liner, which was five, wasn't it? So let's cut five first. Should we... Is it five this way? Actually, it is.
56:30 Let's cut it five this way, I'll get the most out of this. So I can get it in the guillotine. Right. So we know that my hinges need to be five. So let's get it to five. Mark it at five. Let's just trim this off. Right, so I need 3 inch. Remember what we said? 3 inch. So cut it at three. I'll do one and then you're going to see exactly
57:00 why. So I've got my 3 inch hinge. So I'm going to score 1 inch, turn it around, and score it at 1 inch. Okay. So you've got this now. Yeah? So when you do this,
57:30 and this fits in this, and I can hang my pages from my hinge. Get it, right? So my next one needs to sit inside here. So I know that this bit of it here is an inch. So shall we come do a three-quarter so it sits inside nice? Or you could do a half and a quarter, however you want to come down. So let's do a half. So I need an inch leg,
58:00 a second inch leg, and I need a half for the middle. Two and a half. Woo. So score for me inch leg. Get rid of that cutter. Turn it round, give myself another inch leg.
58:30 Oh, man. Look at that. That just sits inside. Look like it were meant to be. Come on. Let's do next size down then. So that was half. Shall we do one at a quarter? Because they don't have to be even spaced inside. However many pages you want to do, come down in quarter increments, half increments, whatever you want. So let's do a quarter this time. So I need a quarter-inch for middle.
59:00 What do I need? I need an inch leg on the left and an inch leg on the right, so that's two and a quarter. Let's do it. Now score. Have I taught anybody out new tonight? Are you all just like, "Tony, we've seen it over again." Seen it over and over. You're boring. And another inch leg on the other side.
59:30 Thanks for doing albums today. Did somebody ask? I'm sure somebody asked. Can you see you got that little score line there, and you do this, and you do this, and you got a little baby one. Look. And look, they all sit inside each other, and they are your legs for your pages. Whoop-whoop. Where's me...
1:00:00 It's easy. Honestly, it's easy when you know how. Remember that. So let's glue these together. So glue this together before you put it in your book, okay? So you've got your big... Let's have a look. So you've got your big, your next one down. Where's me baby one gone?
1:00:30 Oh, she's here. And me little baby. And you can do this as many pages as you want, okay? Doing an ultra thick one, get some pages in there. Awesome legs. We love legs. So I'm just going to put a line of glue down here, red liner tape as well, if you want to make it so it's super durable. And you're just going to stick it in middle, look. You can pick it up, have a look at top, make sure it's a line at top.
1:01:00 Make sure it's lined up at bottom. Can you see? Lined up at top. Move that over a little bit so it's equal. A viewer says, "Never done an album, thought it would be too difficult." Well, I hope I haven't made it even worse for you. So we've got... Look, we've got one leg. So we've got four pages here. No, I'm not going to mess with it. And then if we add this one, we've got six, and
1:01:30 if you add more, go bigger, go smaller. So let's get this little one in. So always leave an inch leg on your here. Because if you are adding pages that have pockets, or you want them to carry a bar of chocolate or something a little bit heavier than just like a pocket page, the pages need something to sort of like be grounded onto. And if you do a little hefty quarter-inch hang leg,
1:02:00 it will just come apart. I promise you it will just come apart. So give yourselves a good inch leg to attach your pages to, knowing that it can carry Carry the weight. So then what I like to do then is, again, I like to manipulate, so hopefully it's
1:02:30 glued now. So then I like to train my pages, because they will get flicked and looked through. So I take them all that way, and then I take these ones all this way. Then I have a nice flicker flicker. There we go. And then this will go in here, like so. And there is my hinges for my little mini book.
1:03:00 Now, page-wise, you just need to get a page stuck to each one of these legs here. For this one, I'm going to need six pages, okay? Bearing in mind, my page is not going to exceed my album width, length, whatever you want to call it. So I don't want my pages to come longer than my book. So let's see what this measures.
1:03:30 Four. So my pages really need to be three and a half. And we know, don't we, guys, that this is five deep, so 5 by 3 and a half. Super easy. I'm not going to open that black card because I've got my own here. 5 by 3 and a half. So I like this because you get little to no waste with it cut in that size. So 5 by 3 and a half. So let's cut the pages. Do one at a time. So all my pages need to be five.
1:04:00 And then my page width is three and a half. Before you cut any more, make sure you check. So this will be glued onto here. Yes. And then this will go onto here. Let's make sure the page doesn't protrude. It does not. So
1:04:30 that was perfect. Three and a half, was it? Honestly, think about, so for example, if you have a whole bunch of envelopes that are five by seven, okay, and you want to use the envelopes, you don't want to do all of the measuring. I showed you how to use the envelopes in pocket formations and things like that, didn't I? So you know that your envelopes are five by seven, maybe a little bit bigger so the card can go inside. So then just make your album one inch bigger. So when you come to put the
1:05:00 carcass together inside, you have little to no measuring, because you've built your album around what page size you're going to put inside. So it's sometimes a little bit canny to think about, what you're going to page size-wise, or what you're going to use for your pages, and then work backwards from there. How many pages do you want? I'd like 12 pages. Well, you know you're not going to be able to do that on an inch and a half inch spine. Think about it. So you're probably going to have to go two and a half, double the page, okay?
1:05:30 So think about how big, what you're going to do. Think about it beforehand. So five by three and a half. I'll do two at the same time. And then all of these pieces, belly bands, pockets across the pages,
1:06:00 so many options. In fact, I'll just put this black card on just in case anybody is wanting super-duper cheap, 50 sheets. It's good quality. So I'm using it, aren't I? So that's four pages. One, two, three, four. And then one more.
1:06:30 Three and a half. "I have done envelope ones before," says a viewer. Nice. So let's just have a look. So before I go anywhere near sticking this in my album, I stick my pages in. So I stick all of my pages to my hinge spines. But what I do when I stick, guys, is I always pull it a little bit away from the spine to give grace for the
1:07:00 pages to be opened and closed. If you go right on the spine, it's going to catch. That's right on the spine. It's going to catch. You need to pull it away just from your scored line, like so. So you've got a little bit of a mark. Can you see that there? So that's the gap that you need to leave, okay? So grab my glue. Take a page,
1:07:30 fold it again. Grab the spine. You see I've left a little bit of a... I can't really. There you go. Can you see? It's just away from the spine now, guys. Don't forget to get commenting, guys, because I'm going to pick a winner. So one page. Super-duper easy. Next one. So let's just close that down.
1:08:00 So the next one. Now, if you're thinking, "Well, that looks ugly," well, we're going to decorate it, so you're not going to see it. However, if you're not going to decorate it, and all you're going to do is put your black belly bands on maybe and put a teabag behind or something like Do it double-sided. Do a page double-sided each side, so you hide that nasty hinge. You have options. You are all crafters. You don't need me to tell you this nonsense. You're all probably far better than me anyway. Next page. So we're going to pop that in there like so.
1:08:30 Leave a little bit of a space so it's not exactly on the hinge, just away. Let it grab a second, and then I'm just going to put my fingers down. Make sure it's level. Page number two. A viewer. Thanks. Next one. So get it on, and then pull it away from the hinge, so they don't
1:09:00 catch when people are looking through the book. That's that on. Three more to go. Super quick. Once you get going, once you just sort of get your head around how the system gets put together, you'll be making tons. And listen, I've pretty much built an album live with you here in what? An hour? So,
1:09:30 if you're doing a few, do all of the spines and binding at once, and then do all your spine interior at once, and then all pages at once. And then have fun just enjoying the moment and decorating them. Next one.
1:10:00 A viewer, I'm not sure if I have patience for this. It's not for everyone, particularly for those people that don't know who they would be able to give them to, I know that. And then the last one.
1:10:30 Really cool as well if you've got a ton of cardstock you need to get through. A viewer says, "So happy to see the full step-by-steps of a scrapbook and happy to be able to get the paper since HSN apparently decided to keep them to themselves."
1:11:00 A viewer, I know. Oh, lots of new stock over on HSN, just can't get it loaded. Meeting tomorrow, though. So now we have, look, our own little book. So maybe if you've got our card kits, with the lovely little football cards I keep talking about, with all those incredible toppers, you
1:11:30 could put a topper on every page if you wanted to use some of those up in your stash. And then all you do is you just take this, and we glue it into the center of our spine, like so. And then you have your book. Cha, cha, cha, cha, cha, cha. But before we do any of that, just a few things for you here. So you can decorate the pages with your coordinating papers, but these are where they come into their own. So decorate your page, and then the little pieces you've got that are the same length, if you take your
1:12:00 glue, look, when you've got it decorated and you pop them on the page, you've got a little belly band where you can put things underneath, like tags, or comments, or a poem, or just something really lovely like that to tuck in underneath. If you've got any of our
1:12:30 other papers with the toppers and the mounts and all, really, you can have so much fun. So now, say, for example, you can stick something underneath. Be quite creative with it if you wanted to. So let's put this in. This is where I'd definitely use a little bit of tape as well. And then just take your book and then pop it in. You see how it's perfectly aligned. So because we did it at five, the same as the lining, it all works
1:13:00 seamlessly. And don't faff with it like I am. Give it a chance. Make sure it's all centralized and you're happy. Hold it, hold it.
1:13:30 How neat. Hand sewn with leather. Oh, gosh, yeah. Easy when you know how, isn't it, guys? So then you'll have... Just be gentle with your album till it knows where it needs to go.
1:14:00 And then look at this. Oh, that needs glue in there. Quack, quack. Need to stick some glue under there, but you get the idea. Let me just show you See the pages in there? And then what's cool is you can do a belly band closure. So I'm slowly moving this, as you can see. I don't want to crack my spine, but it is moving
1:14:30 beautifully. And look how gorgeous that simply looks. Absolutely wonderful with the pages. Decorate your pages, add your mounts, add your pockets, add your chocolate bars, your teas, your seeds, whatever you want to do. What do we think? Are you going to be making them? So cool. And if you've got any embellishments, like little metal keyholes or charms,
1:15:00 it's a whole new level, guys. It's a whole new world of craft. But if you've got a ton of stock, stash with papers and cards and mount board and, 48 of you have these papers in your baskets. What are you all doing? Didn't you all get them last week? Add some more glue down here. So shall we pick a winner? You've all been commenting.
1:15:30 Gorgeous. Well, listen, I need to keep you all off my case. So if you're busy in your craft rooms doing your craft, you're not bothering me. Leaving me alone. I'm chuffed with that, guys. That stripe is incredible. Lovely little mini book. There, it's closed now. Look, guys. Yep. Yay. So, let's pick a winner then, shall we?
1:16:00 Who's it going to be? Let me get it on my phone. Lovely, Tony. Well, thank you very much. Have we all shared, if you can? And don't forget to tell your crafty friends as well. We love our Tuesdays and Thursdays now, don't we? Right, what am I doing? Right. Shush. Better turn this down in case something happens. Right.
1:16:30 Let me log in. Getting old like you guys, can't see a thing. Oh. Right. There I am. "Love the papers," says a viewer. I do, too. I've already used one color, all of it.
1:17:00 Let's have a look. I don't want to listen to me then, though. Right. So I've got all comments up. Oh, look at you all doing the hearts, too. Right. There's been quite a few comments, guys, as you can see. So what I like to do, if my eyes stop on a name where I think I've already given you a voucher, it'll either skip above or skip below. Listen, we're not too precious. There's no rules, really. It's just a little bit of a thank you for joining in live. And you don't have to spend a penny to get the voucher.
1:17:30 I don't even know if anybody spends these vouchers. Mind you, you will spend them, of course, because a viewer says, "Can I have a voucher code for such and such winner?" So you get a code, I know you do, but at what point you spend it, I'm not exactly sure. So it's always nice though to have a little golden nugget in your back pocket, right? So let's do some swiping. So I'll swipe up, then I'll swipe down, and I'll swipe up, and we'll do a bit of a in-betweeny, and then we're going. "Now
1:18:00 you can decorate it really great," Dawn says. Absolutely. If you've got your toppers and papers with flower, whatever you want to do. I tell you what, next, on Tuesday, when I'm live, Tuesdays with Toni, using HSM product, I'm going to dig out some of the albums I've made. Do you want to see some of the albums I've made? And I'll just show you them really briefly. I know you come for the inspiration, but I can show you real brief. I'll show you actually some that the design team have made as well, because
1:18:30 honestly, they are out of this world. I'll show you. Let me know. Pop a comment underneath if you want me to show you. Right. Come on. Right. Stop. A viewer Brown5126. Is she there? A viewer Brown5126. Whoo. A viewer Brown5126, you've just won a voucher for website. You need to message me, and we'll get it sorted for you.
1:19:00 Our team was back in today, hence why lots of you have had dispatch notices. So I don't think there's anything else to tell you about other than congratulations to a viewer. Whoo. Boop boop. So I hope you've enjoyed that. I hope it wasn't too boring if you do already make albums. But we all know that it's not just about the inspiration from me. You're here to see your friends and enjoy our community as well. A viewer says, "Question." I have seen the papers on HSM.
1:19:30 I've got my meeting tomorrow, so if you want to just wait. I hate saying wait, because I've been telling you to wait. I'm starting to look stupid, aren't I? I will do my best tomorrow, guys, and see what happens. Congratulations. "Toni has a hurricane coming her way, so if you don't hear from her, that could be why." Mo? Do I? A hurricane of orders.
1:20:00 Listen, it is a bit windy. Does Mo know something I don't? Anyway, stop scaring me. We love the wind at our house. We live right next to a park with huge trees, and my son, he cranks those windows wide. Even if it's freezing, we can listen to the trees. He loves the rain and the wind So if it is, he will be a very happy boy. He loves anything like that. So thank you, Tony. That was a great day spent with you. Thanks, gorgeous lady. I will speak to you all later.
1:20:30 I'm going to go onto overhead. Let's just take everything off air. Yay. I'm going to go into overhead. I'll put some samples. I'll put my little album back on as well. I'll put these back on as well, the ones that a viewer did with all of those lovely papers. In fact, let me just quickly show you. You can see how they all just match so beautifully. So these are the things that you can do on the pockets in your little mini one as well, like stacked little pockets like this as well. And there is another one somewhere, so let's see if we can find that one.
1:21:00 There's the two there. Oh, here it is. So you can just see this one's the stone and green one. This one is the other one. So incredibly beautiful. You can put things in pockets, belly bands, pockets, so on and so forth. But really, really lovely. So that's the end of the show. I will see you all on-- Oh,
1:21:30 I'm on TV. I'm on TV on Saturday, guys, at 1:00, 1:00 and 5:00. They asked me to do it yesterday, so I've pulled a show together. So I'll be on "Hobby Maker" on Saturday, 1:00 and 5:00 PM UK time. And then our guest's on "Hobby Maker" for me on Monday, 1:00 and 5:00. So you've got a nice week. And then I'll see you on Tuesday at 6:00 PM UK, 1:00 PM Eastern, 10:00 AM Pacific. Did I get that right? I hope I did. I'll speak to you all later, guys. Have a great evening. Oh, see you later, guys. Bye,
1:22:00 guys.