Étape 1 sur 9
Cut a piece of the decorative paper slightly smaller than your gift bag (or card blank).
Ink around the edges with your Surfboard ink before adhering in place.








 The Friday Final Cutven. 6 nov. 5 h 00
 Community Showcaselun. 9 nov. 5 h 00
 Hobbymaker TVlun. 9 nov. 9 h 00
Les prix sont mis à jour immédiatement. Chaque langue est notre propre traduction, pas Google.
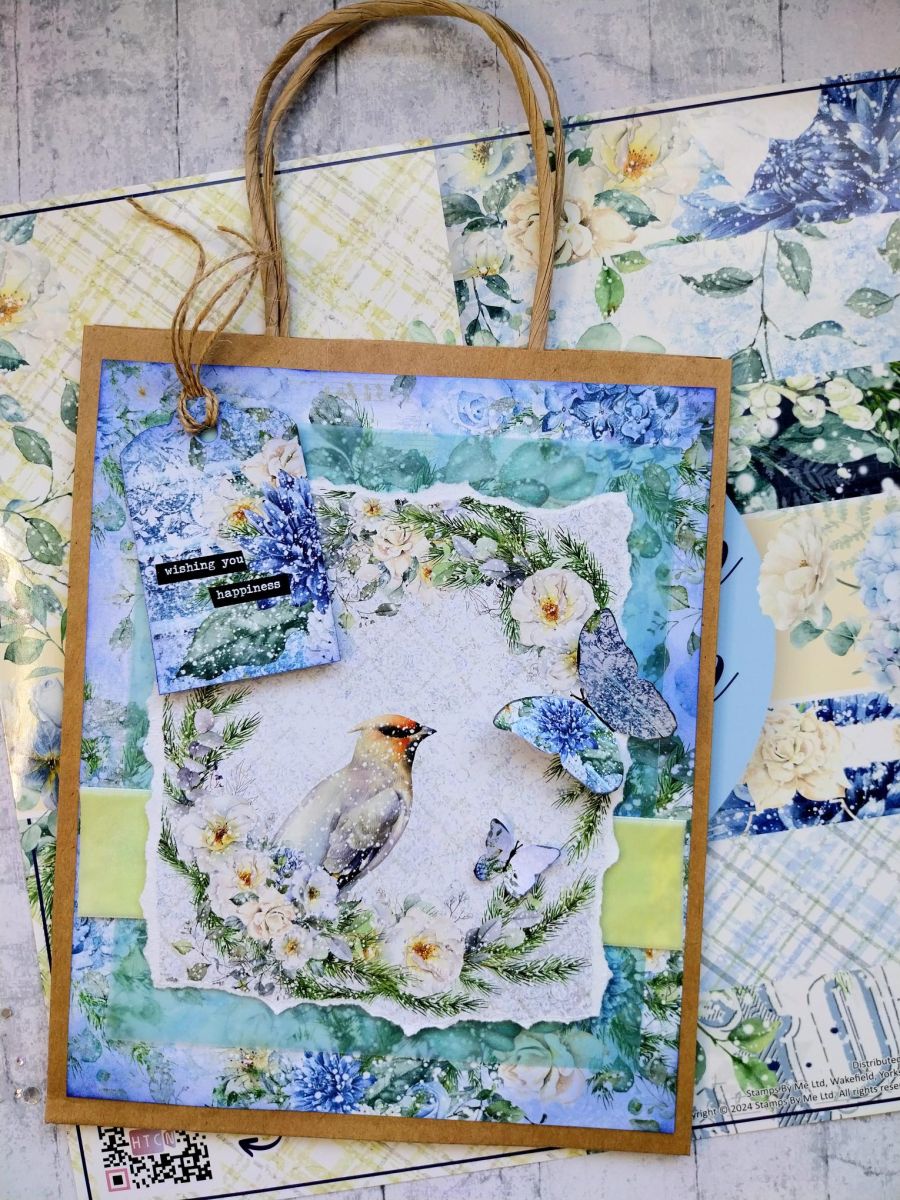
Cut a piece of the decorative paper slightly smaller than your gift bag (or card blank).
Ink around the edges with your Surfboard ink before adhering in place.
Trim vellum to the size you want the panel to be.
Secure your ribbon across the lower half of the vellum with red liner tape and then adhere to the bag using a tape runner (which is less visible through vellum).
Tear a panel incorporating this gorgeous wreath design.
Adhere to the centre of the bag.
Cut out one of the tags from the embellishment pack, blend Surfboard around the edges then thread twine through a punched hole.
Add a sentiment of your choice, whether it be stamped or sticker tabs.
Secure tag in top left corner.
Fussy cut a butterfly from the embellishment pack. Secure on your bag and use a black pen to add "feelers" and define it's body.
Finally, use the Stickles to add glitter and sparkle to your finished bag.
Partagez votre création avec la communauté Stamps By Me - et gardez ce tutoriel pour la prochaine fois.
Vous préférez l’ancienne présentation ? Ouvrir l’ancienne page.