Étape 1 sur 15
Place stencil 1 in the centre of the white card, cut to 7 x 5".
Using a blending tool, lightly apply the Twisted Citron Distress ink.








 The Friday Final Cutven. 6 nov. 5 h 00
 Community Showcaselun. 9 nov. 5 h 00
 Hobbymaker TVlun. 9 nov. 9 h 00
Les prix sont mis à jour immédiatement. Chaque langue est notre propre traduction, pas Google.
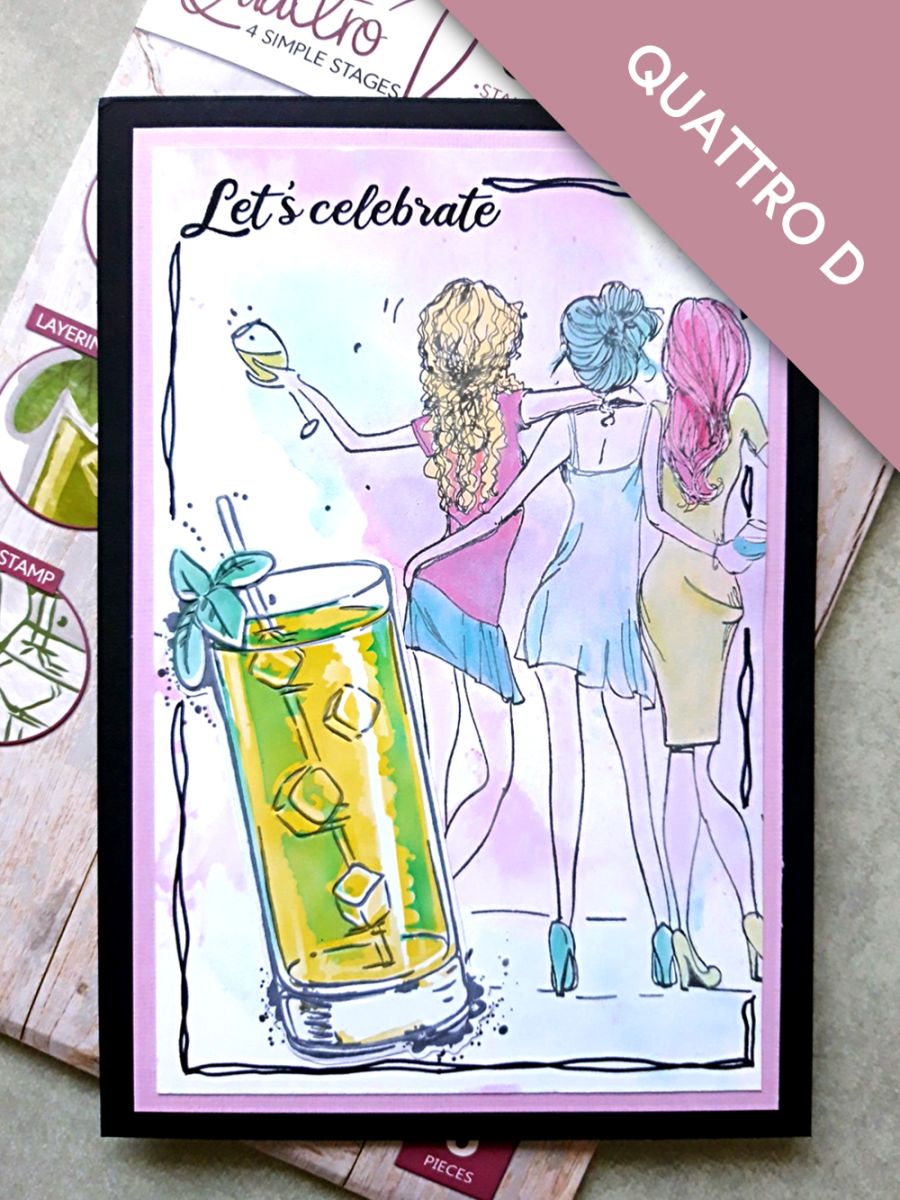
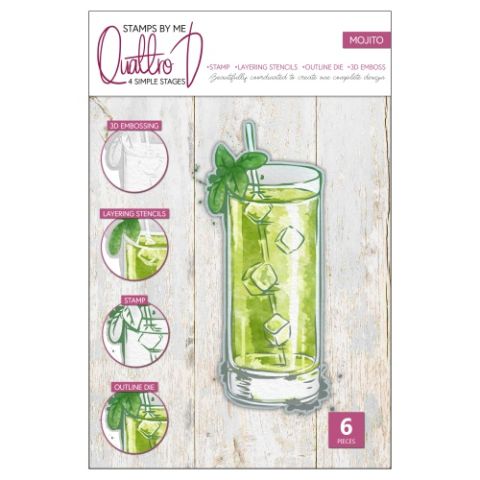 Stamps By Me Quattro D - MojitoQuattro D Mojito Collection
Place stencil 1 in the centre of the white card, cut to 7 x 5".
Using a blending tool, lightly apply the Twisted Citron Distress ink.
Line up stencil 2 and apply the same ink, but with more pressure.
Line up stencil 3 and this time blend with the Peacock Feathers Distress ink.
Blast off the ink with your heat tool.
Ink up the co-ordinating stamp, with the Smokey Gray Versafine and stamp over your stencilled image.
Line up the outline die and run it through your die cutting machine.
Line up your die cut Cocktail, in the embossing folder and run it through your machine.
Set your 3D Cocktail element to one side.
Use the Cocktail die to cut a "mask" from a masking sheet or copy paper.
Position your mask at an angle, in the bottom left corner of the white card, cut to 7 1/2 x 5", securing it in place with low tack tape, placed on the reverse of the mask.
Having swirled the Iced Teal Pearl Mist, to activate the Mica, spray on to your card. Dry the spray with a quick blast from your heat tool.
Apply the Magenta ink to your glass mat, spritz with a little water, or the Iced Teal Pearl Mist, then holding the mask in place, dab the card through the ink.
Dry with your heat tool.
Ink up the stamp from Imala Show Some Love, with the Smokey Gray Versafine and stamp on to your inky background, over the mask and just off the right hand edge of the card.
Remove the mask, then ink up the Cocktail stamp with the Versafine and stamp in the masked off area.
You can now paint your lovely ladies, using any combination of the Distress and Premium ink pads, a little water and a paint brush. You could also use the Iced Teal Pearl Mist to add a touch of shimmer.
Adhere your 3D Cocktail element over the stamped image, with wet glue or foam pads, for added dimension.
Ink up the sentiment stamp from the Weekend Lamination Stamp Collection, with the Onyx Black Versafine, and stamp in the top left corner.
Use a black pen to draw a decorative frame around your artwork.
To finish, adhere your artwork on to the pink card and then on to the front of your black card blank.
Partagez votre création avec la communauté Stamps By Me - et gardez ce tutoriel pour la prochaine fois.
Vous préférez l’ancienne présentation ? Ouvrir l’ancienne page.



