Étape 1 sur 11
Ink up this stamp, from Our Story Stamp And Die Collection, with the Memento ink and stamp on to the super smooth, white card.
Use the coordinating outline die to cut it out.








 The Friday Final Cutven. 6 nov. 5 h 00
 Community Showcaselun. 9 nov. 5 h 00
 Hobbymaker TVlun. 9 nov. 9 h 00
Les prix sont mis à jour immédiatement. Chaque langue est notre propre traduction, pas Google.
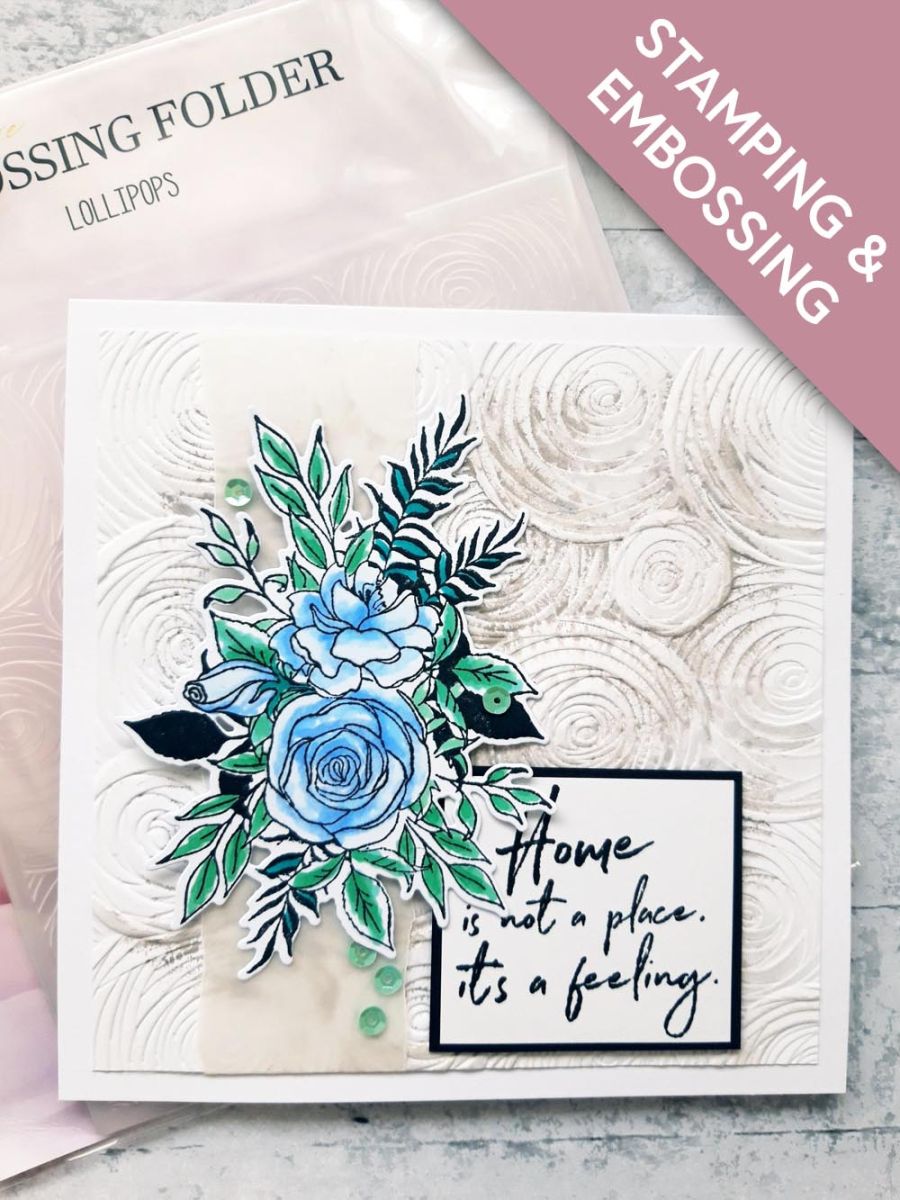
Ink up this stamp, from Our Story Stamp And Die Collection, with the Memento ink and stamp on to the super smooth, white card.
Use the coordinating outline die to cut it out.
Colour in your die cut element with the Gossip alcohol pens.
TIP: Place a sheet of copier paper under your card, as the alcohol ink seeps through the card on to the surface below!
Ink up the DEBOSSED side of the Lollipops Watercolour embossing folder, with the Hickory Smoke Oxide and spritz it with water.
Cut white card to roughly 6 x 6", place inside your inked embossing folder, and run it through your die cutting/embossing machine.
Once the ink is dry, you can trim your background to 5 3/4 x 5 3/4".
Tear a strip of vellum 6 x 1 1/2".
Place vertically, towards the left side of your embossed background. Tuck the edges over the top and bottom of the card and secure on the back, with double sided tape.
Adhere your coloured, die cut floral element over the vellum panel, as shown here.
Adhere this on to the front of your card blank and set it to one side.
Ink up the sentiment, from Trust Your Journey Stamp and Die Collection, with the Memento and stamp on to white card (2 1/4 x 2").
Adhere this on to black card, cut to 2 1/2 x 2 1/4".
Adhere on to your card blank, with foam pads, tucking it just under the bottom right of your floral element.
To finish, add sequins on, around and tucked under, your floral element.
Partagez votre création avec la communauté Stamps By Me - et gardez ce tutoriel pour la prochaine fois.
Vous préférez l’ancienne présentation ? Ouvrir l’ancienne page.