LIENS RAPIDES

info@howtocraftnetwork.com
Encore plus malin : achetez et regardez avec l'application SBMTÉLÉCHARGEZ L'APPLIRegardez-nous en direct sur votre smart TVVOIR COMMENTDécouvrez notre chaîne IPTV dédiée : rendez-vous sur my-telly.comREGARDERCumulez des points de fidélité à chaque commandeEN SAVOIR PLUS
Bienvenue sur How to Craft Network
 
SBM SHOP
SUIVEZ-NOUS
OFFREZ 10 $ DE REMISE À VOS AMIS PARRAINEZ UN AMI › DÉCOUVRIR MY-TELLY.COM › ENCORE PLUS MALIN TÉLÉCHARGEZ L'APPLI › CHAÎNE PRIMÉE SUR VOTRE TV › REJOIGNEZ LE CLUB POUR ÉCONOMISER ›
 
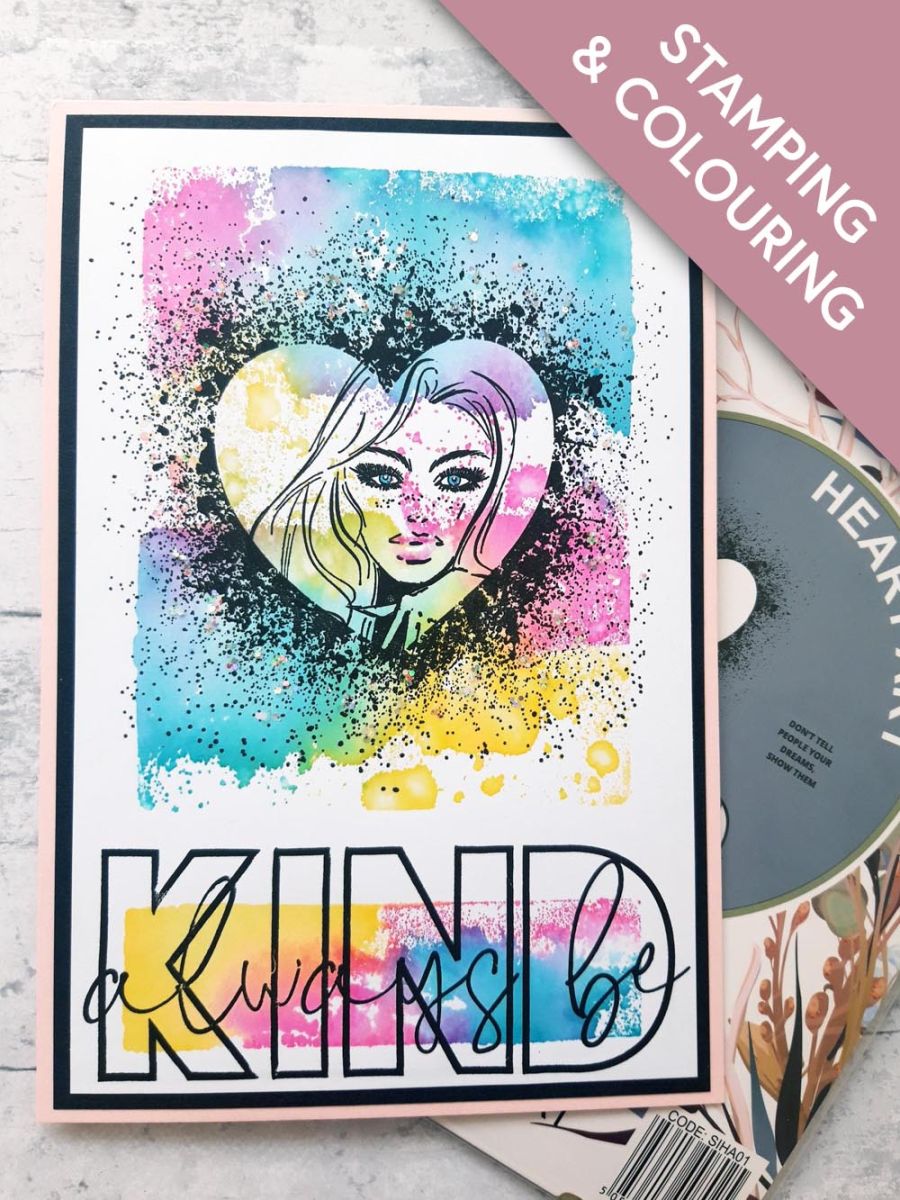
Soyez toujours bienveillant
Tutoriel · 9 étapes

Soyez toujours bienveillant

7 septembre 2022✦ Carley DuffTechniques d'encrageTechniques de tamponnage
9étapes
Étape 1 sur 9

Tout ce qu’il vous faut

0 sur 14 prêts
La liste
Dans votre stock créatif
Cochez ce que vous avez - cet appareil s’en souvient.

Étape par étape

touchez une image pour l’agrandir · touchez TERMINÉ au fur et à mesure - cet appareil s’en souvient
Étape 1 sur 9

Swipe the Izink Dye ink pads randomly, on to the large acrylic block and spritz with water. 

Place down on to white card, cut to 7 3/4 x 5 1/4", in the middle but closer to the top of the card.

Leave for a few seconds to allow the card to drink up the ink, then carefully lift up the block.  

Étape 2 sur 9

Ink up and stamp the thinner acrylic block, as before, positioning it below the first inky panel.

Dry the ink thoroughly.   

Étape 3 sur 9

Ink up the heart with the Onyx Black Versafine and stamp in the middle of the larger inky panel. 

Étape 4 sur 9

Ink up the sentiment with the Versafine and stamp over the smaller inky panel. 

Étape 5 sur 9

Ink up one of the lady's from the Imala Superstars Stamp Collection, with the Versafine and stamp within the heart. 

Étape 6 sur 9

Use the Izink Dye inks and a paint brush to colour in her eyes and lips. 

Étape 7 sur 9

Adhere your artwork on to black card, cut to 8 x 5 1/2". 

Étape 8 sur 9

Adhere on to the front of your pink, top folding card blank. 

Étape 9 sur 9

Dot glue within the textured heart, and sprinkle on the Midas Glitter, to add lots of sparkle to your finished card! 

Bravo, c’est fait !

Partagez votre création avec la communauté Stamps By Me - et gardez ce tutoriel pour la prochaine fois.

⇩ TÉLÉCHARGER LE PDF

Plus de tutoriels : ink techniques

tous les tutoriels ›

Vous préférez l’ancienne présentation ? Ouvrir l’ancienne page.