Give your friends $10 off their first order!
Refer a FRIEND


WHAT YOU WILL NEED:
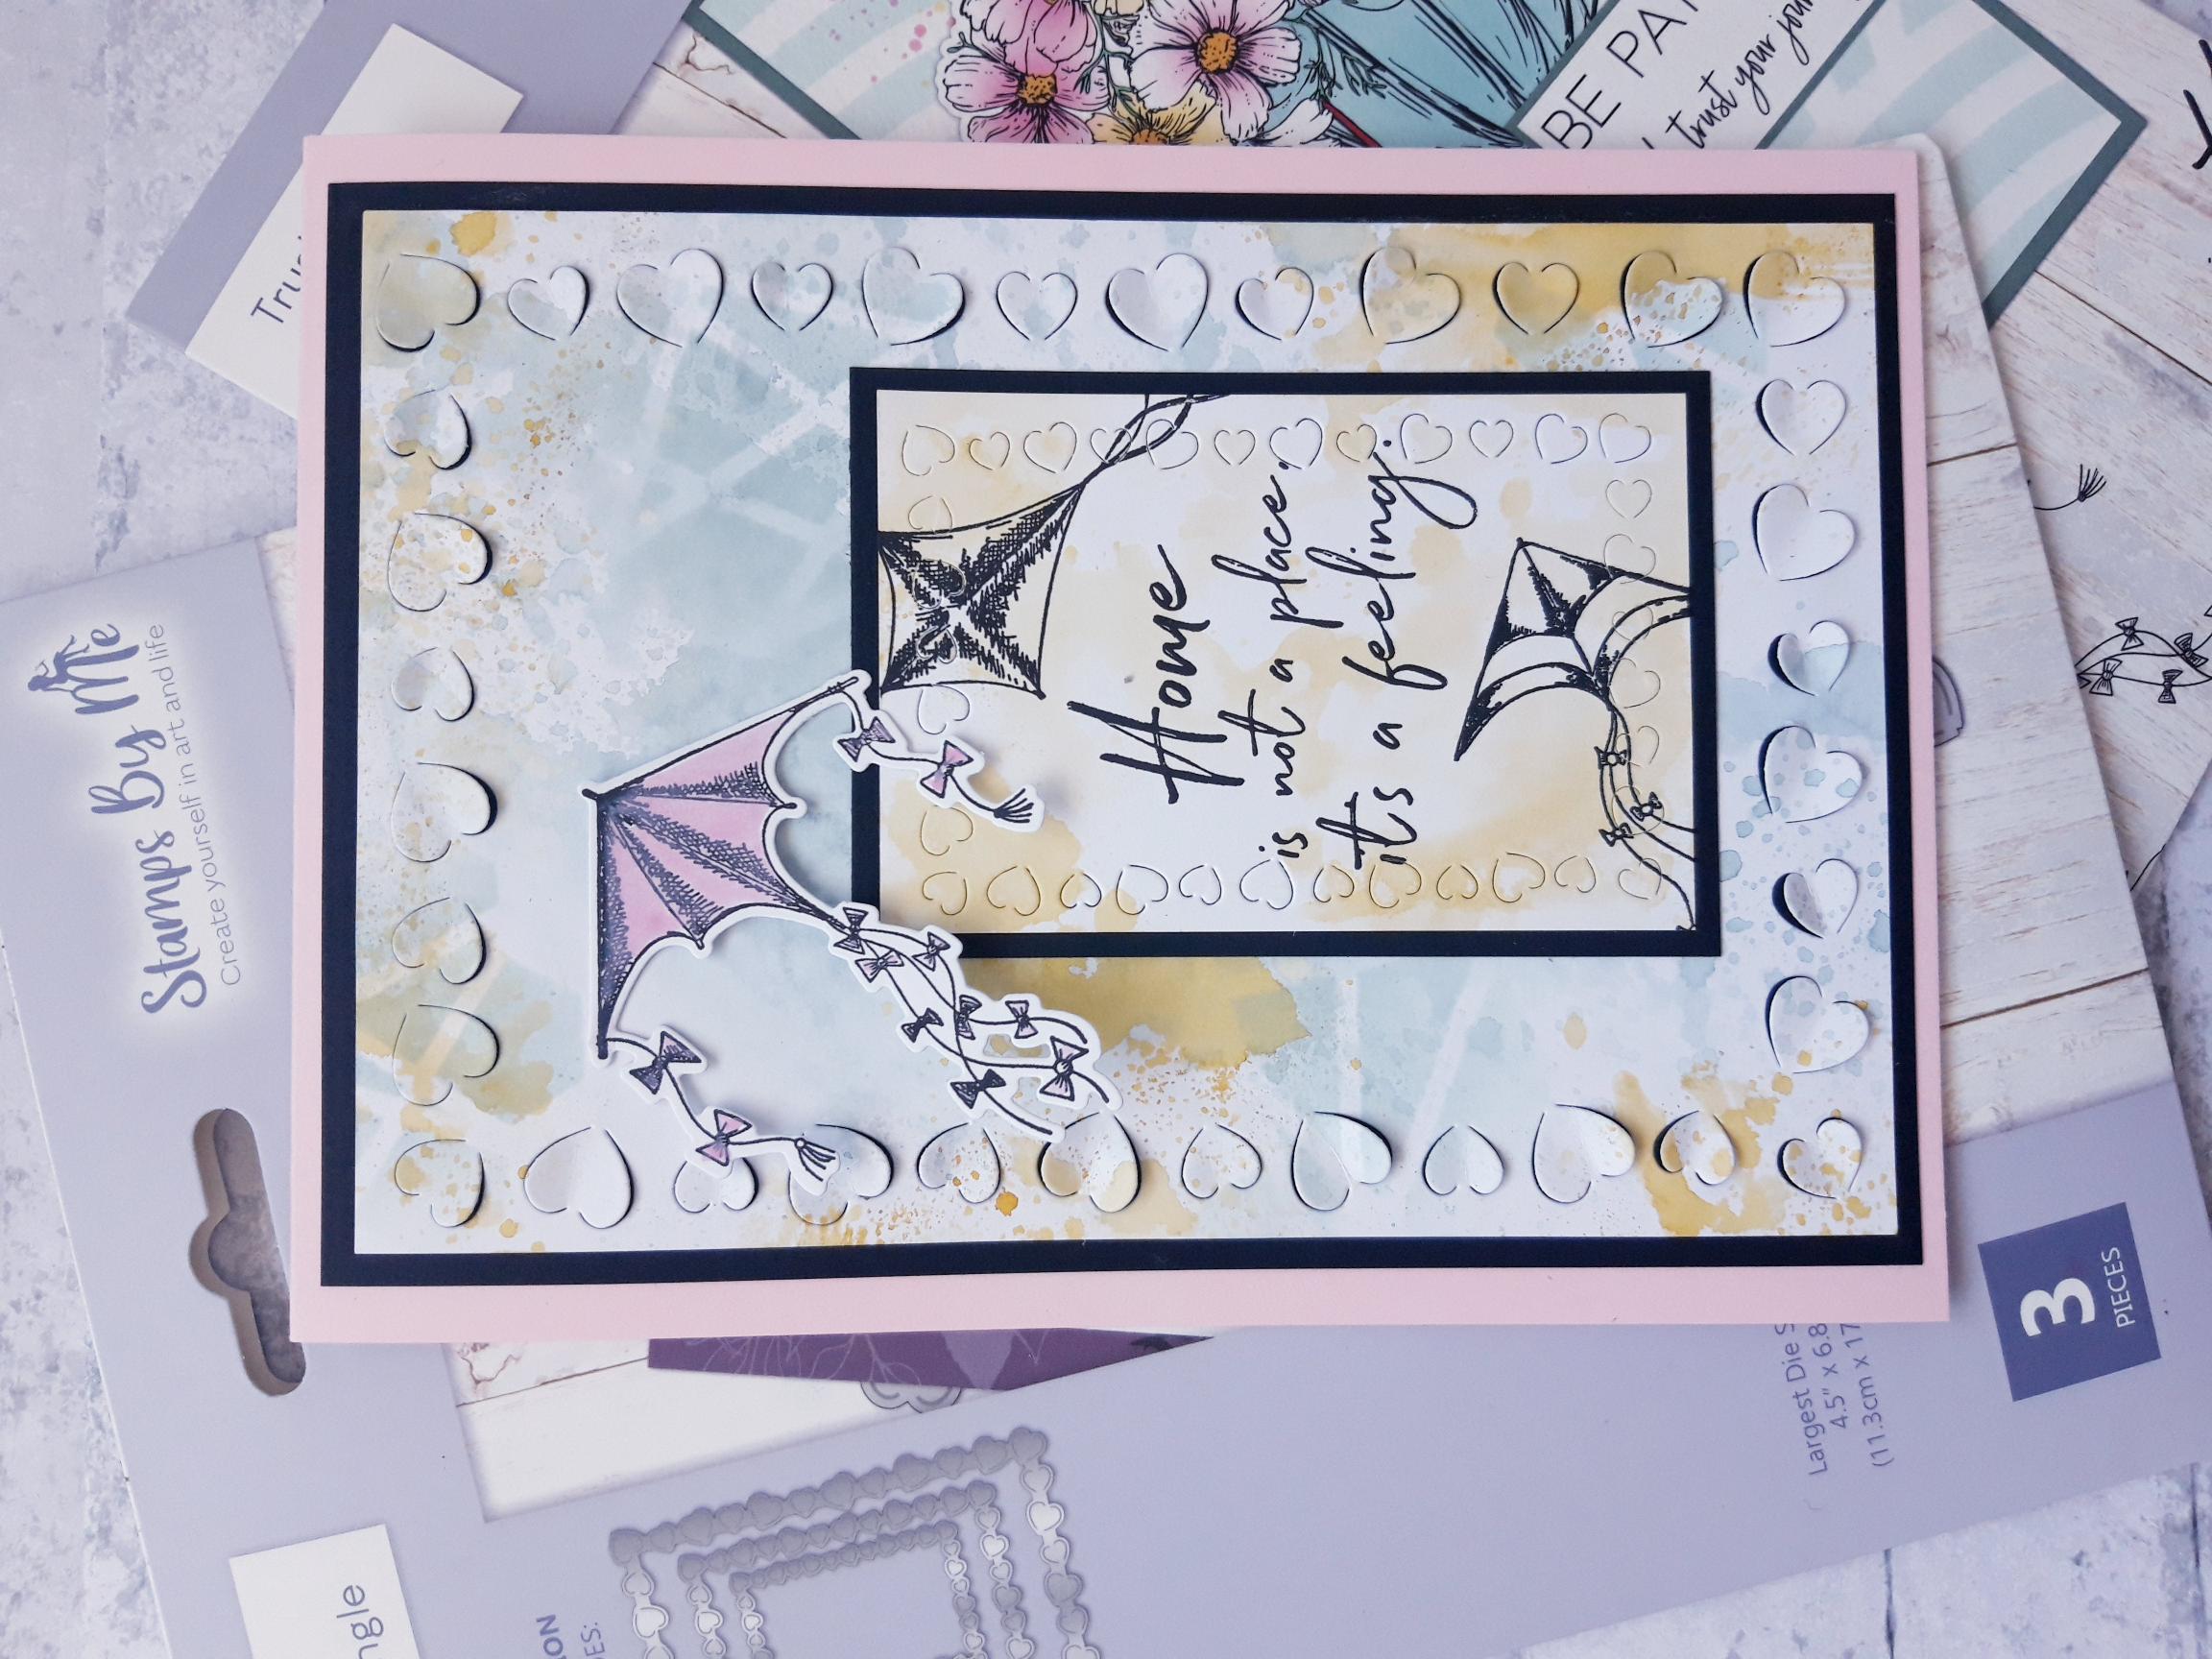
Pink top folding card blank - cut to 7 1/2 x 5 1/2"
Black card (7 1/4 x 5")
White card (7 x 4 3/4")
Black card (4 x 2 3/4")
White card (3 3/4 x 2 1/2")
White card (4 x 3")
Loveables Rectangle Die Collection
Trust Your Journey Stamp And Die Collection
Honeycomb stencil
Versafine Ink Pad: Onyx Black
Izink Dye Spray: Butterscotch, Morning Mist
Izink Pigment: Lychee, Avalanche
Izink Pigment Vintage Ink Pad Collection: light blue
Paint brush
Water spray bottle
Eureka 101
Paper Trimmer
Perfect Together Glue
Foam pads
Die Cutting machine
[click image to enlarge] 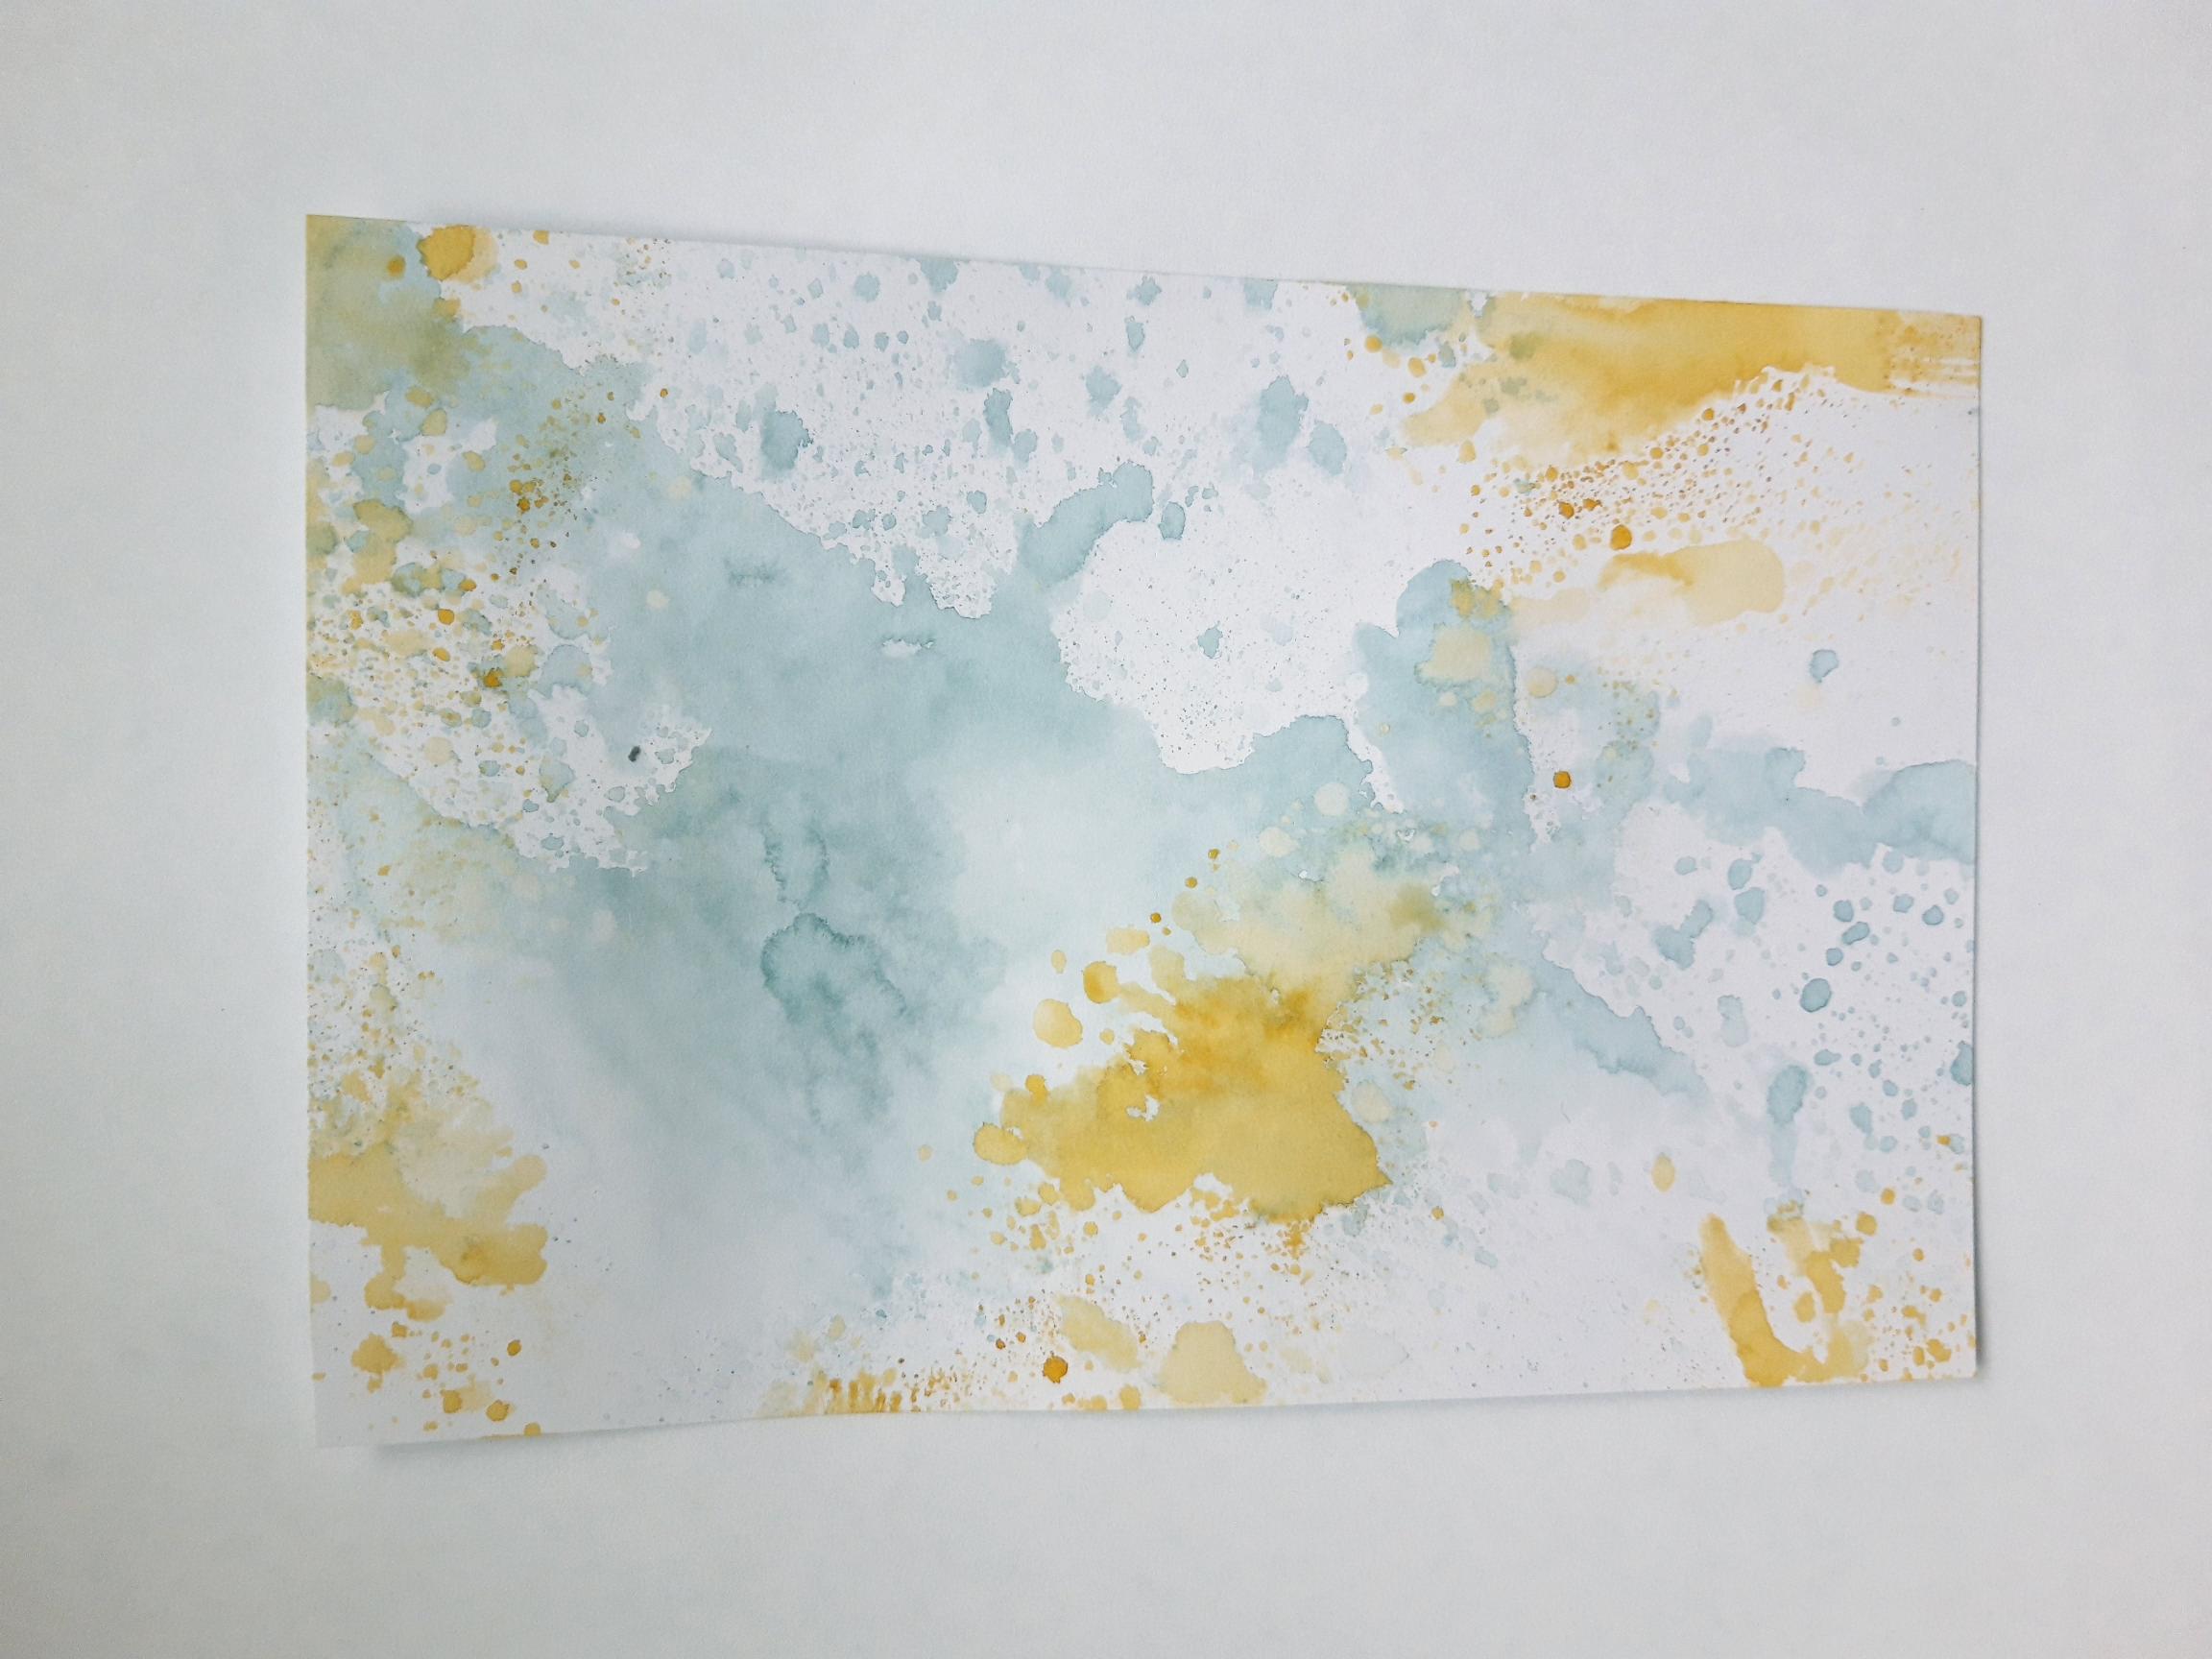
|
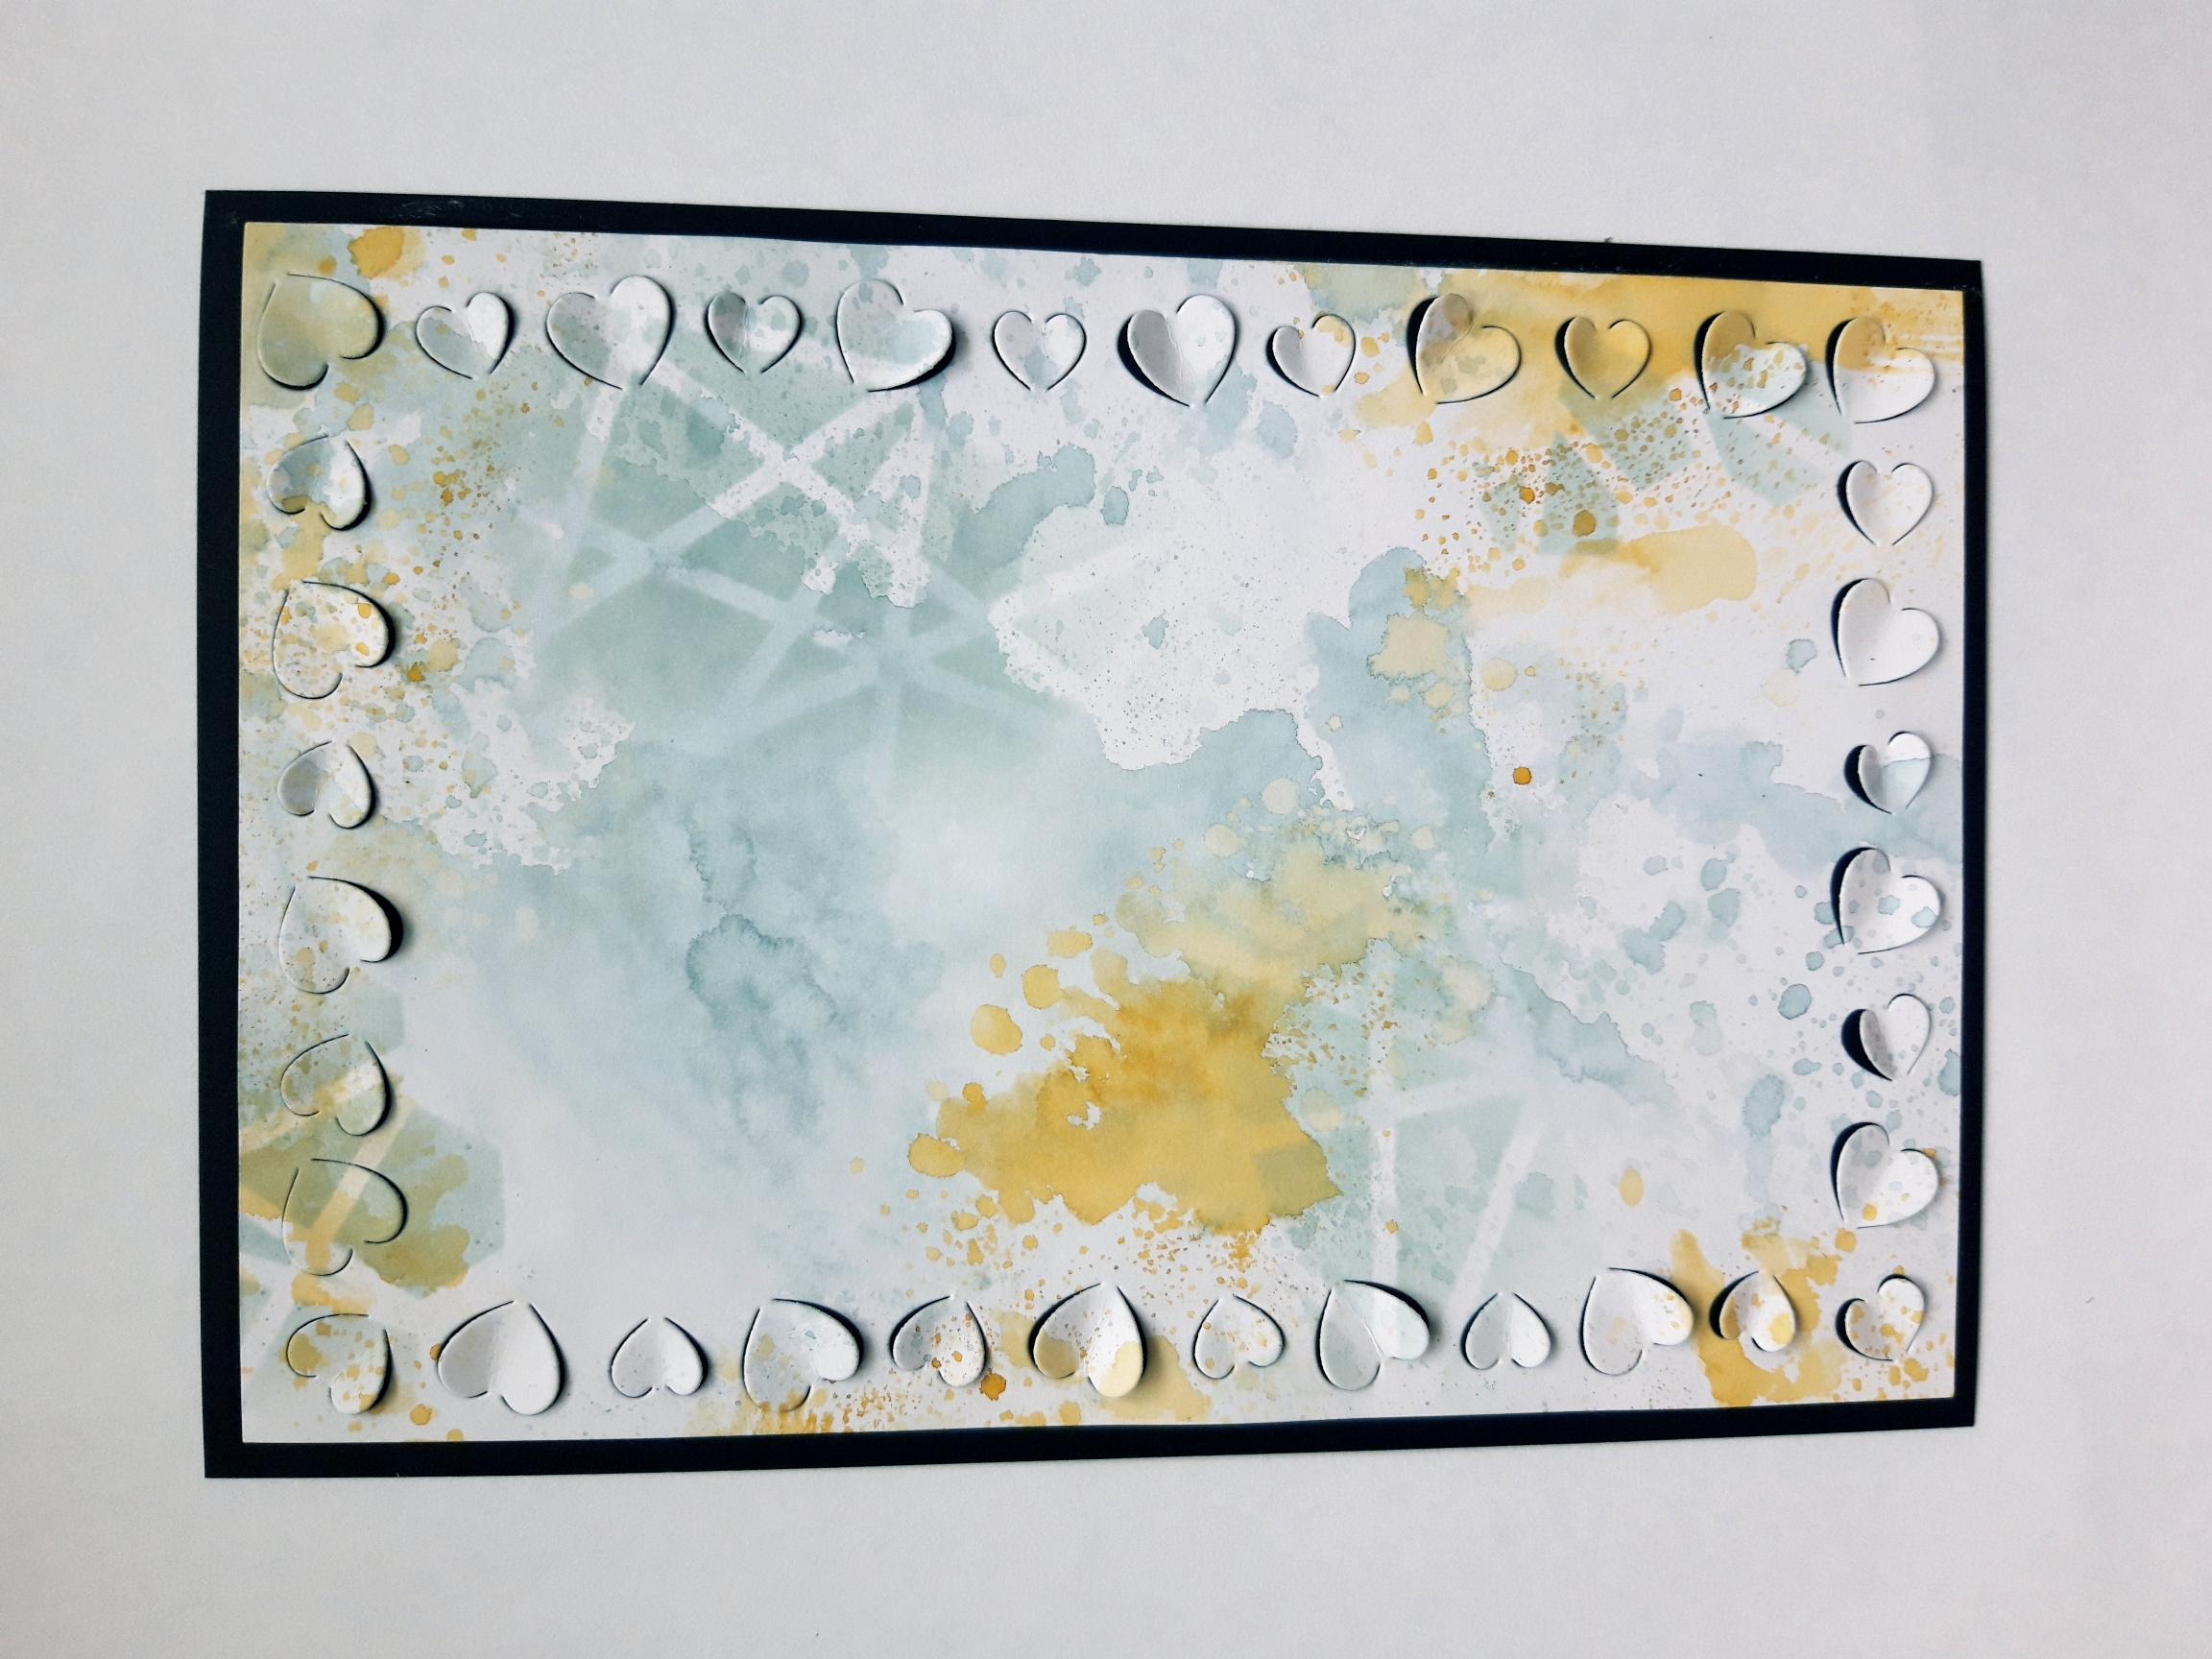
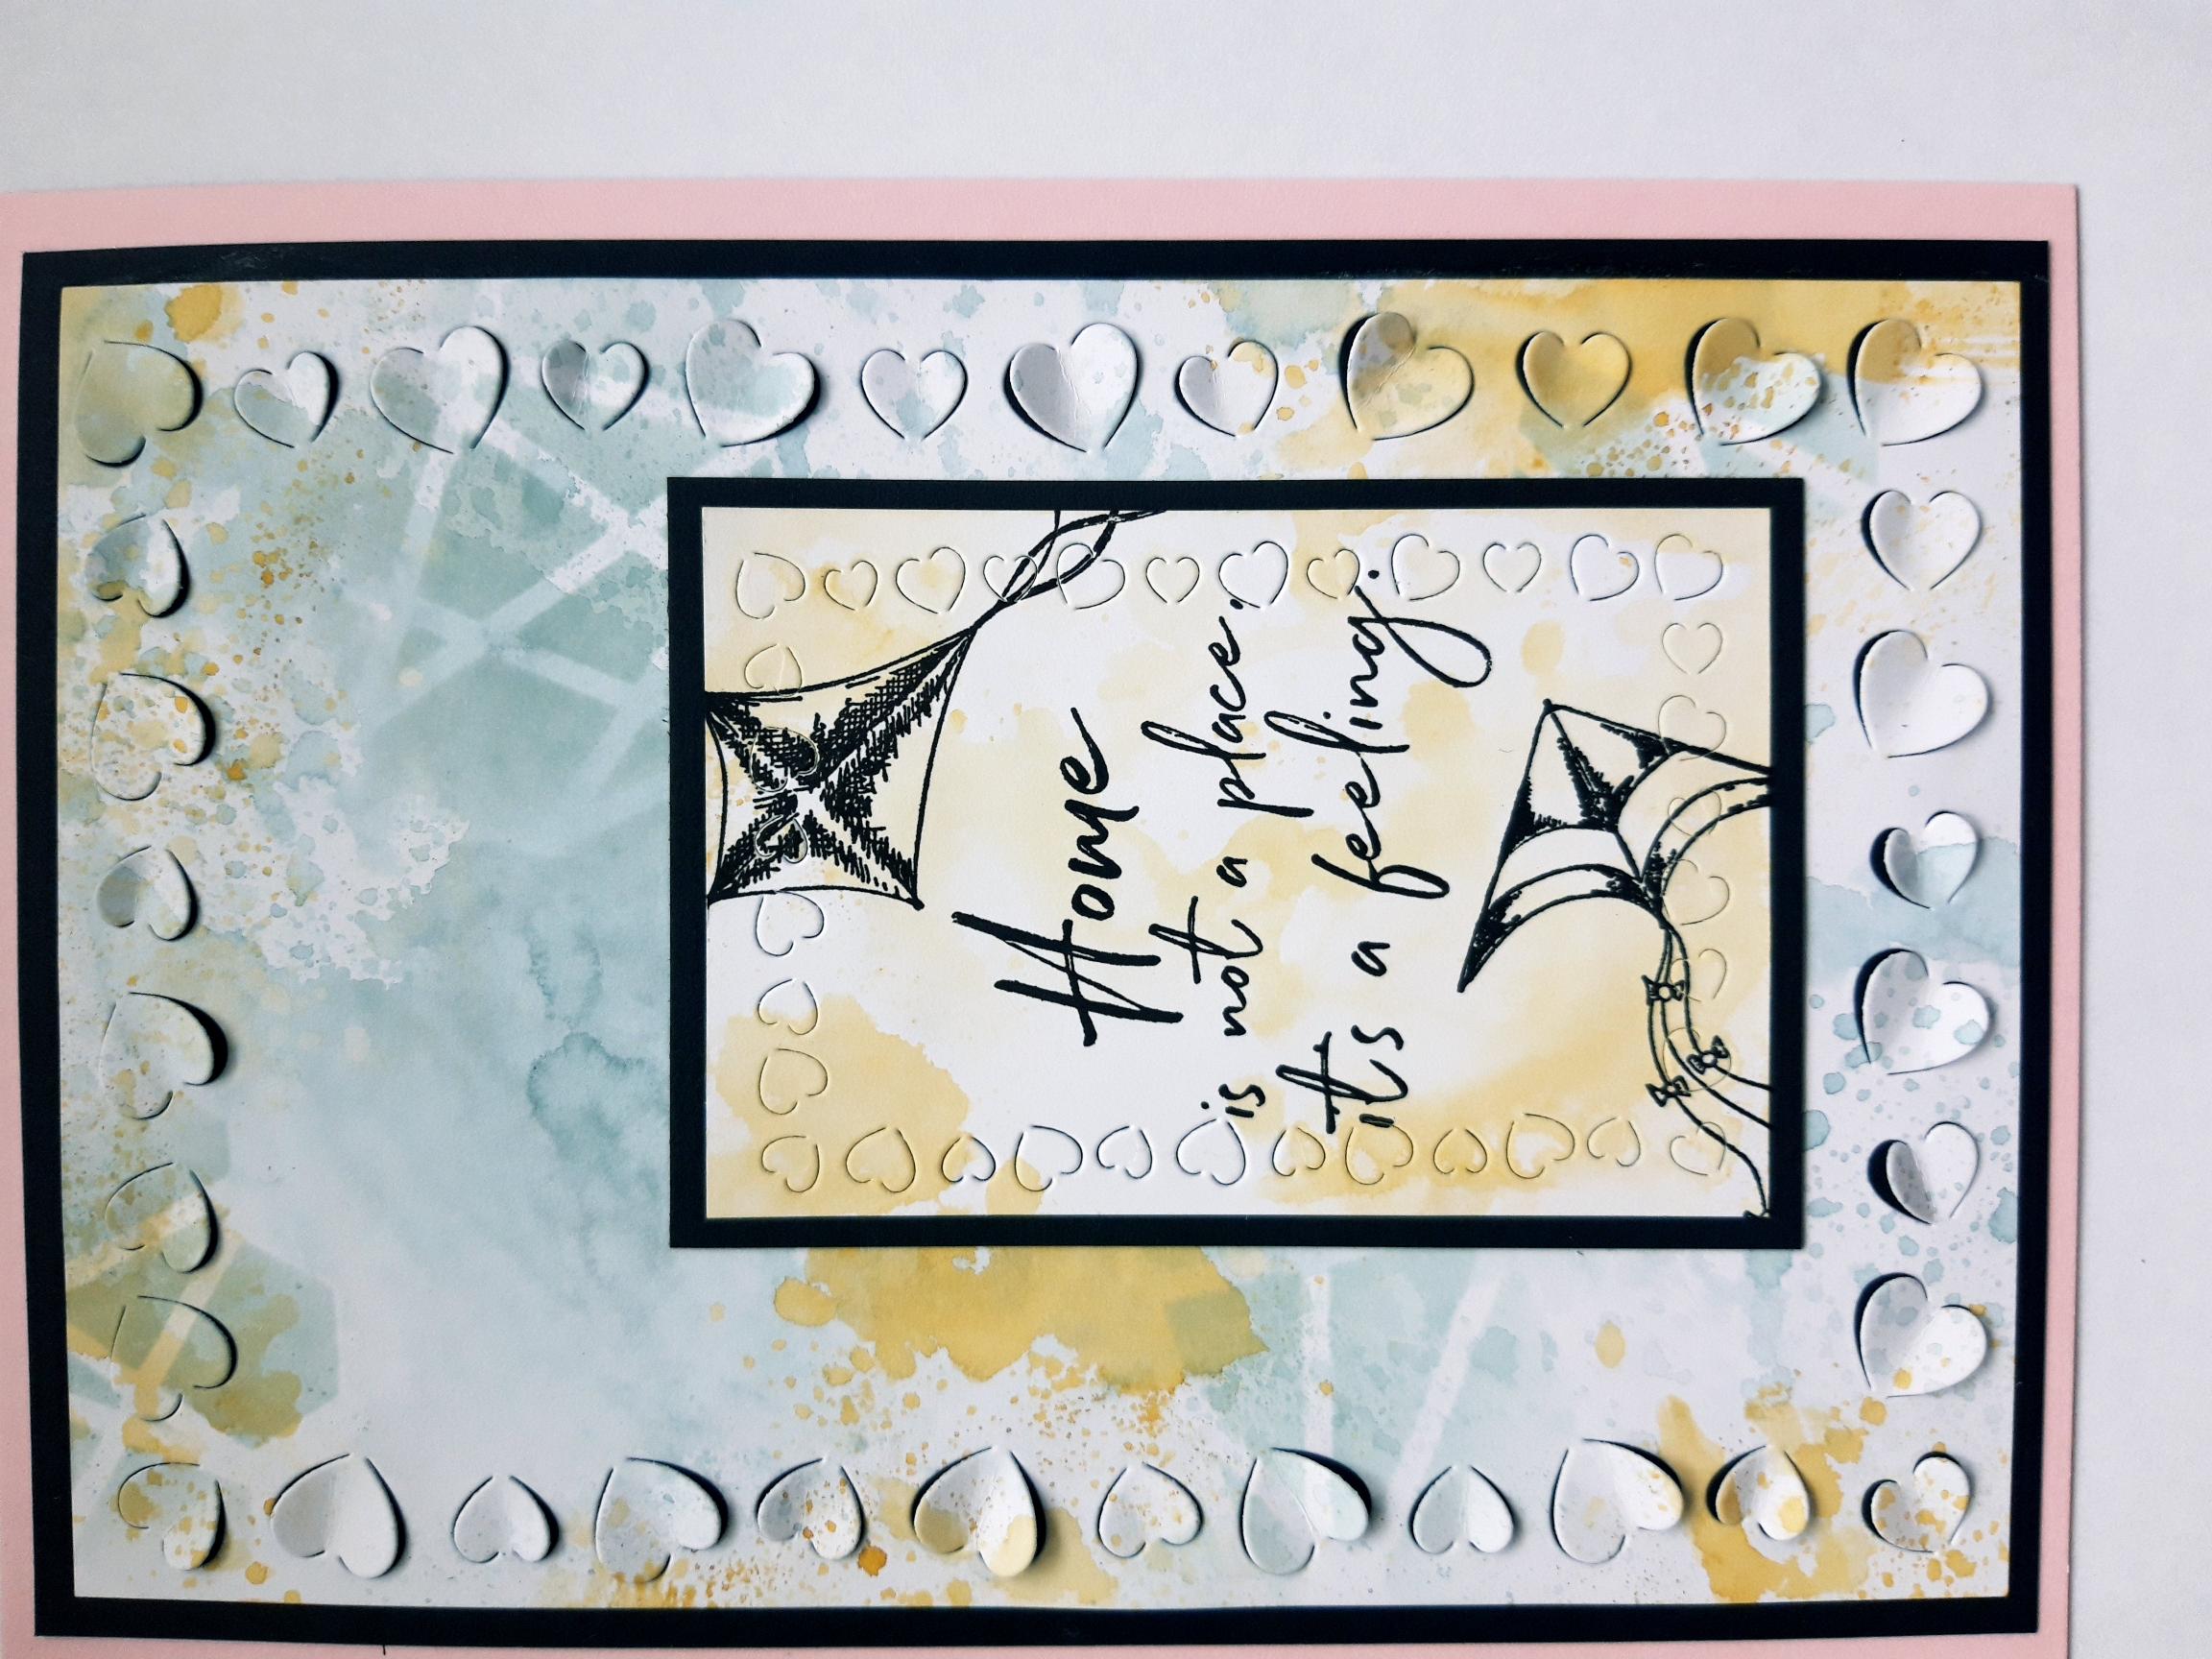
Spray the Izink Morning Mist on to your craft mat. Spritz with a little water then pick up the ink with the white card (7 x 4 3/4"). Repeat with the Izink Butterscotch, then dry off your background. |
|
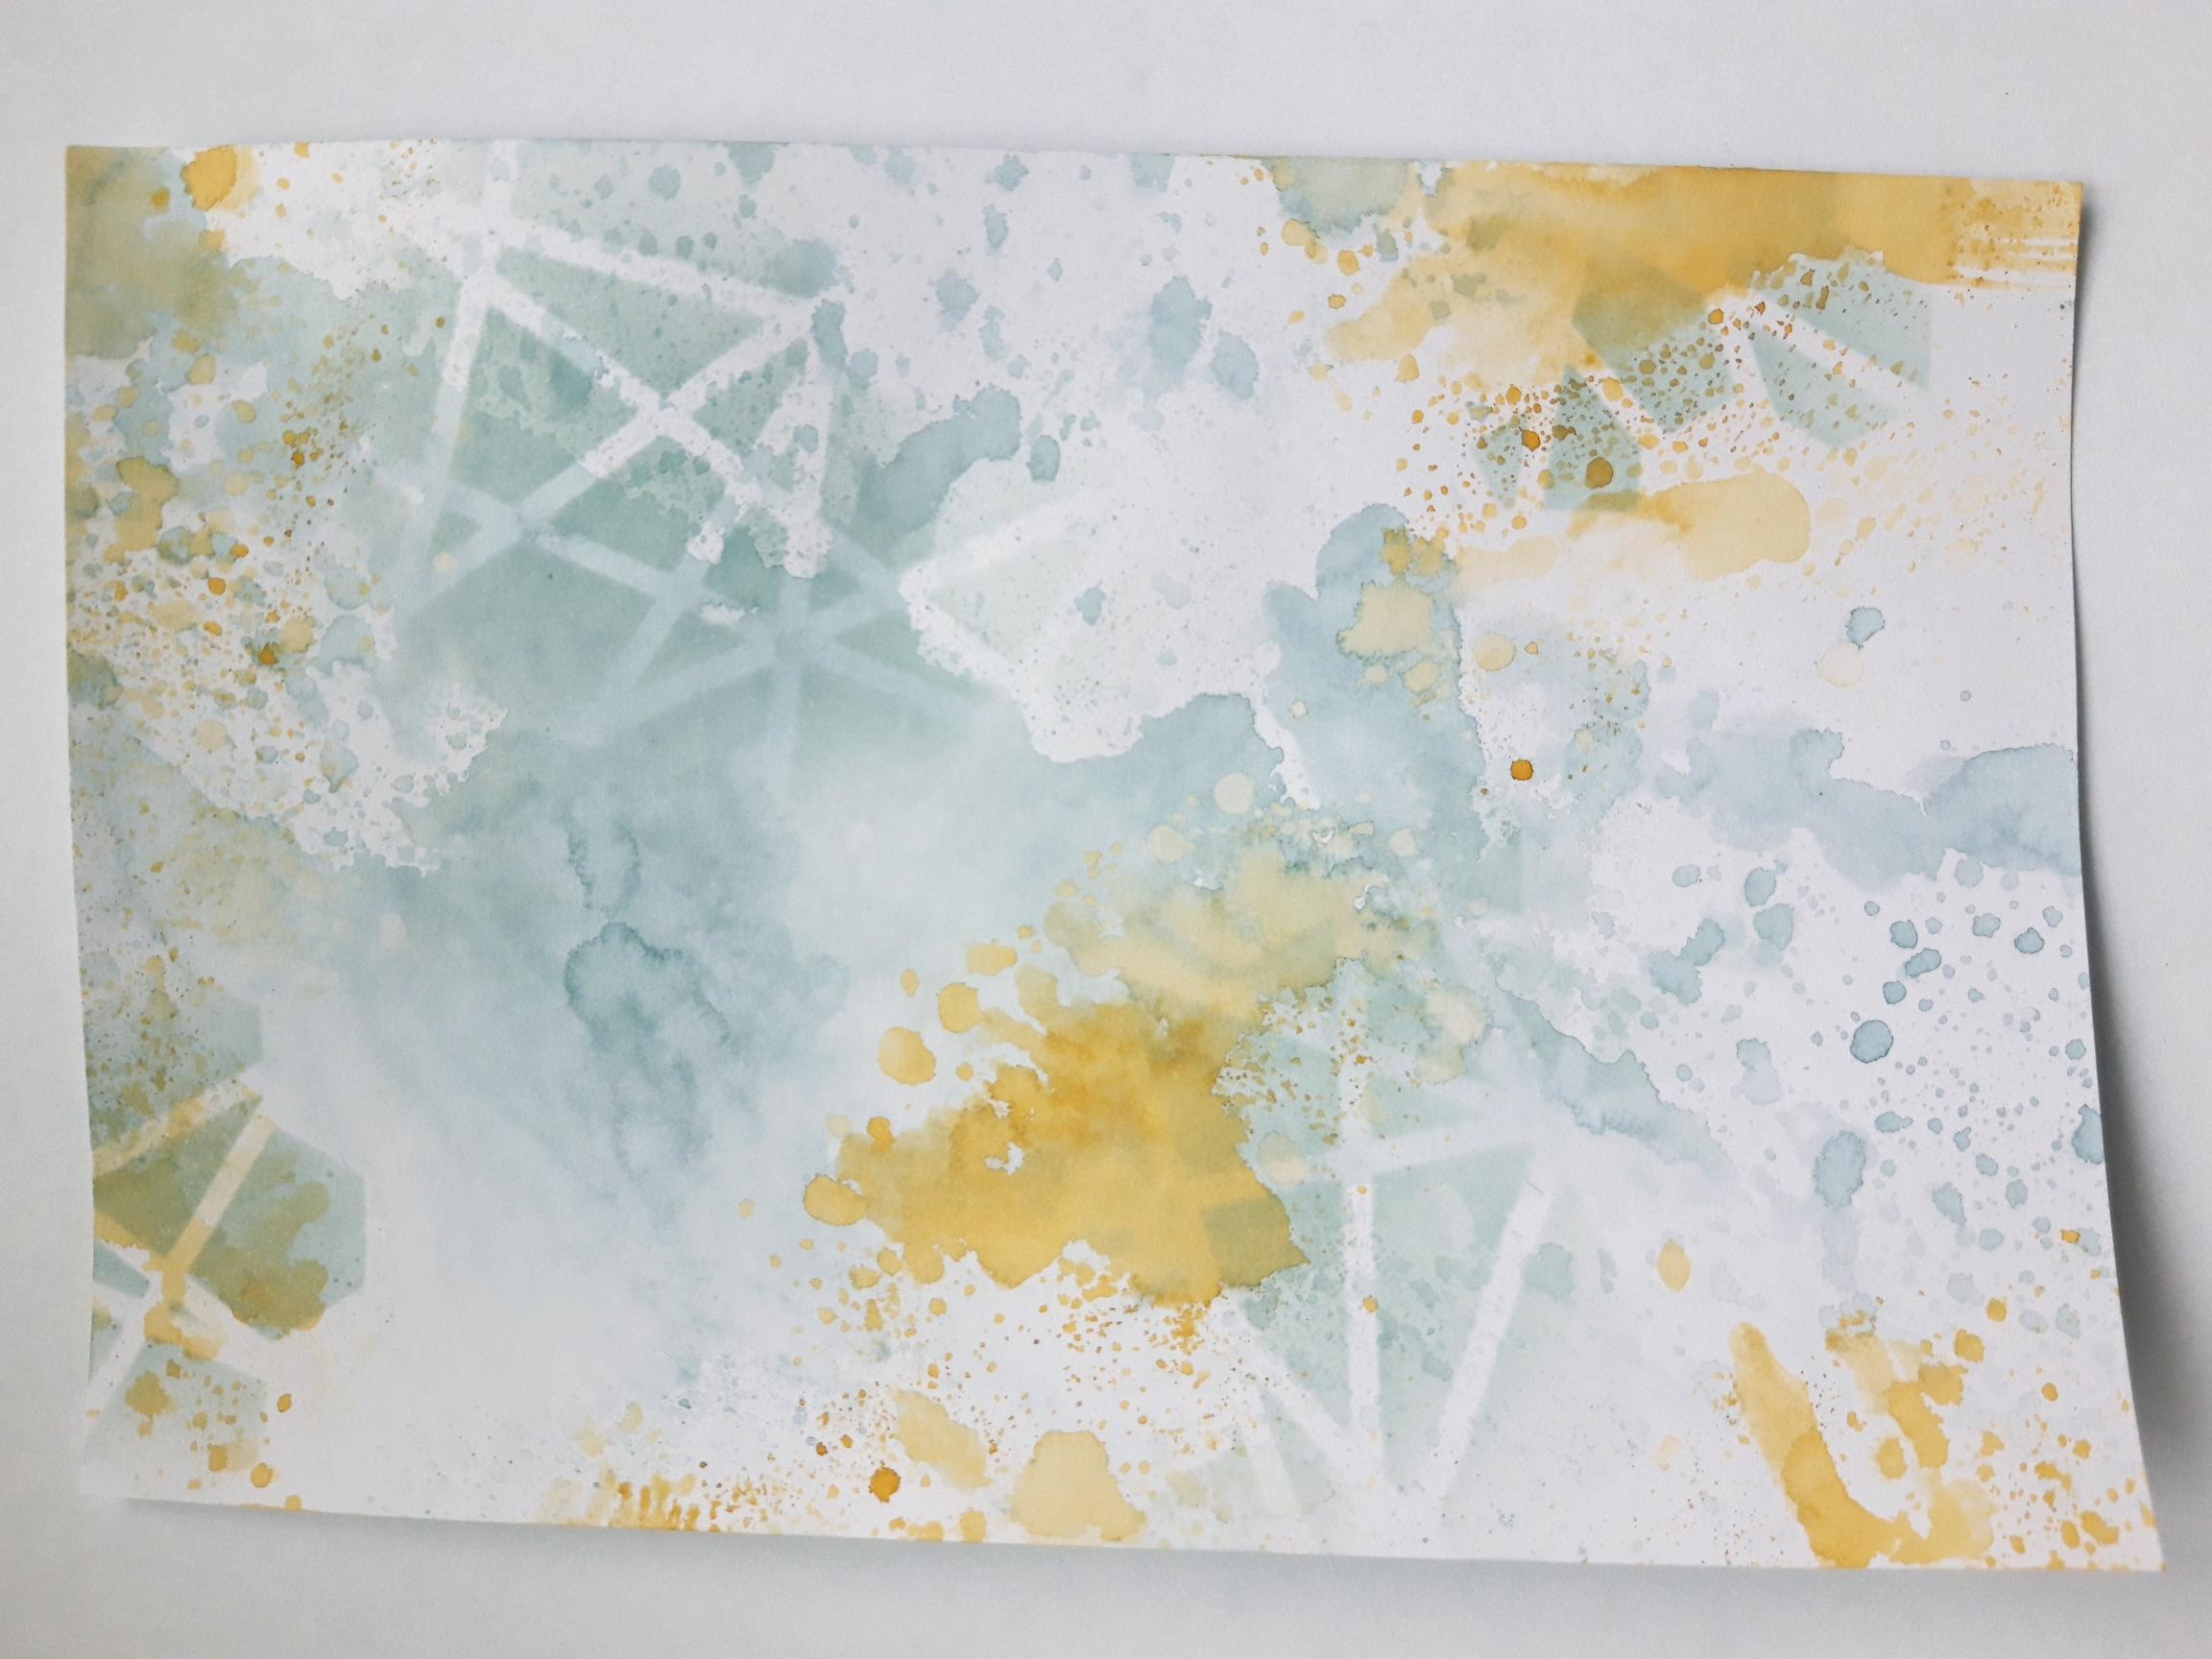
Blend the light blue Izink Pigment ink randomly, through your Honeycomb stencil. Dry off your background. |
|
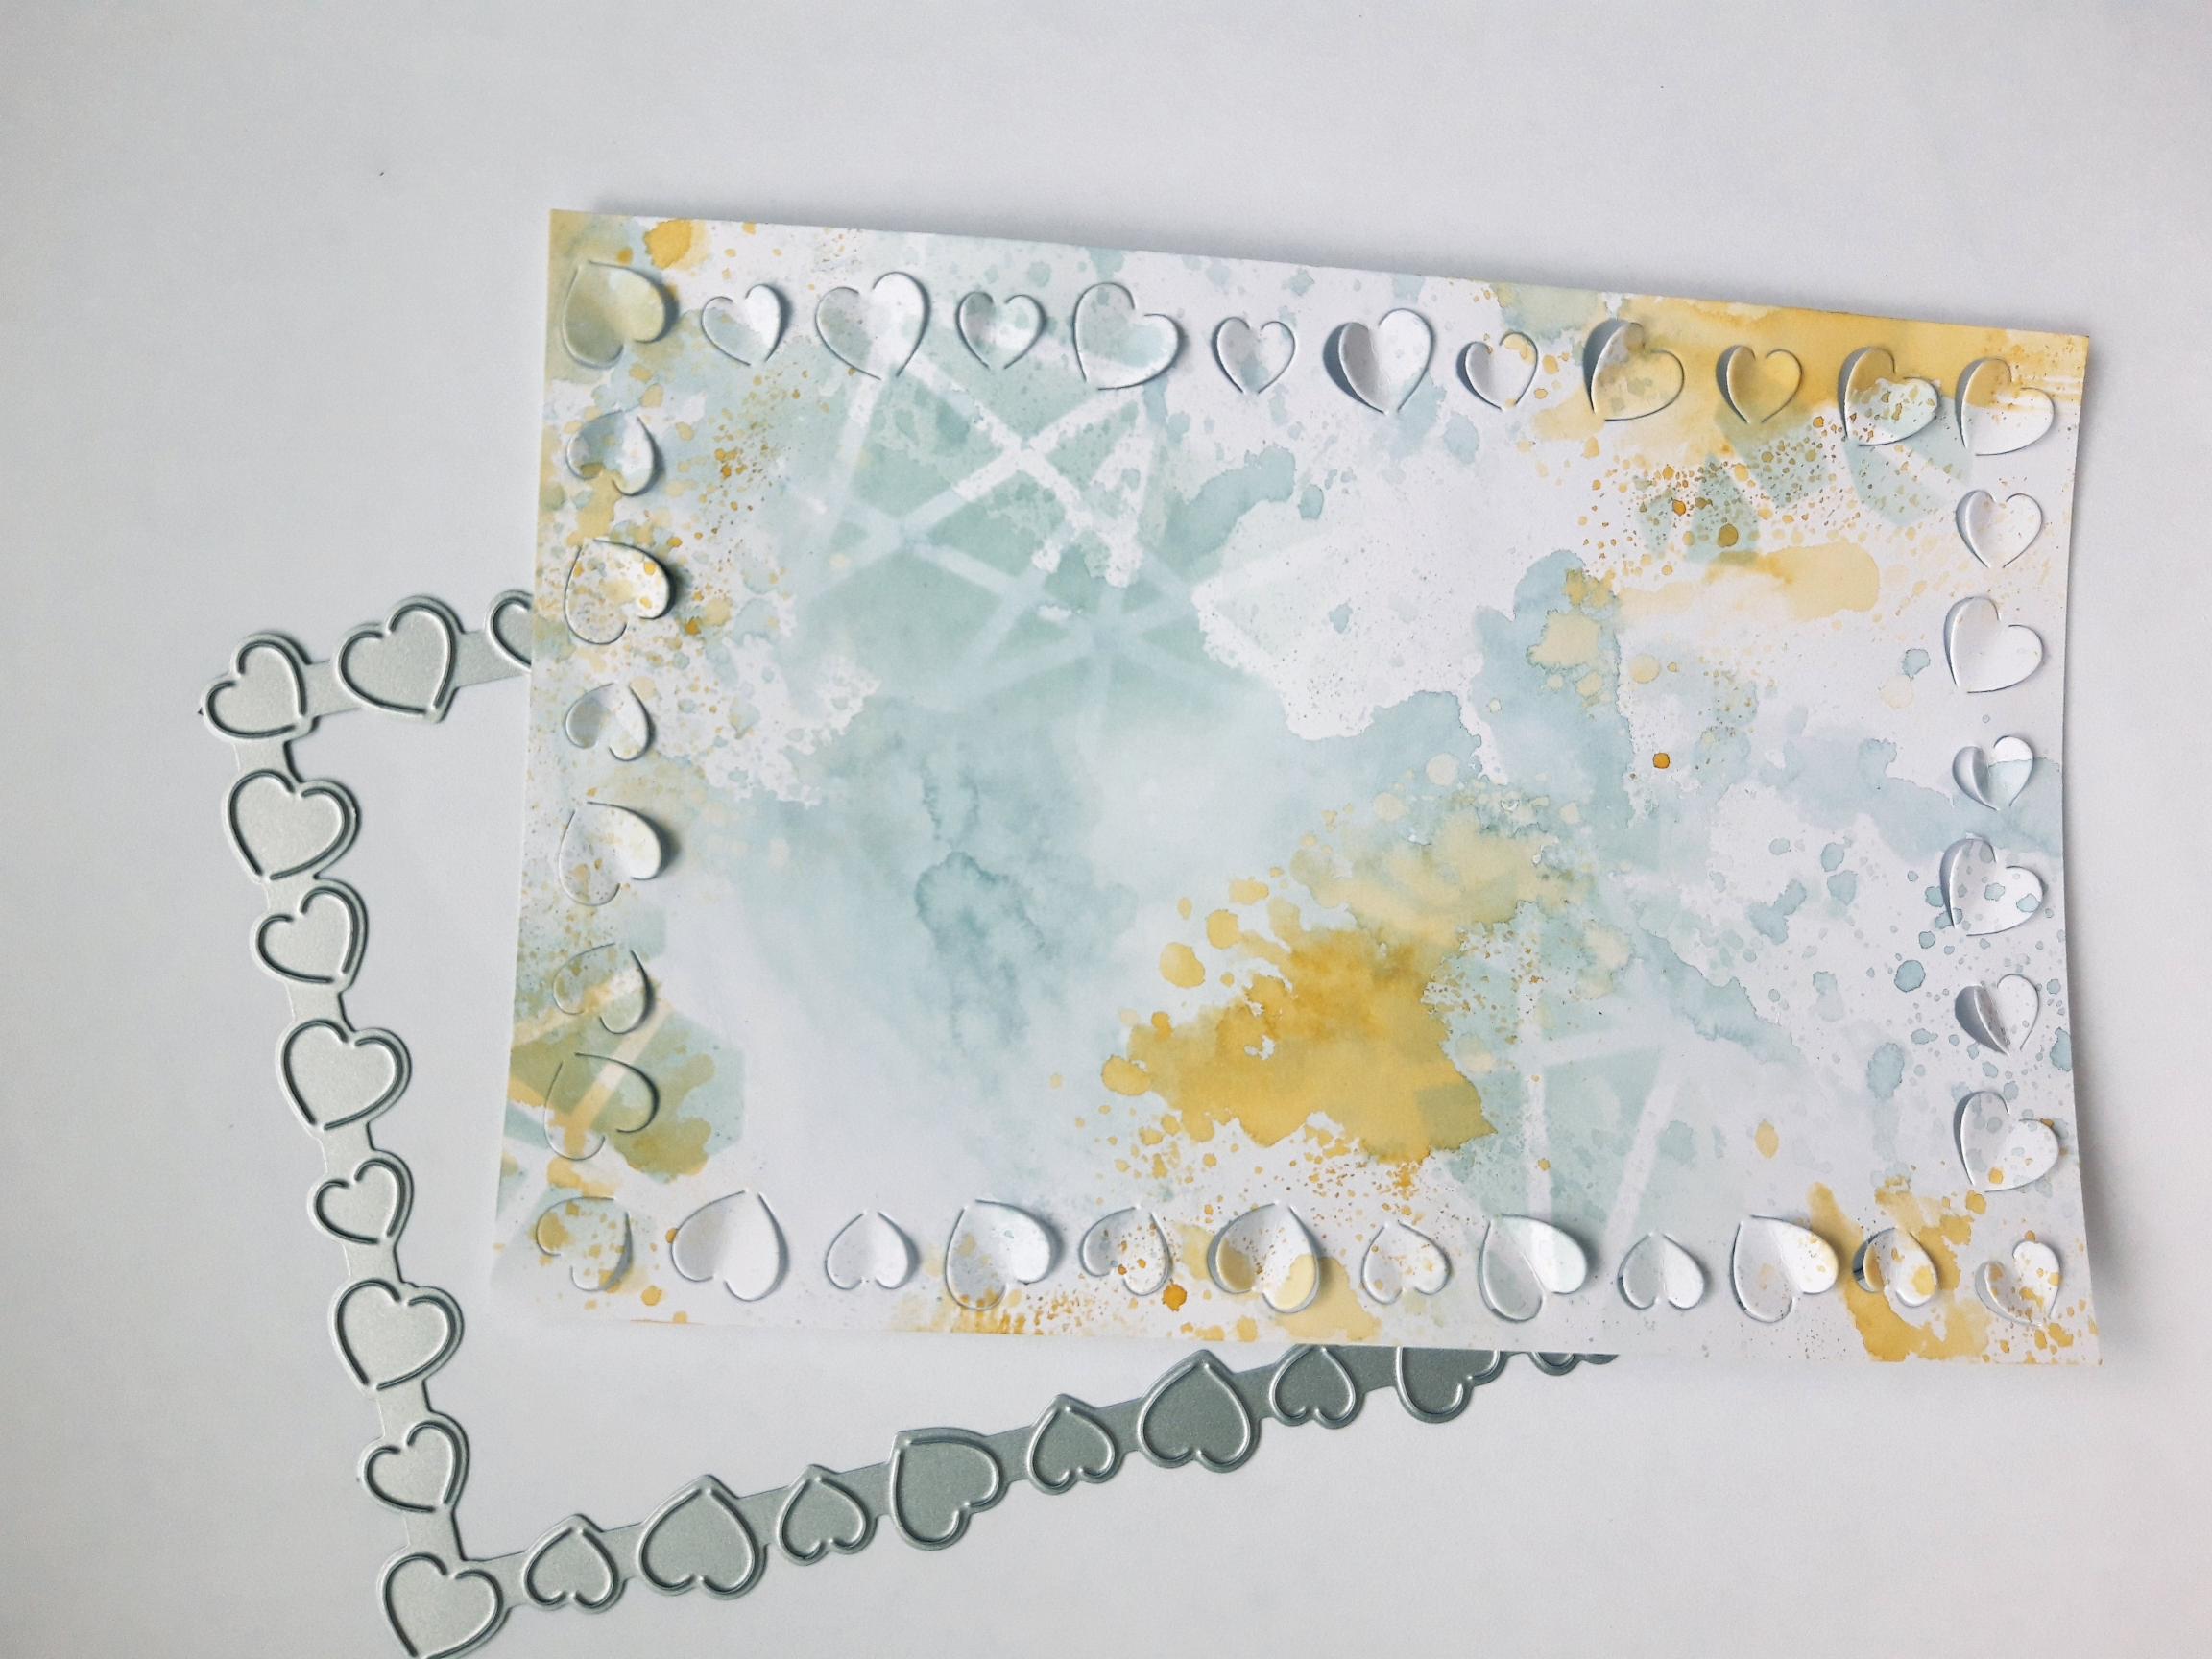
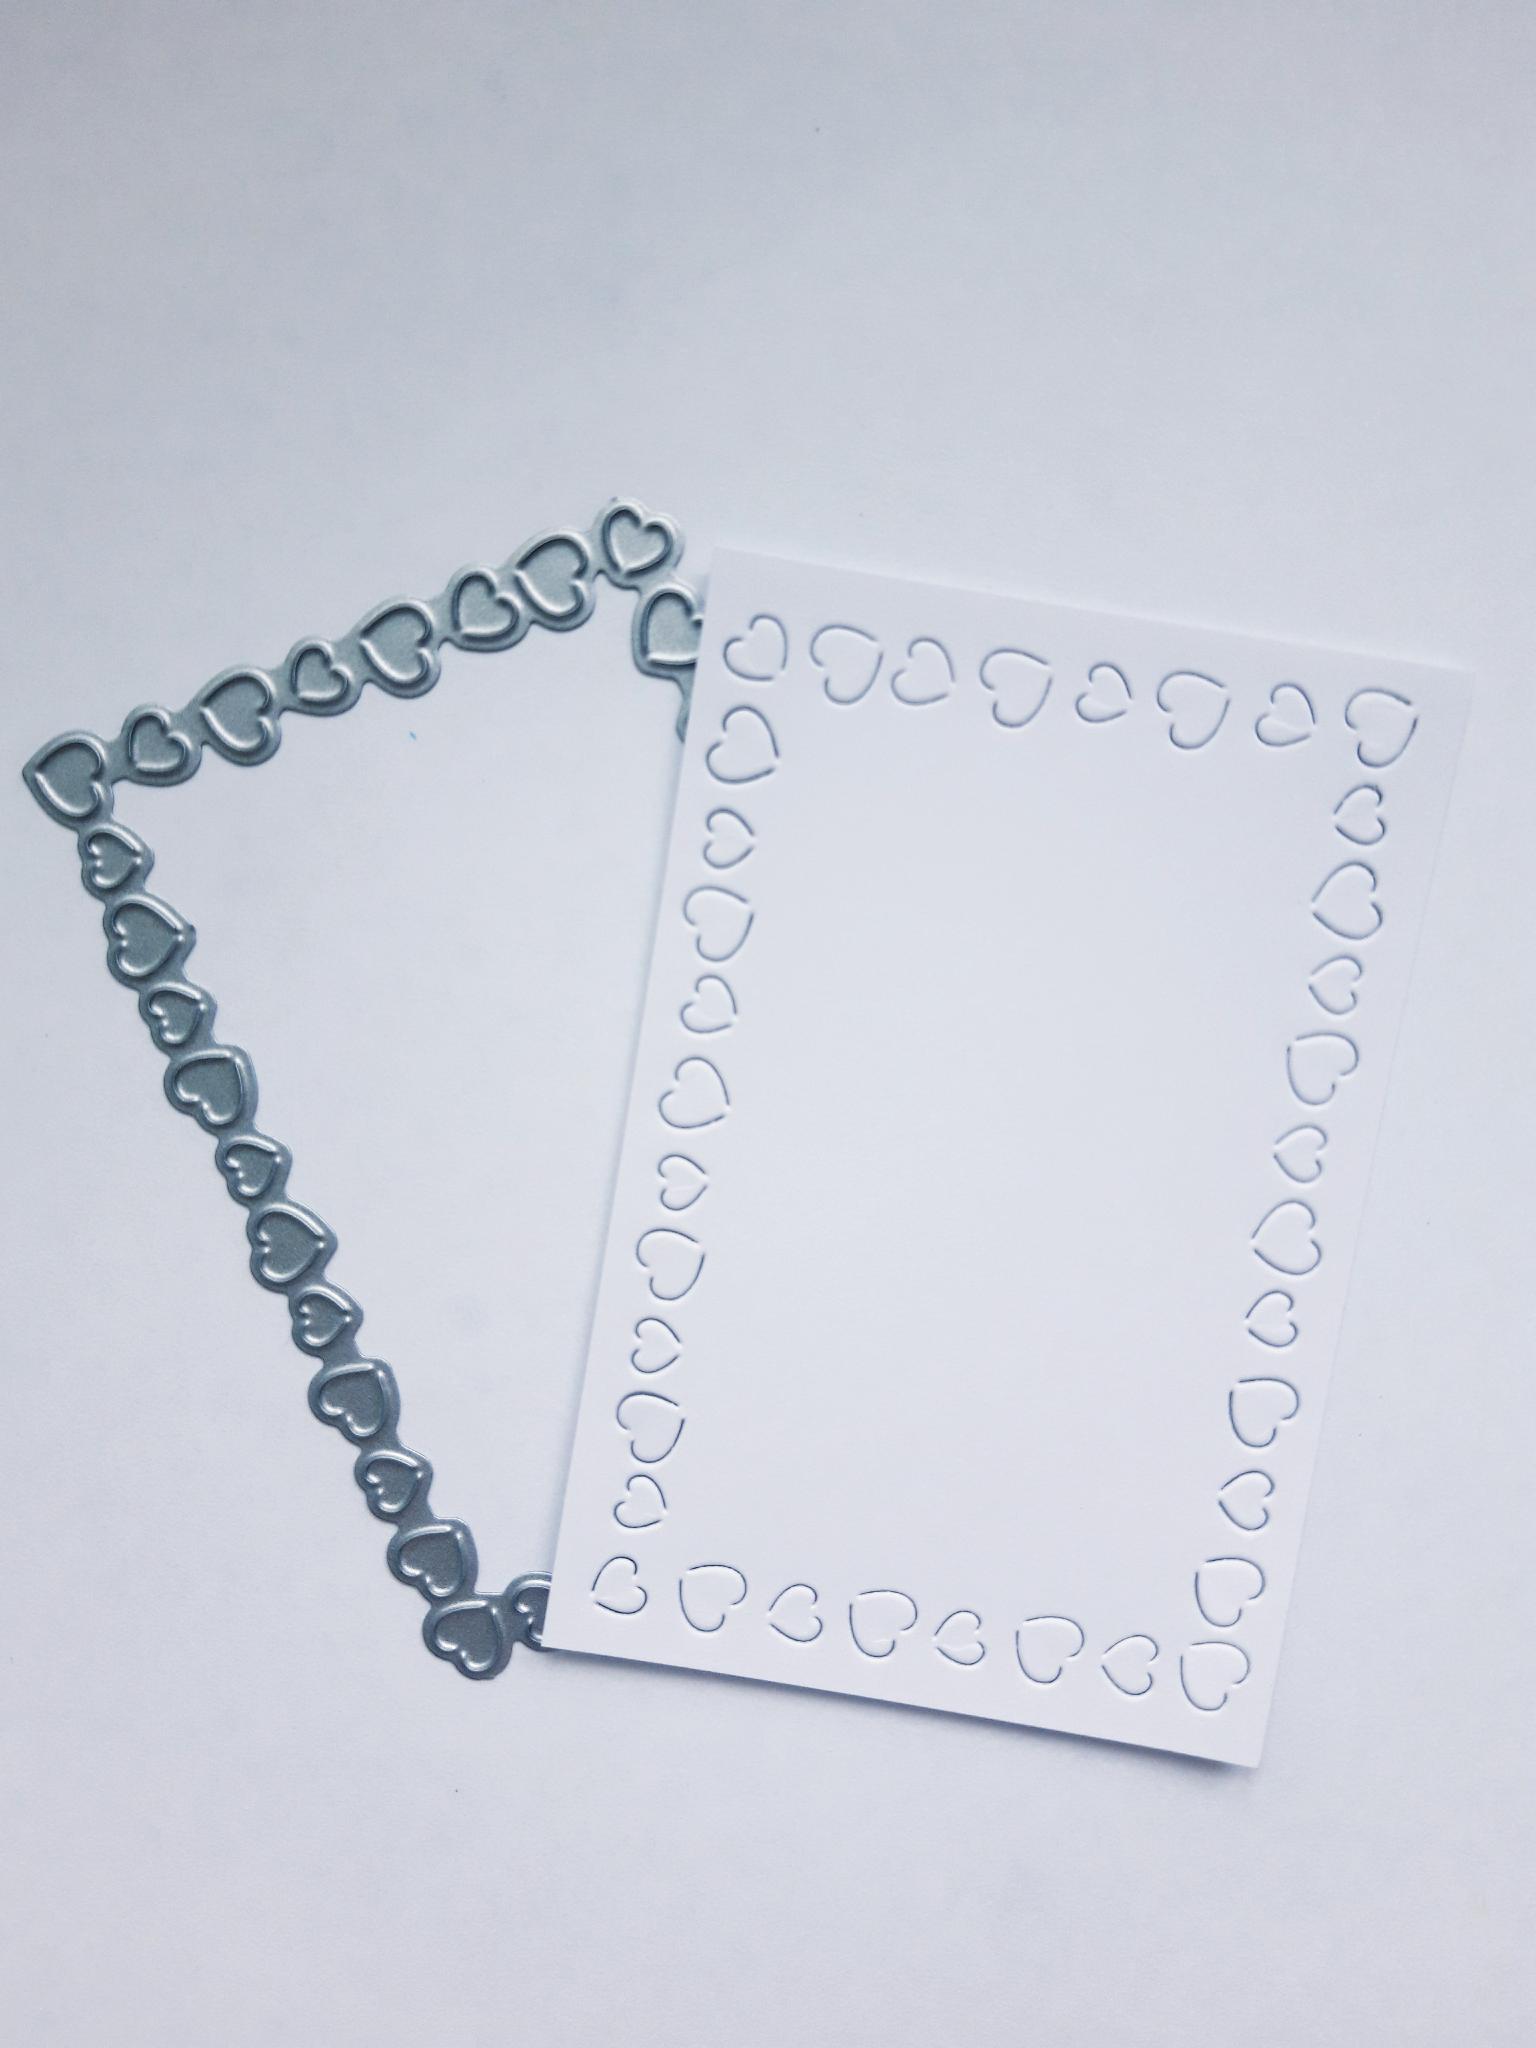
Place the largest frame die, from the Loveables Rectangle Die Collection, on to your inked background, and run it through your die cutting machine. Lift up the partially die cut hearts, as seen here.
|
|
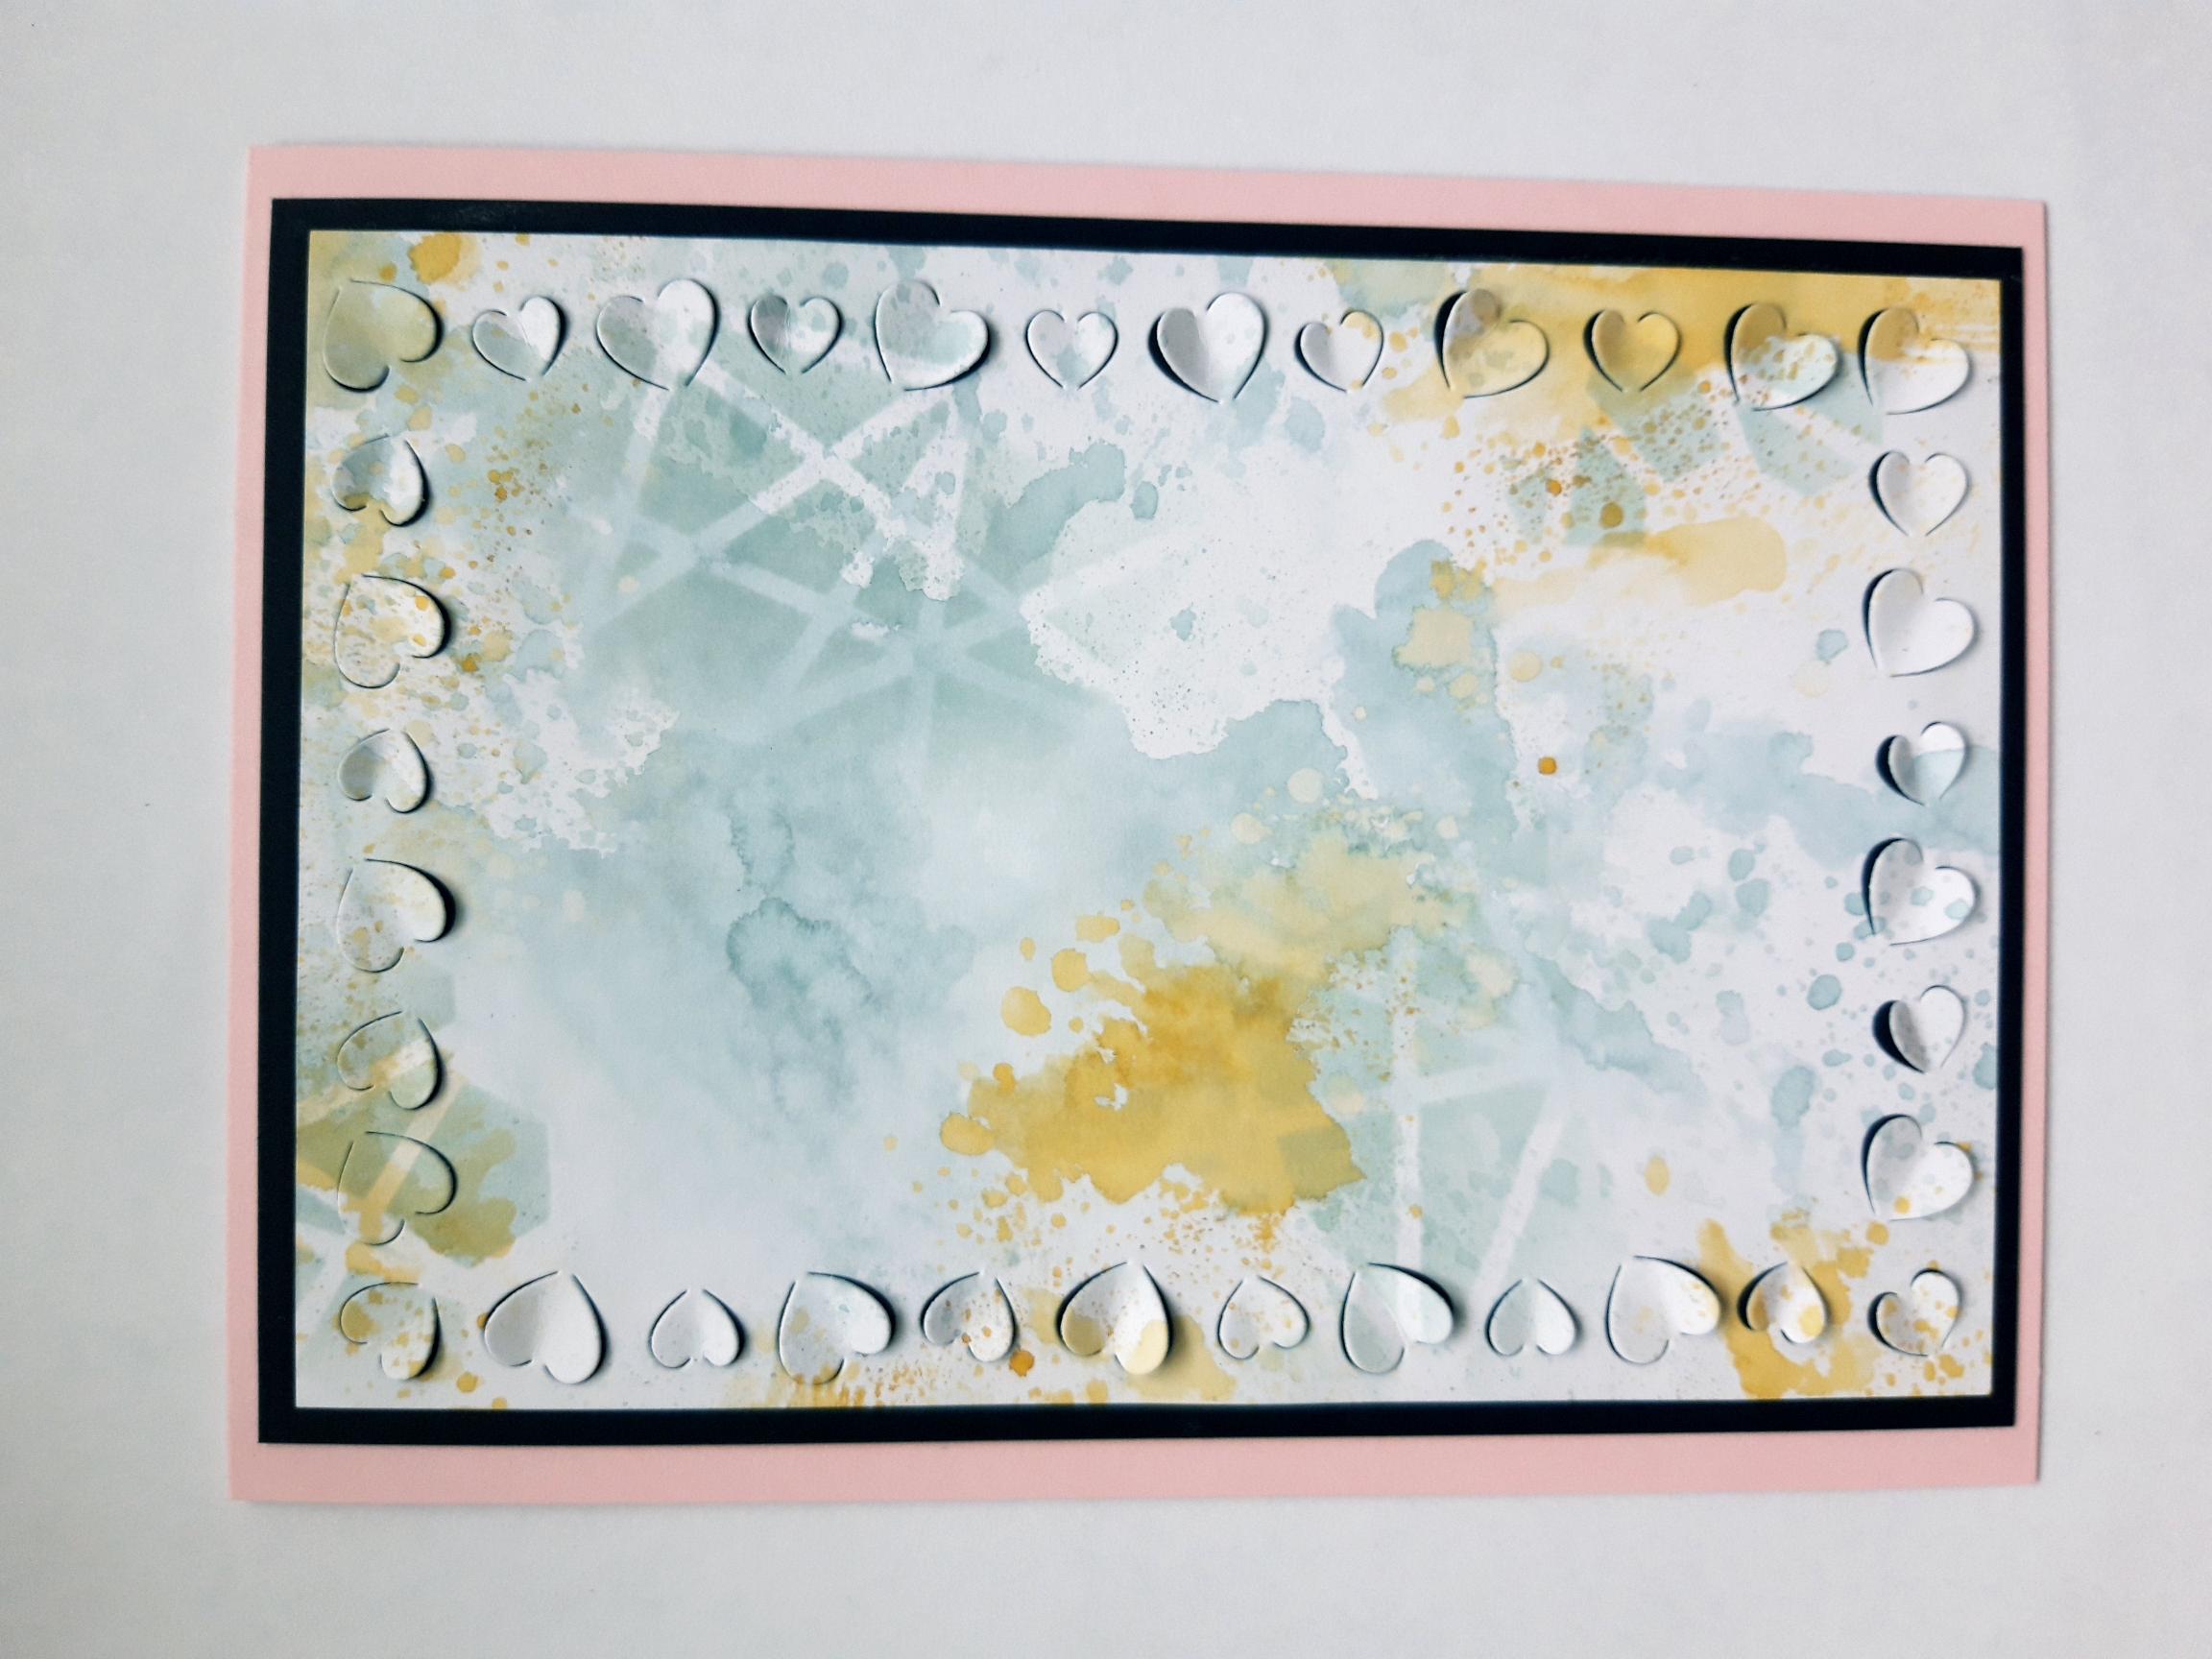
Adhere on to the black card (7 1/4 x 5"). |
|
Adhere on to the front of your pink, top folding card blank and set to one side. |
|
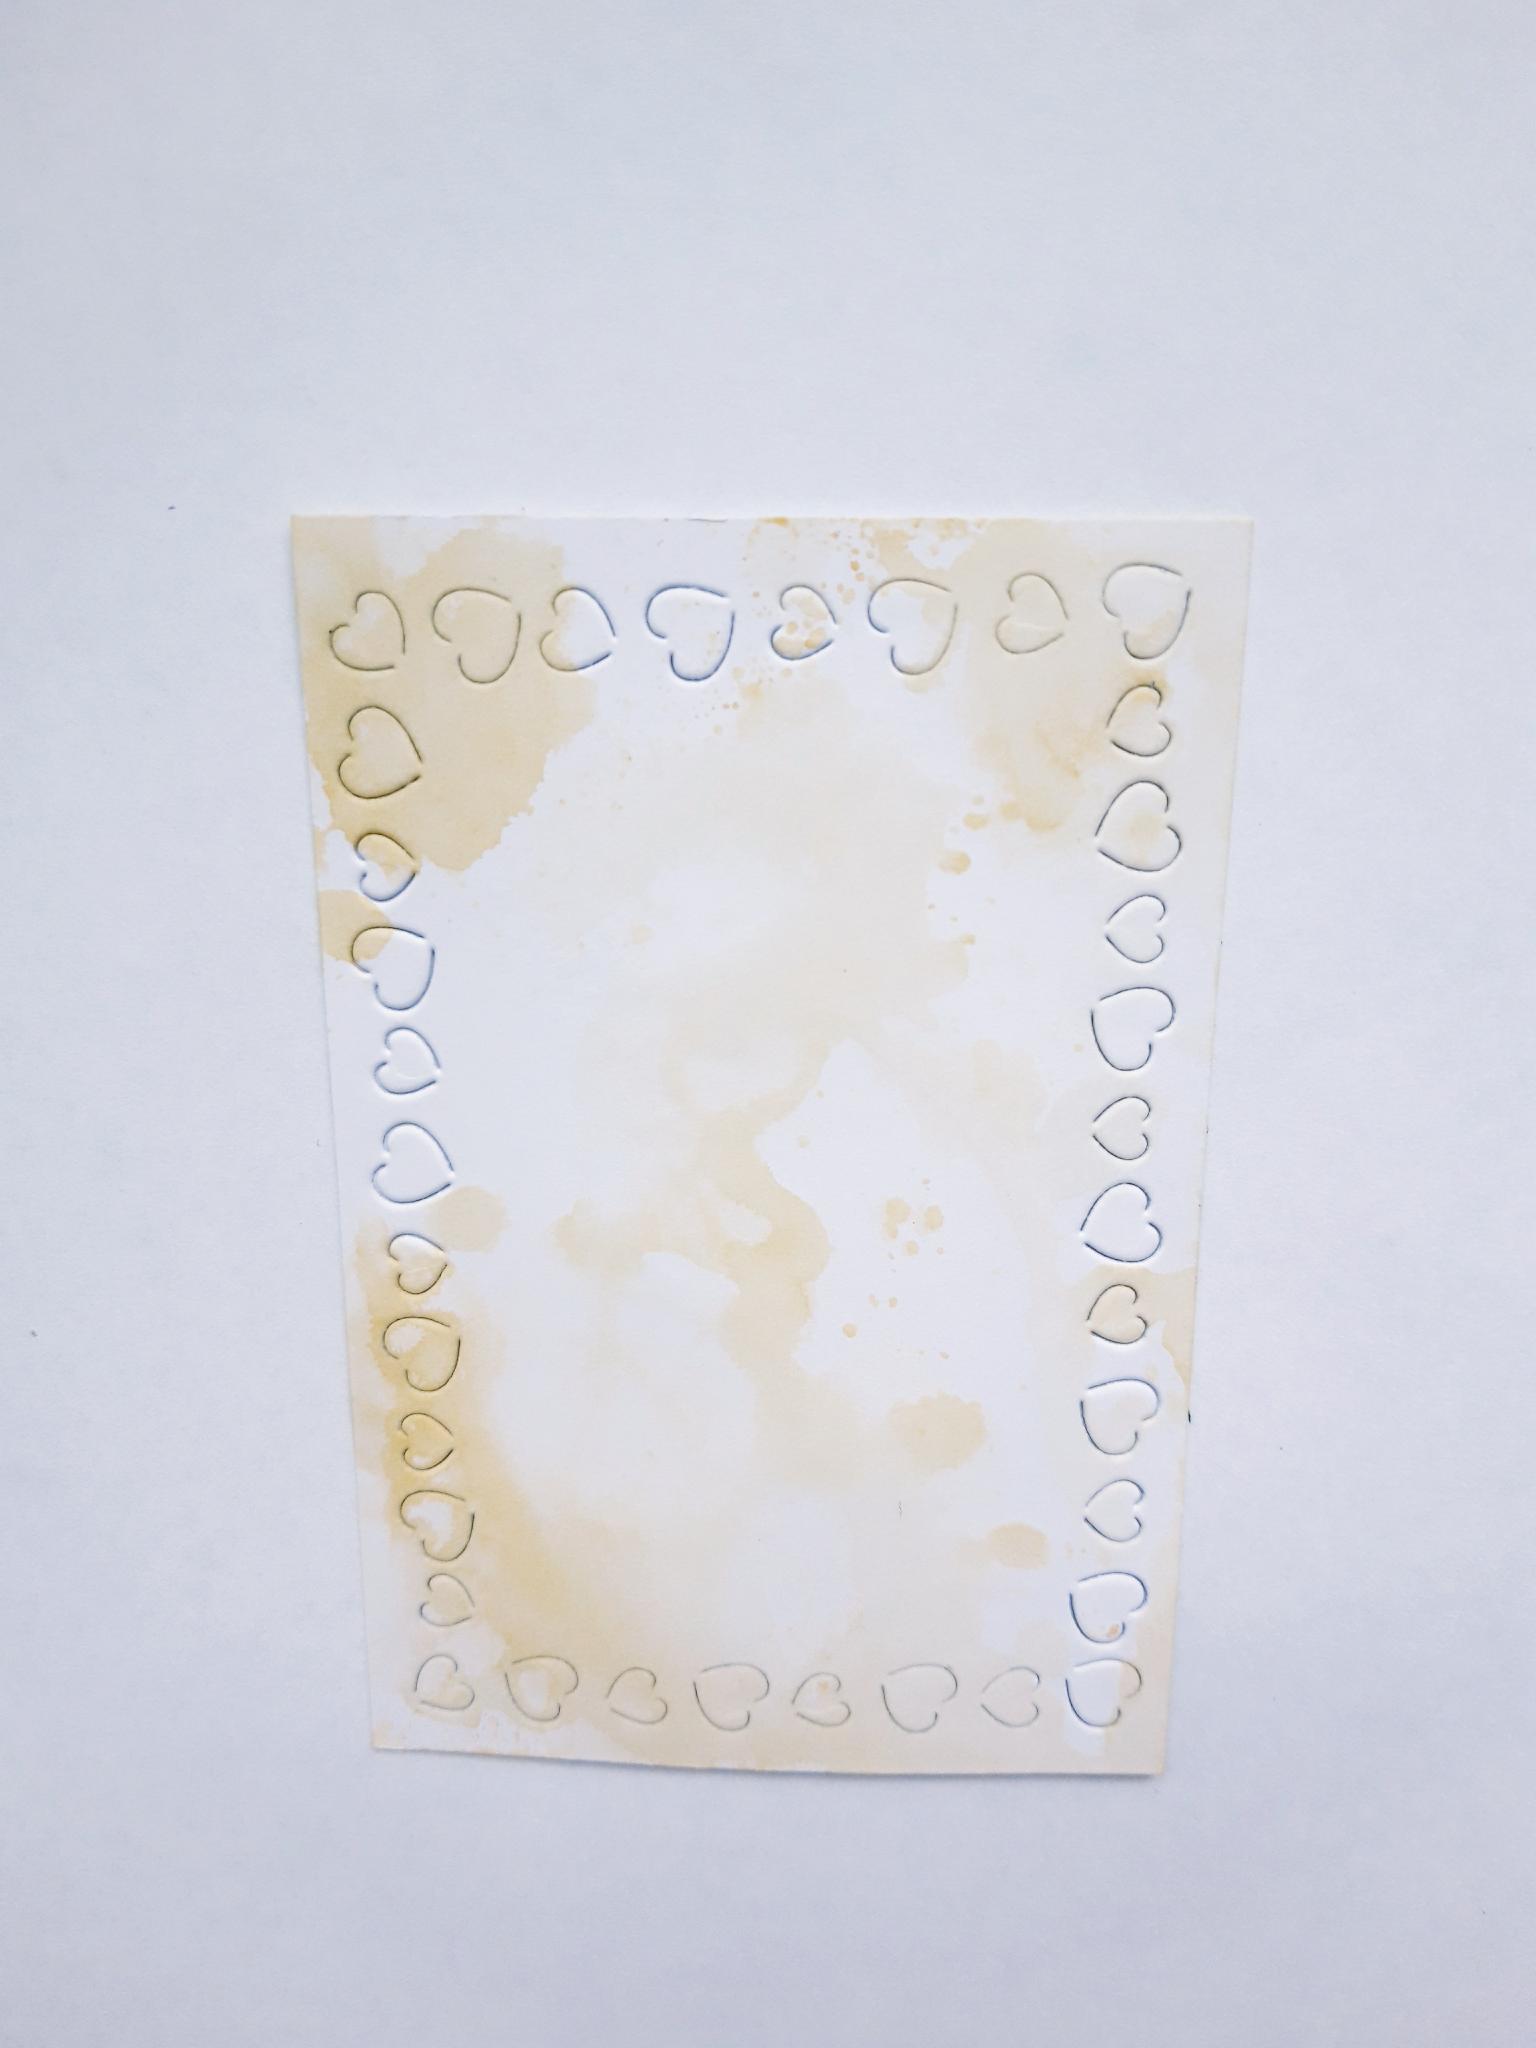
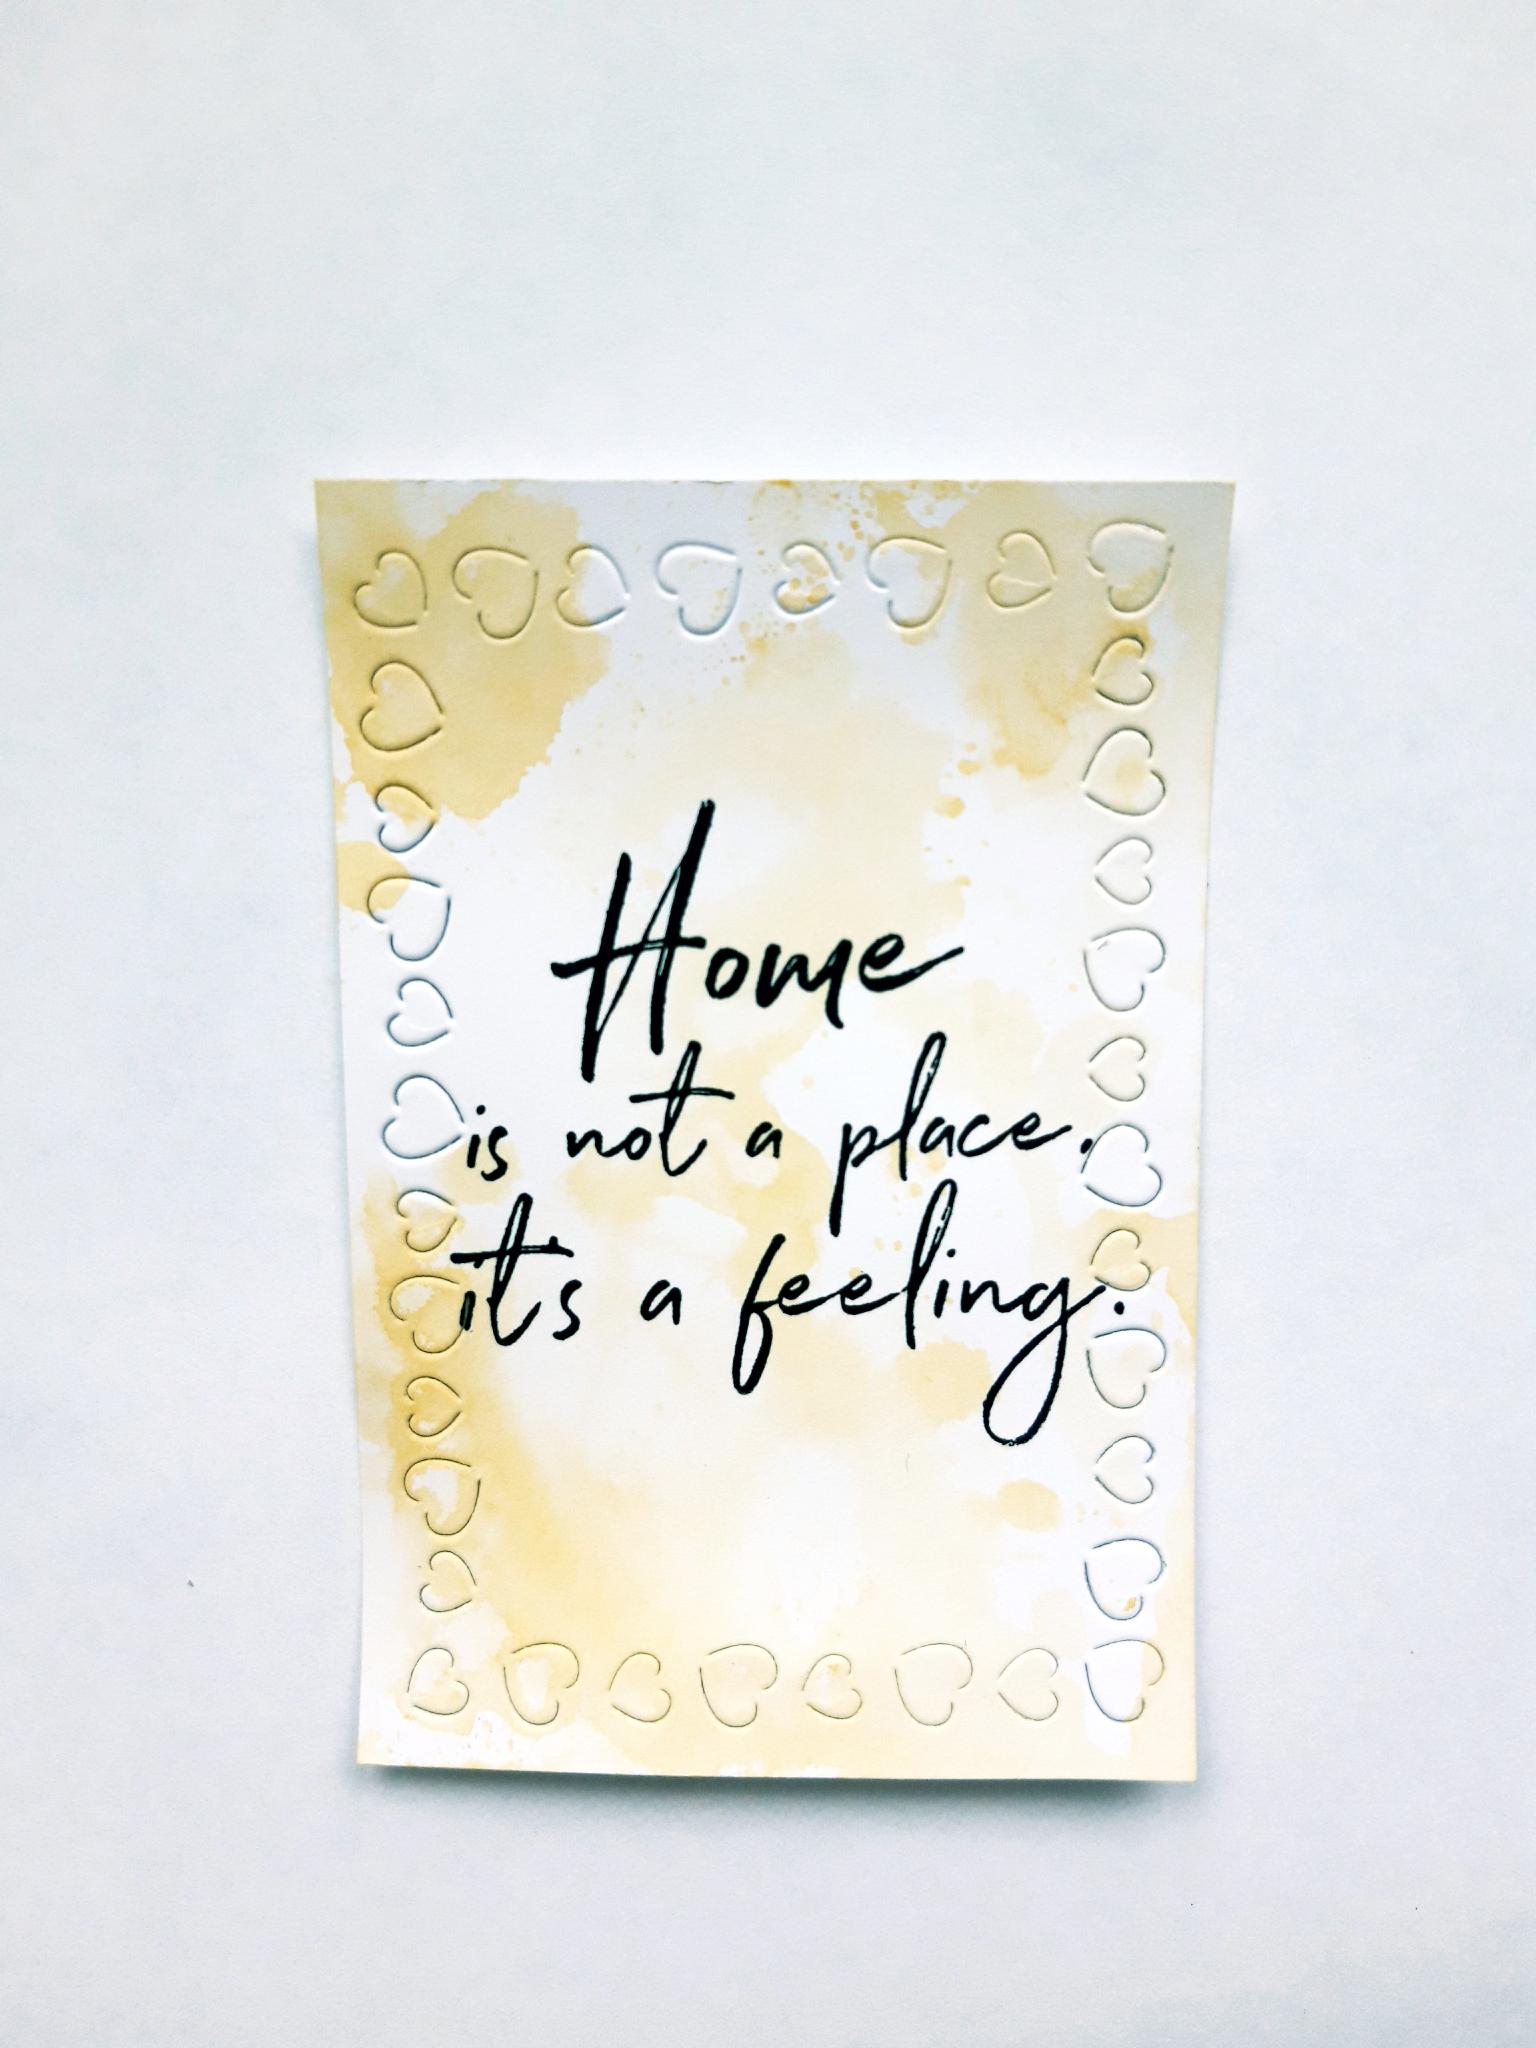
Place the smallest frame die on to the white card (3 3/4 x 2 1/2"), and run it through your die cutting machine. Keep the partially die cut hearts flat, on this element. |
|
Spray the Izink Butterscotch on to your craft mat, spritz with a little water and mop up the ink with your embossed card. Dry off the spray. |
|
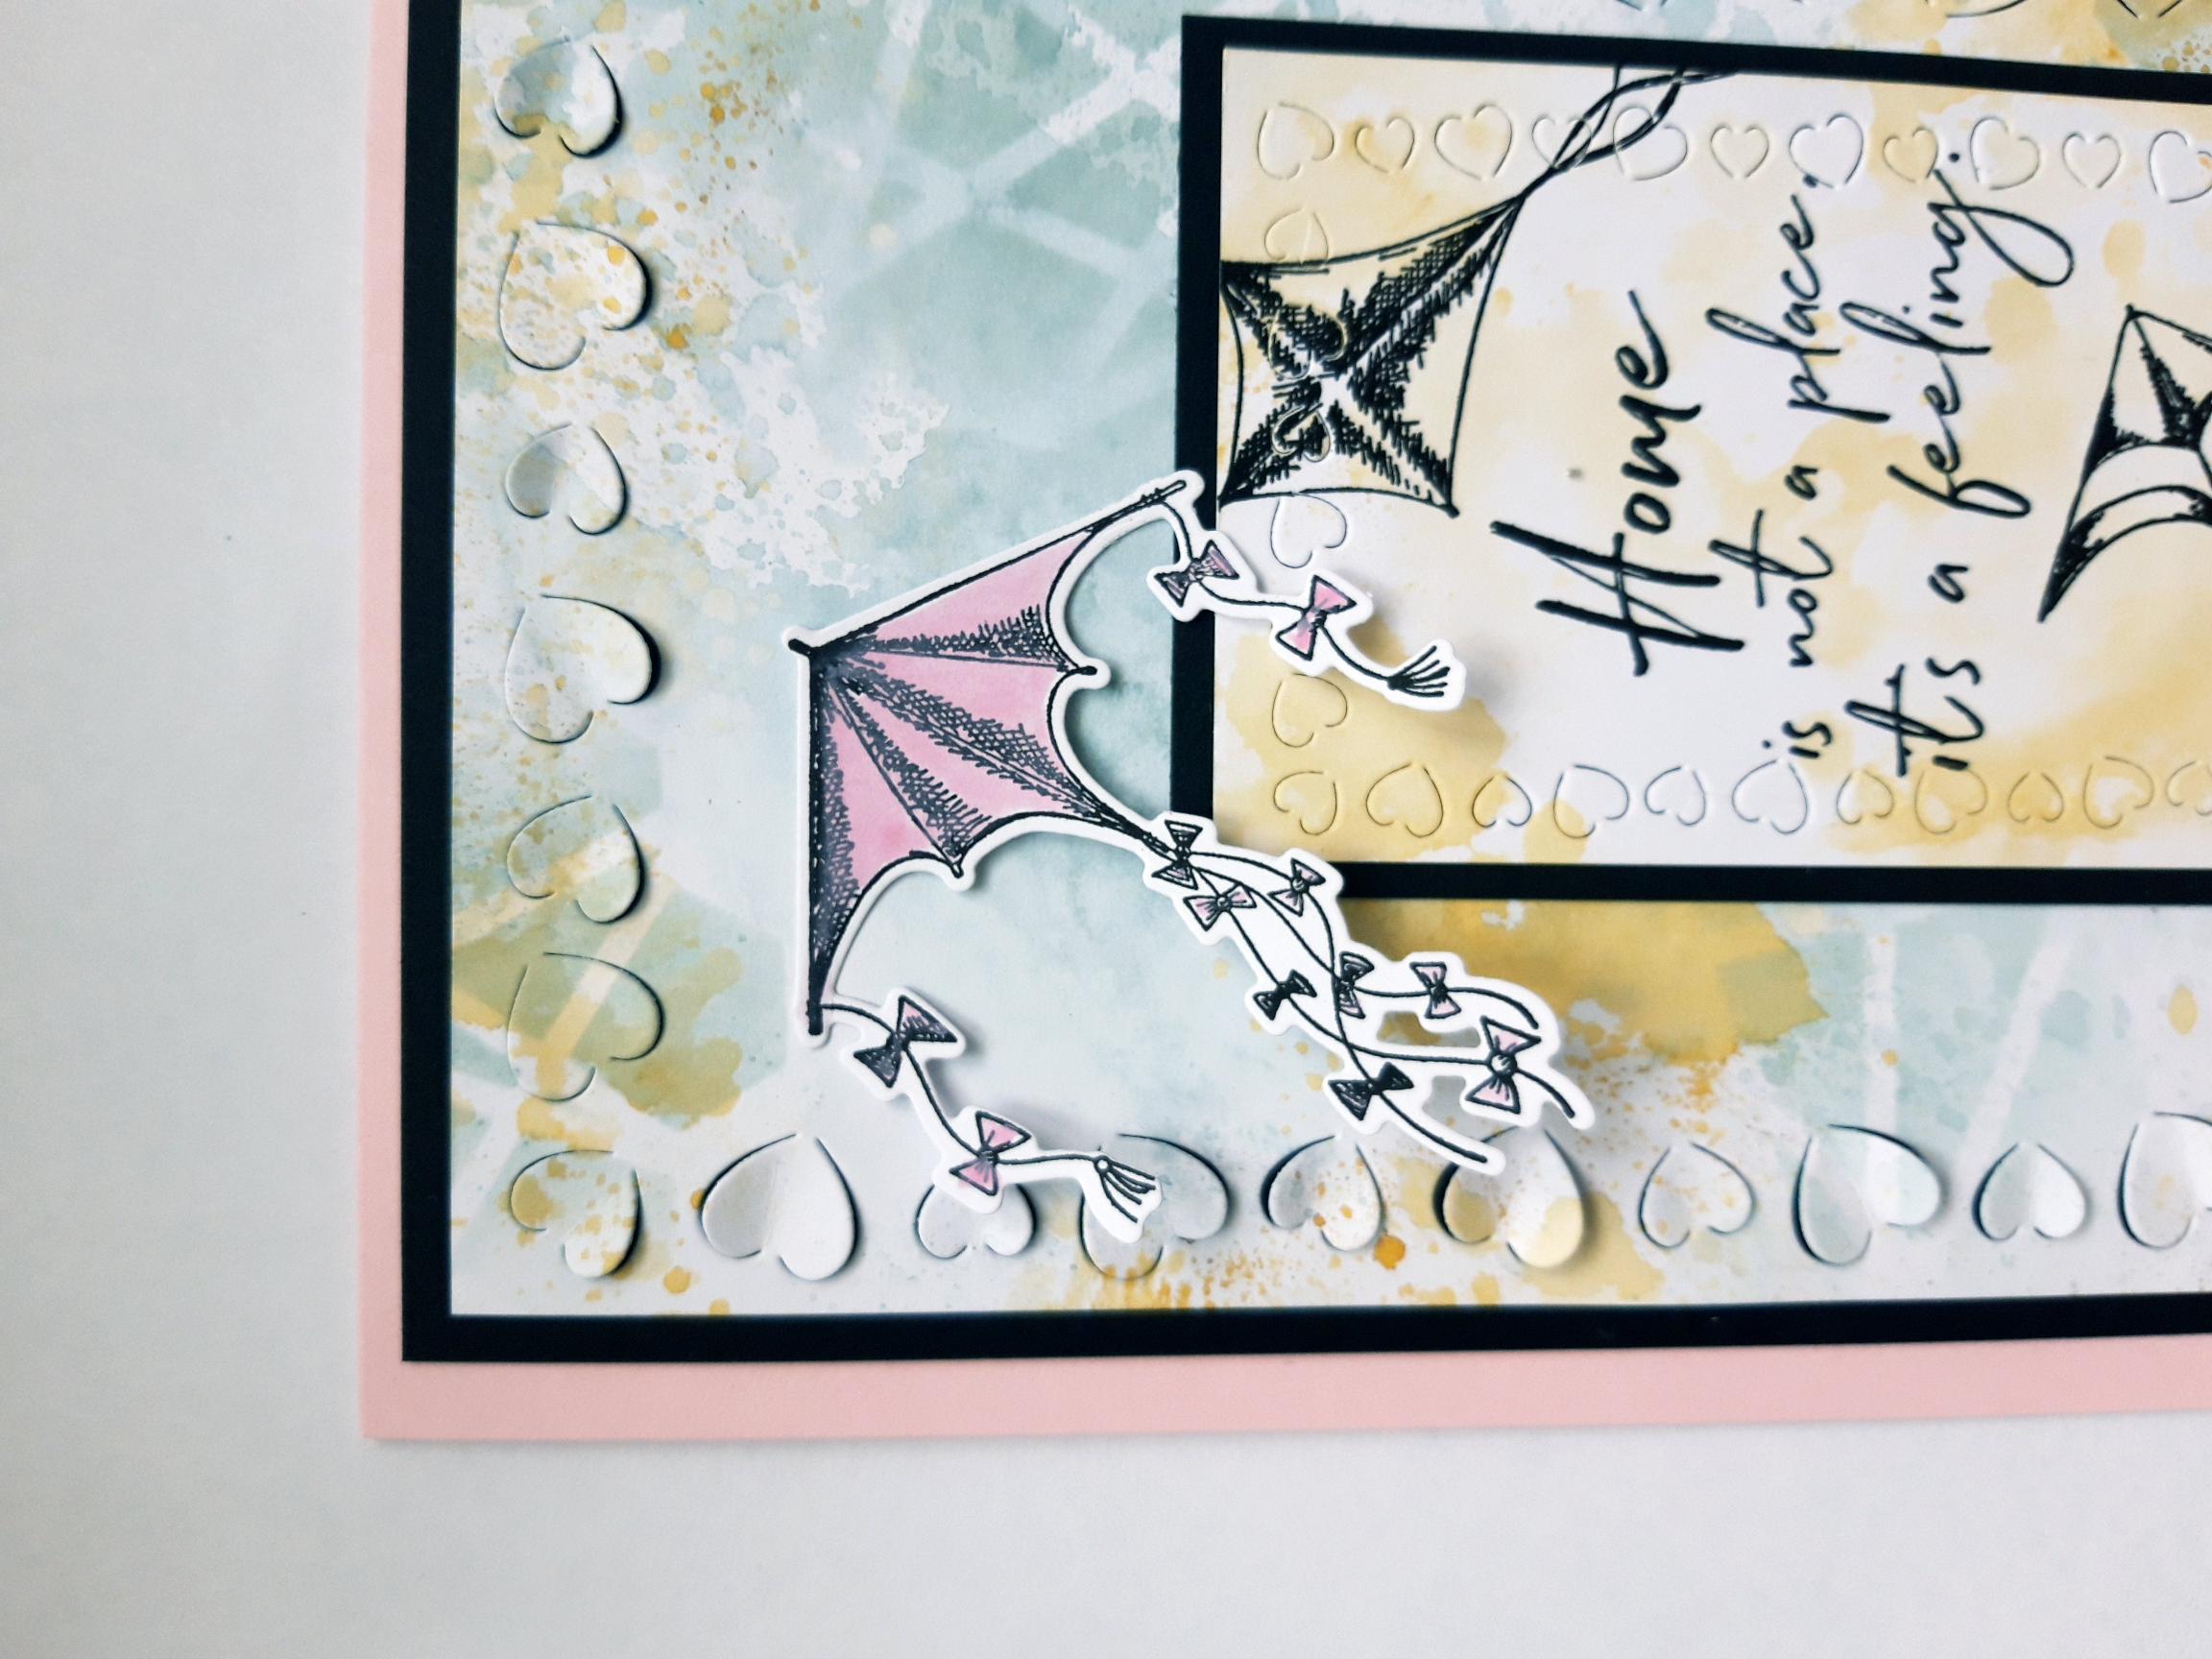
Ink up the sentiment stamp, from the Trust Your Journey Stamp And Die Collection, with the Onyx Black Versafine. Stamp centrally, on to your inked, embossed card. |
|
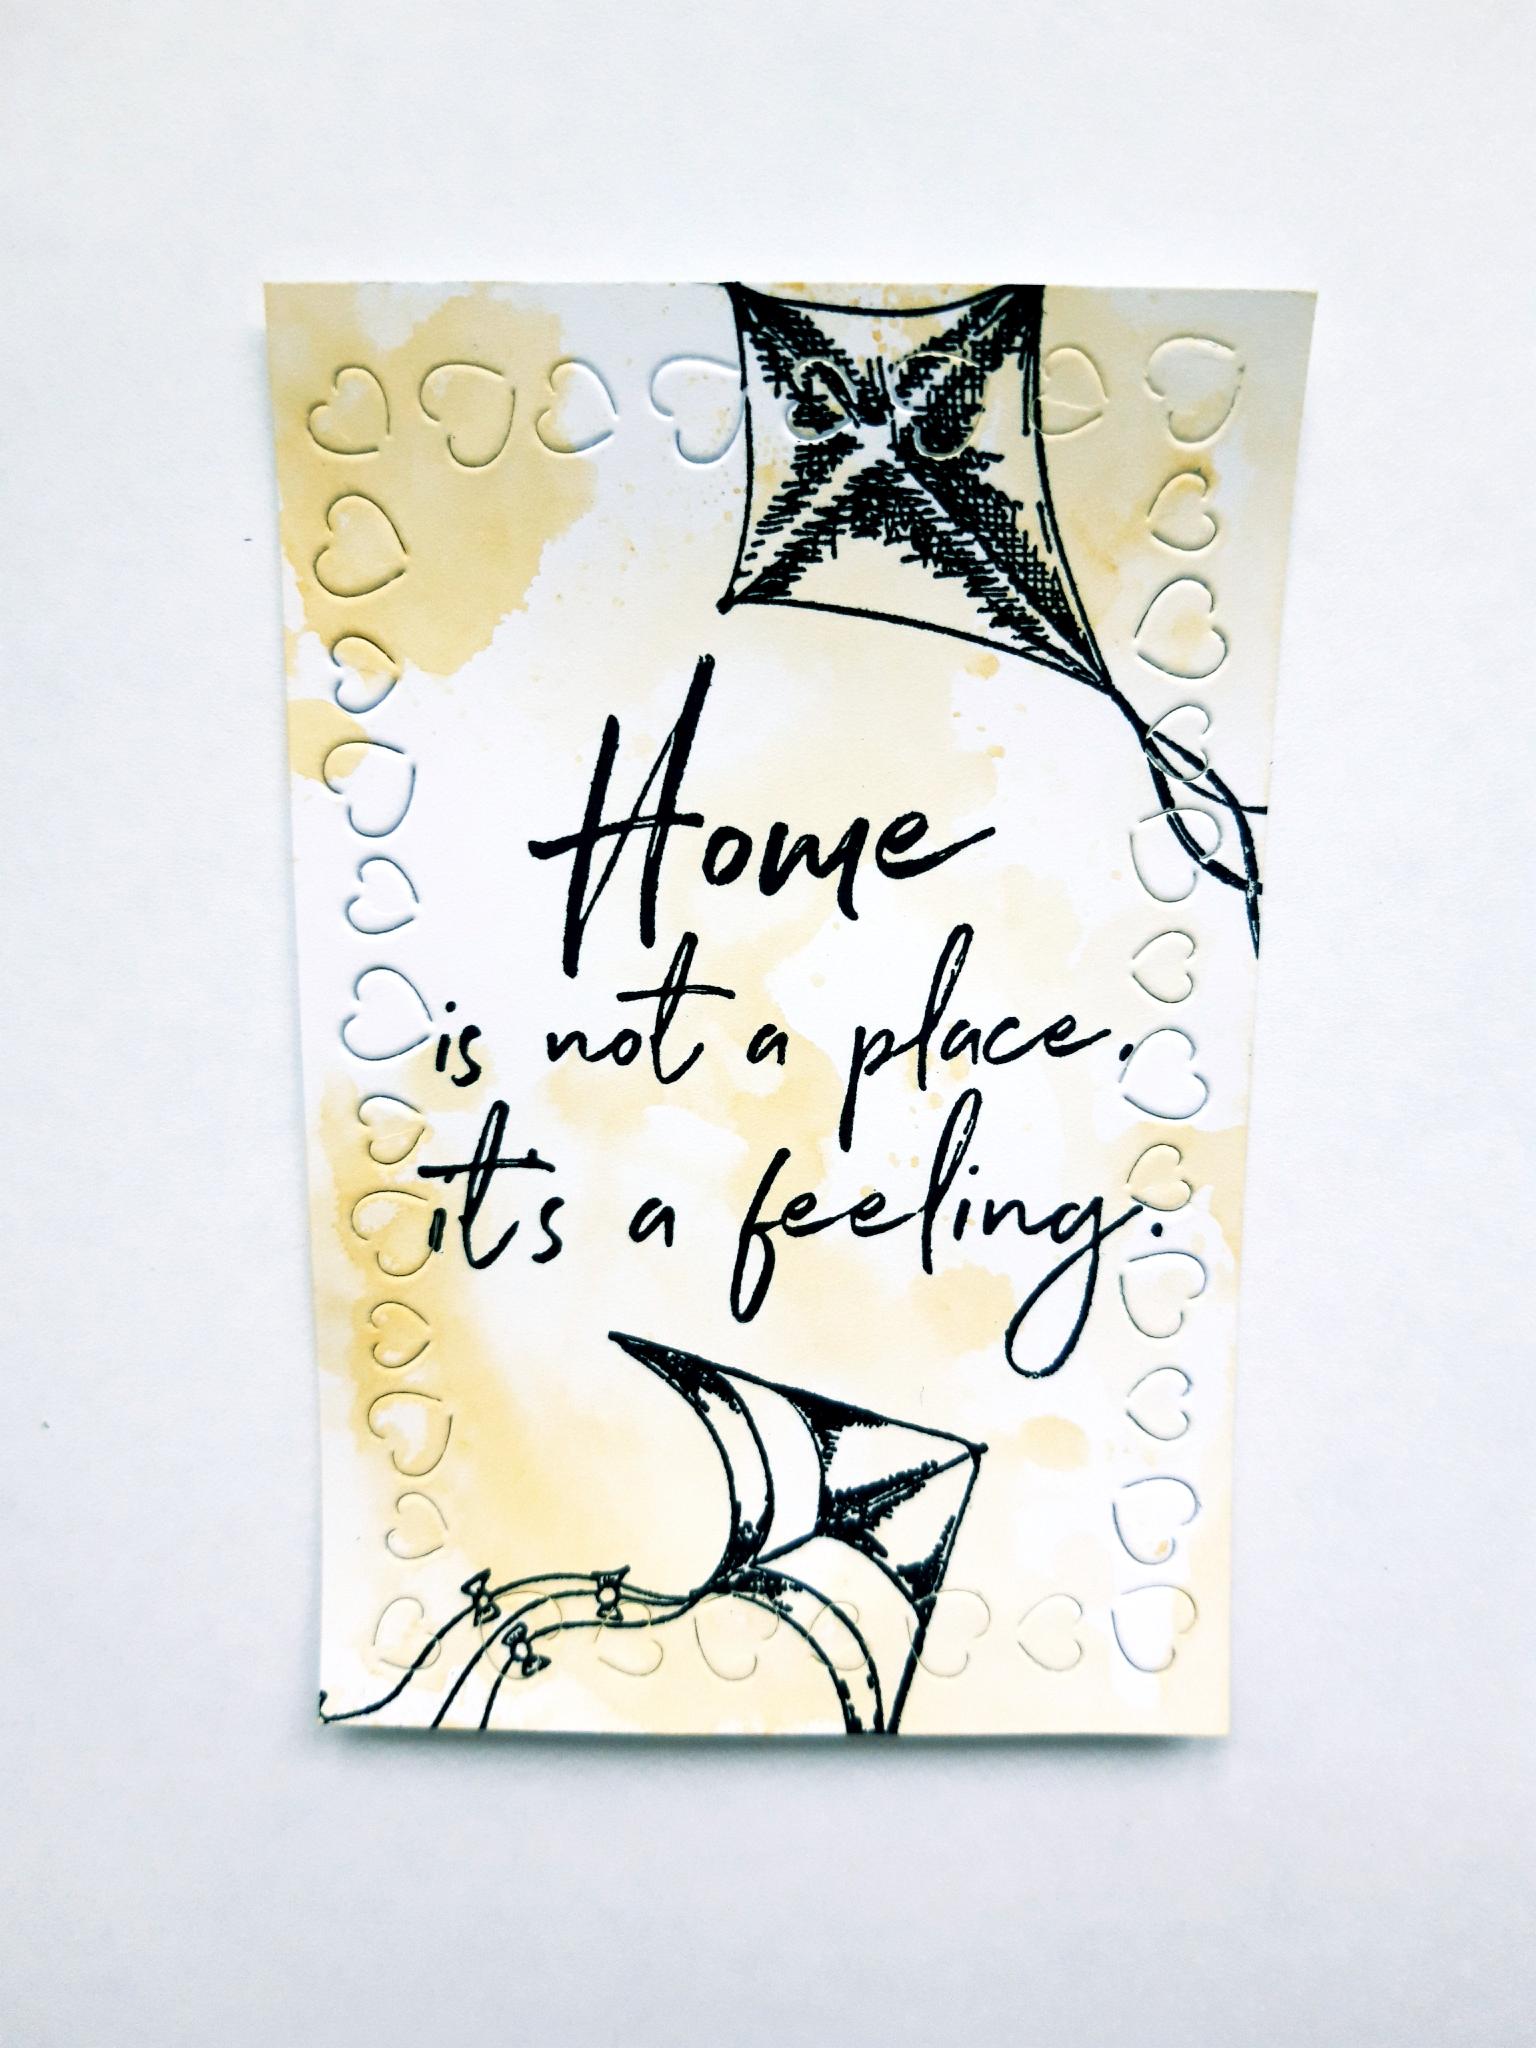
Ink up a couple of the kite stamps, from the same collection and stamp on to the inked, embossed card. |
|
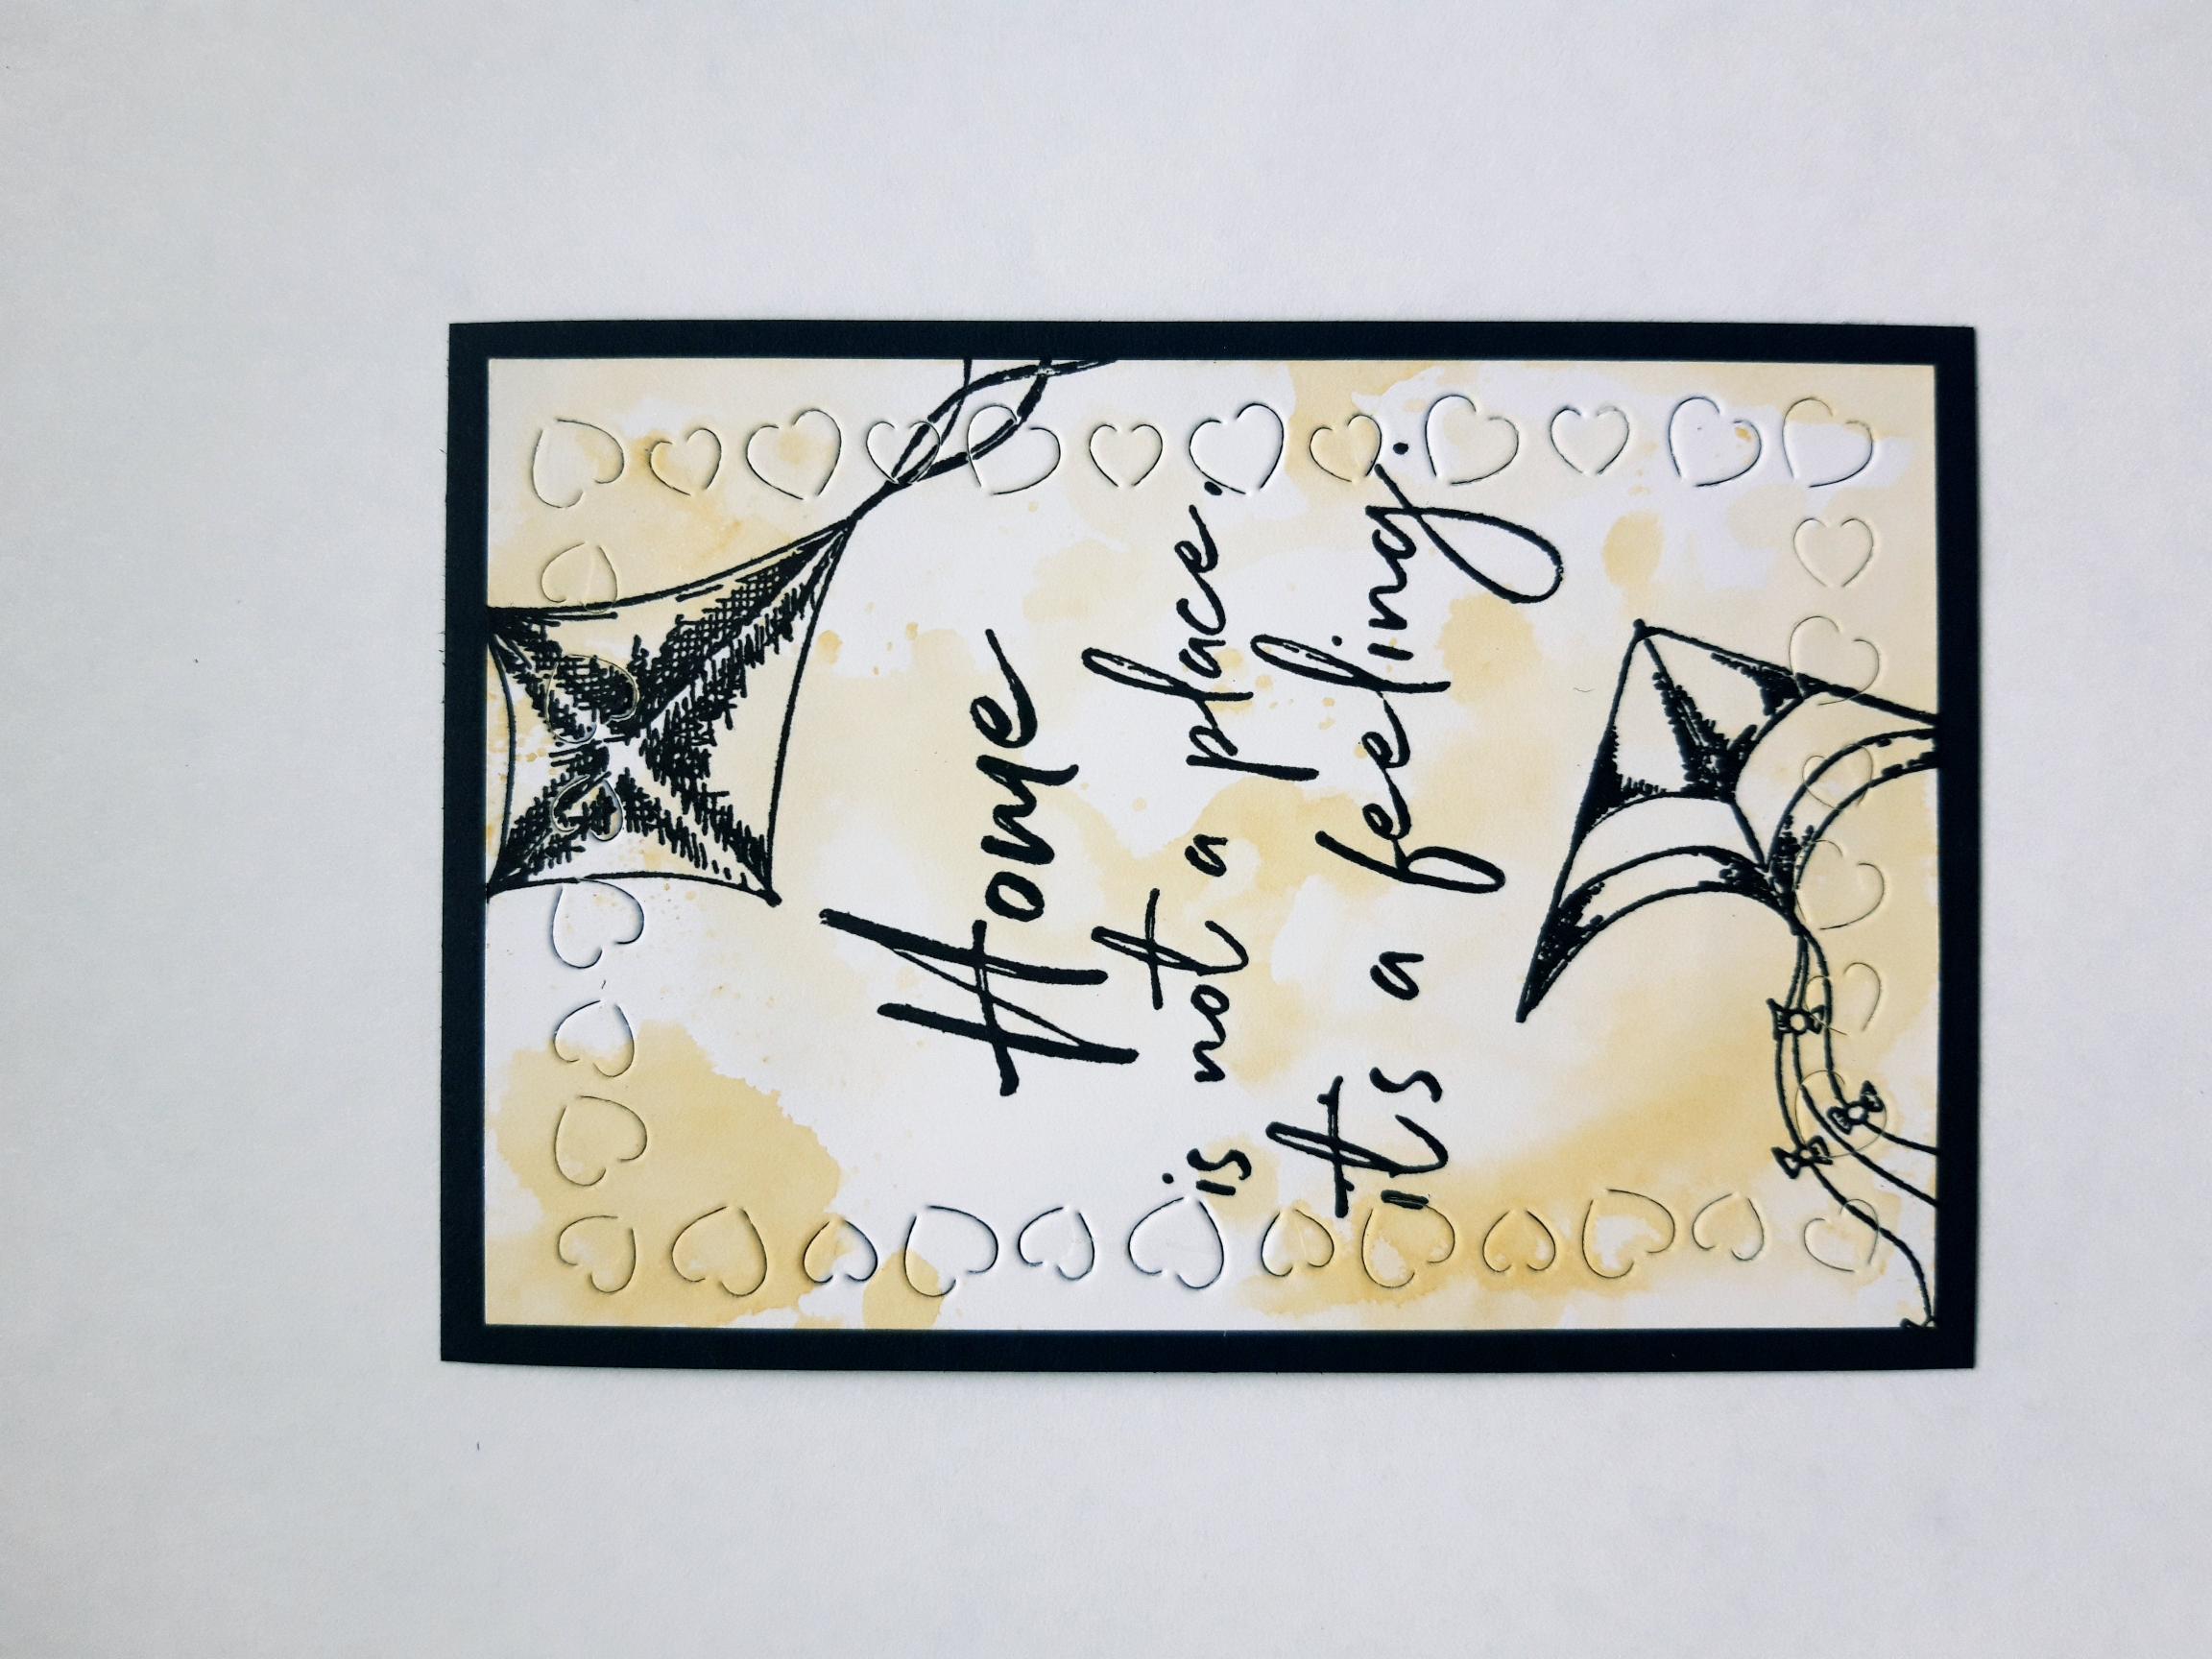
Once dry, adhere on to the black card (4 x 2 3/4"). |
|
Adhere on to the bottom, right side of your card. Set to one side. |
|
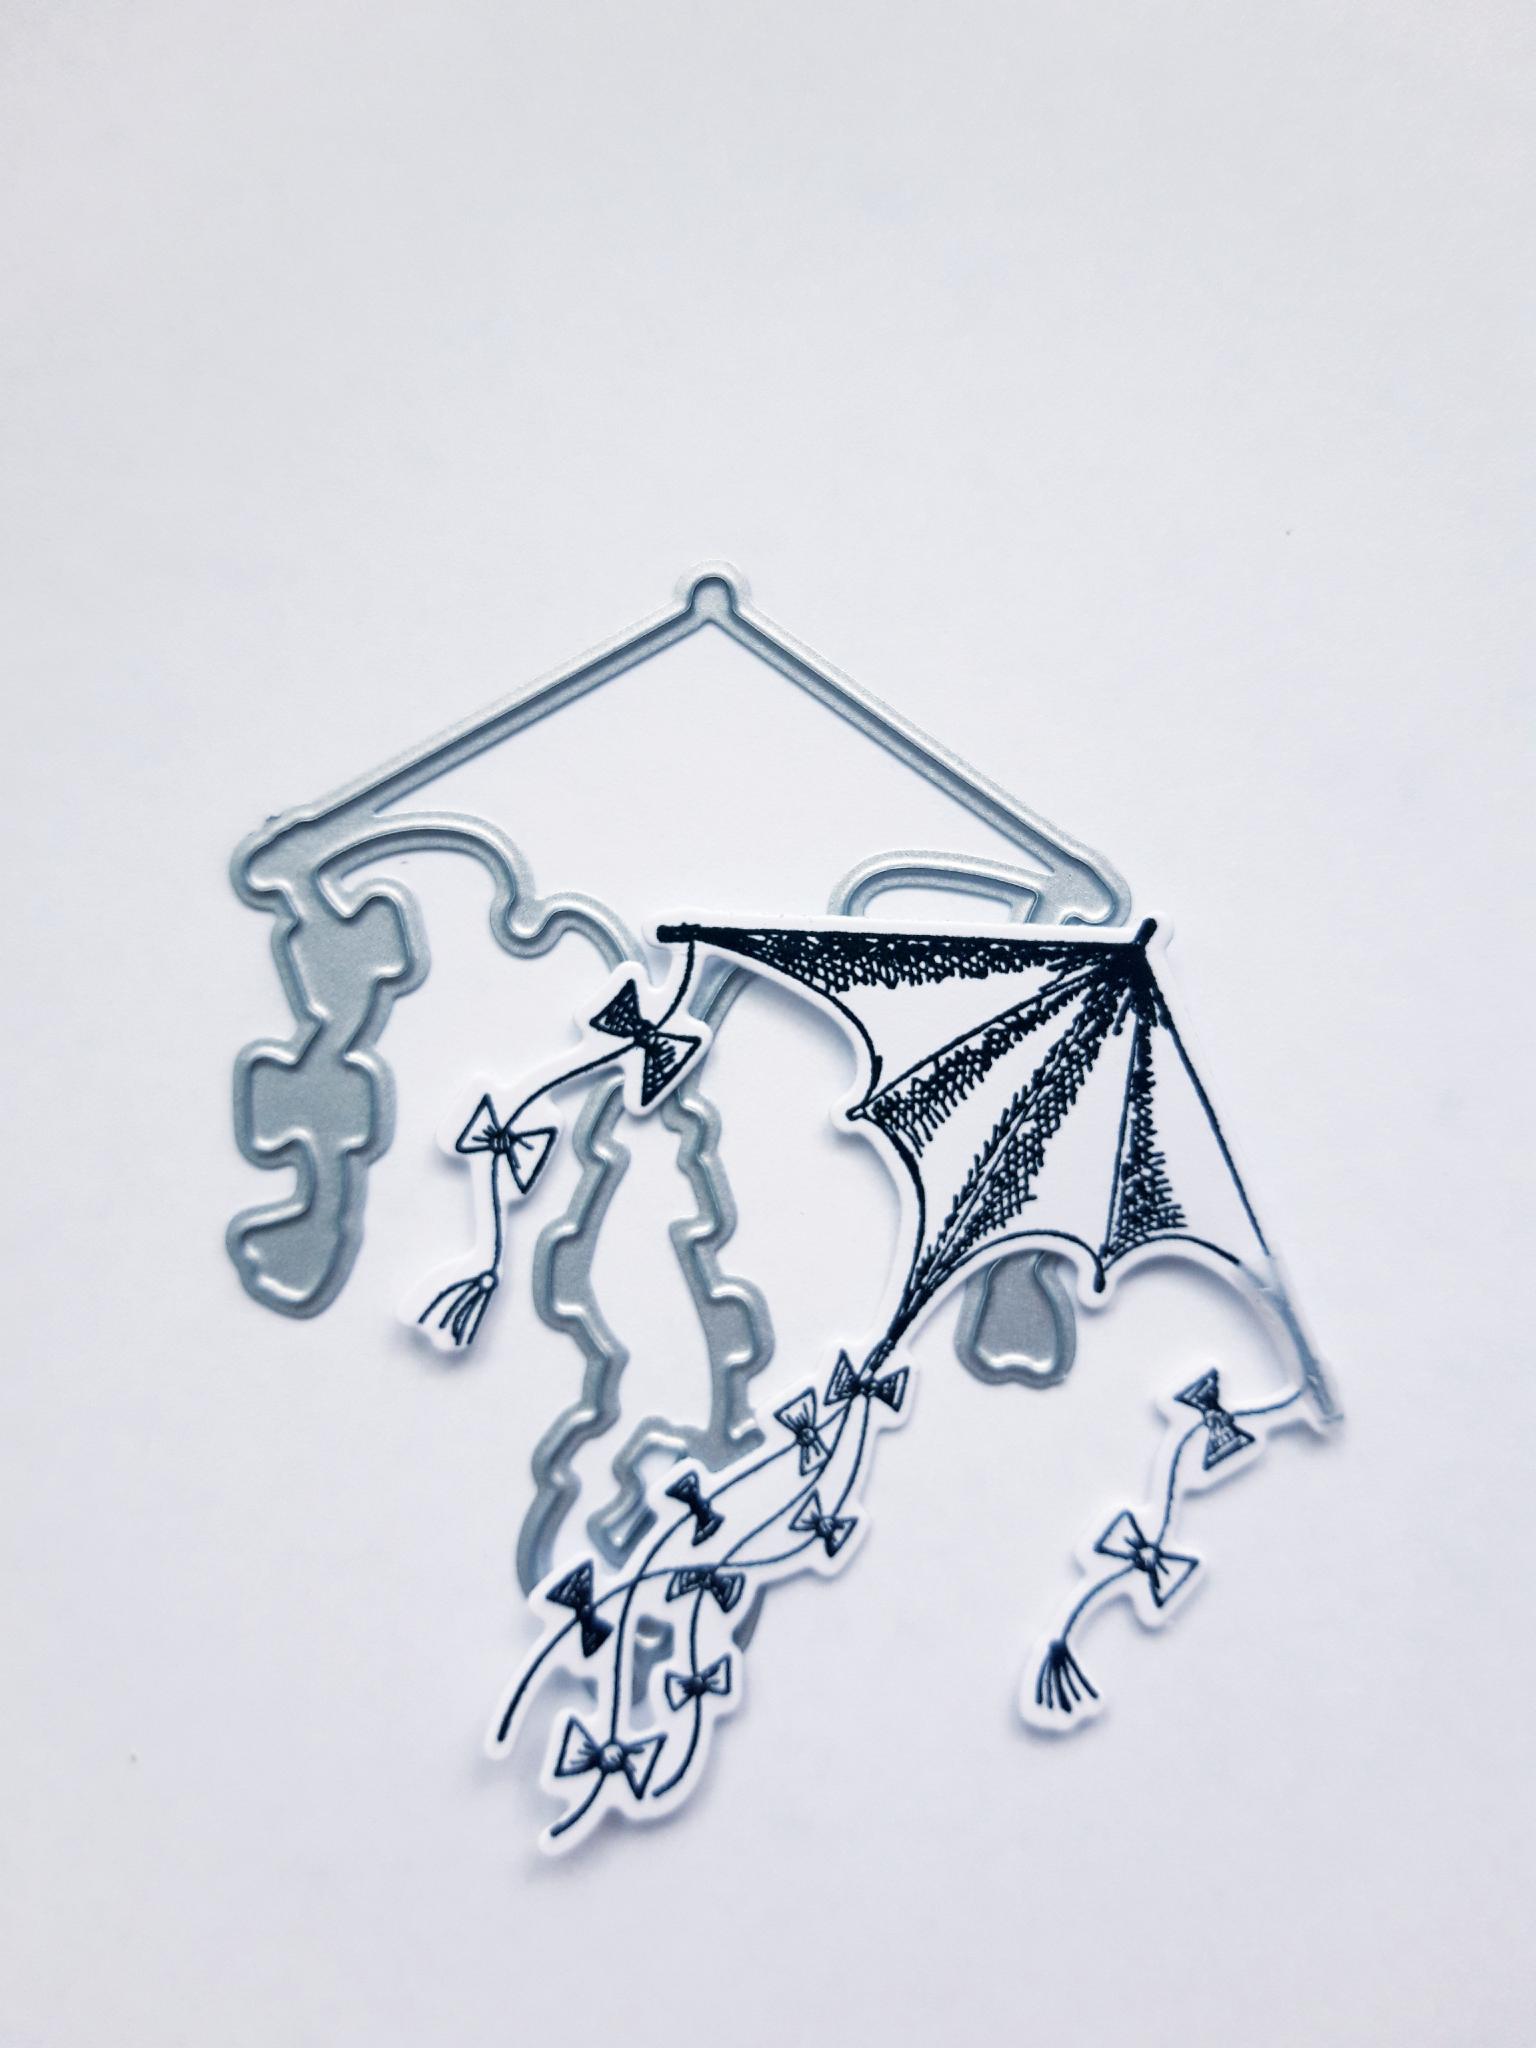
Ink up one of the kite stamps with the Versafine and stamp on to the white card (4 x 3"). Place the coordinating outline die in place. Secure with low tack tape and run it through your die cutting machine. |
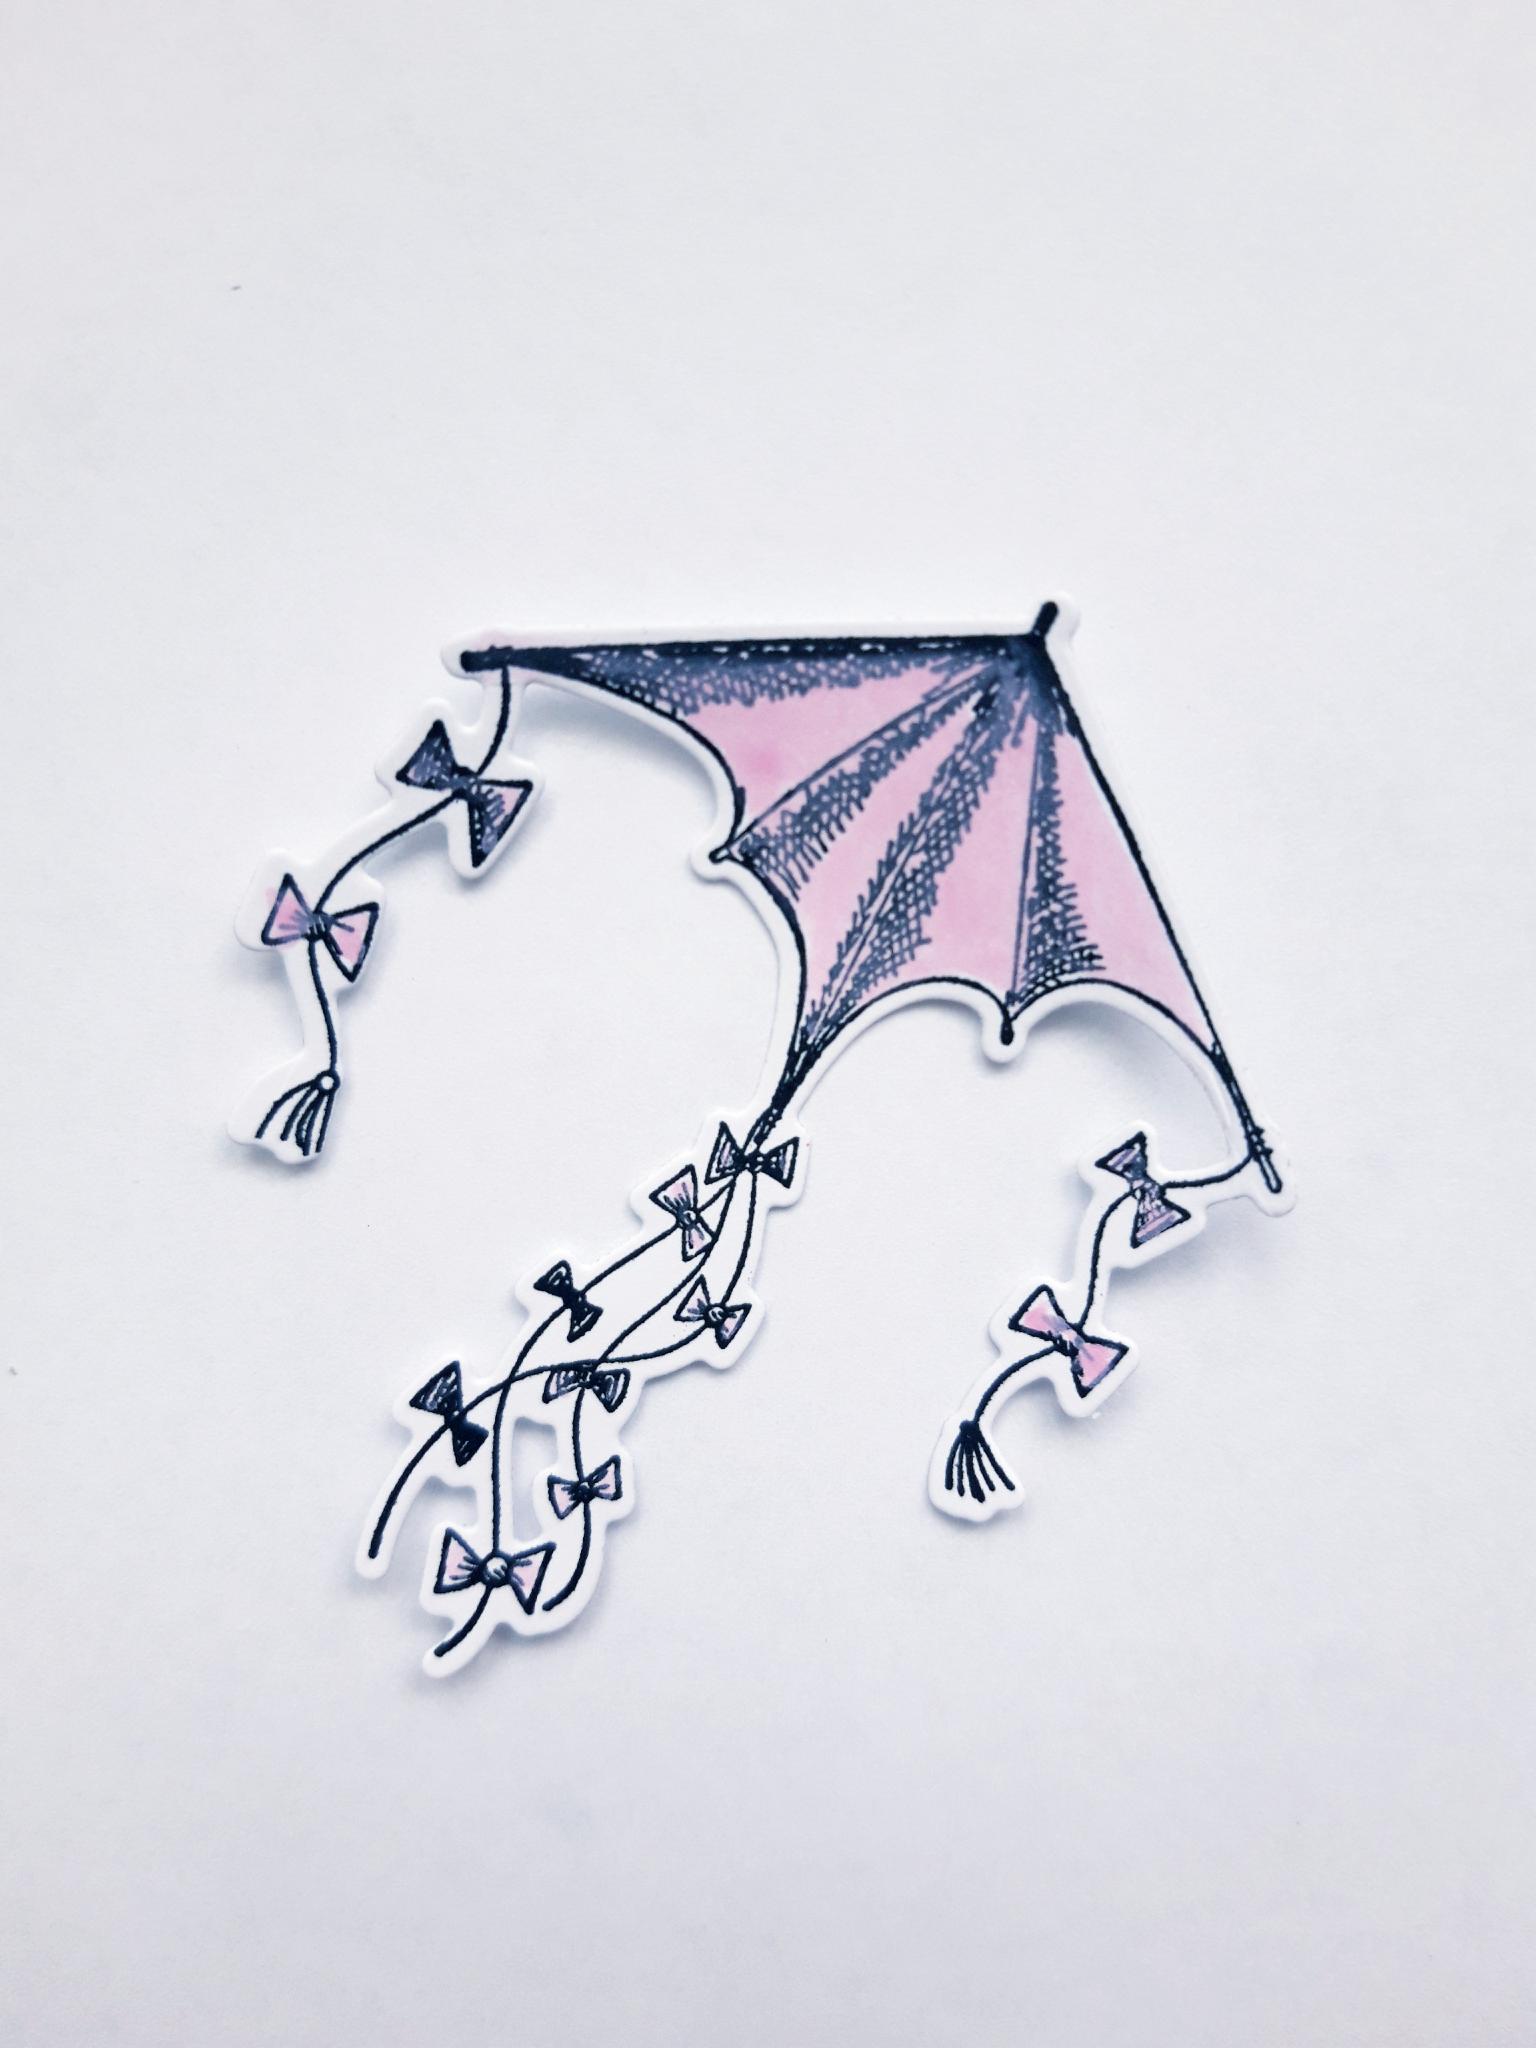
|
Mix the Izink Lychee and Avalanche Pigments on to your craft mat, add a little water and paint your die cut kite. |
|
To finish, adhere your die cut kite on to your card, with a small foam pad. |